Projector
<Top and front>
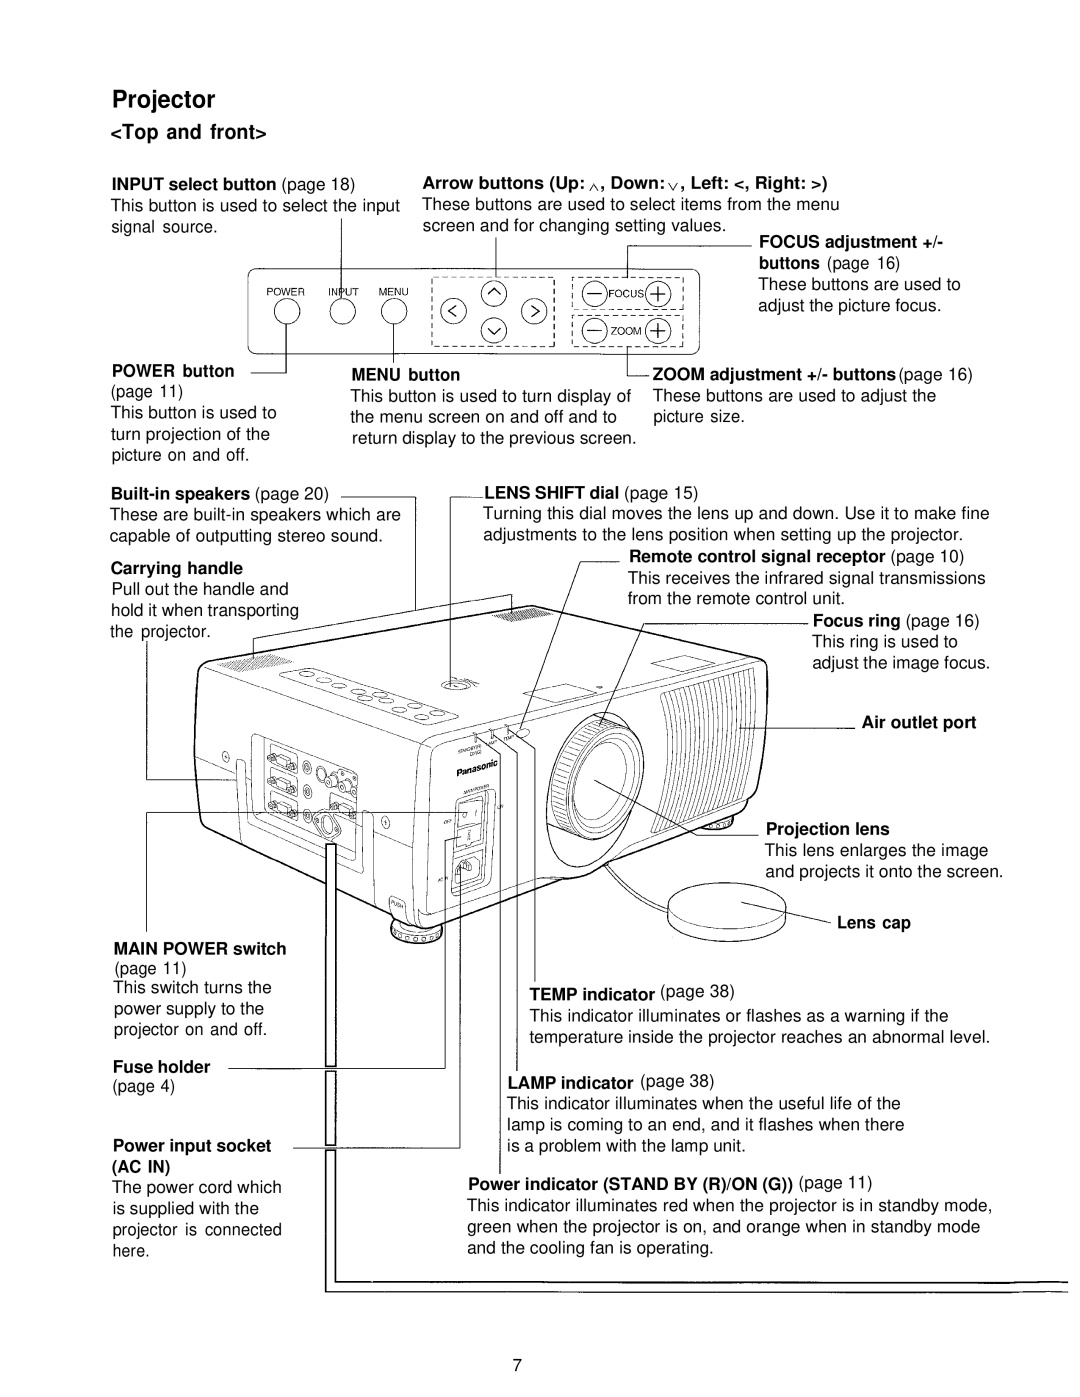
INPUT select button (page 18) | Arrow buttons (Up: , Down: , Left: <, Right: >) |
This button is used to select the input | These buttons are used to select items from the menu |
signal source. | screen and for changing setting values. |
|
| FOCUS adjustment +/- |
|
| buttons (page 16) |
|
| These buttons are used to |
|
| adjust the picture focus. |
POWER button | MENU button | ZOOM adjustment +/- buttons (page 16) |
(page 11) | This button is used to turn display of | These buttons are used to adjust the |
This button is used to | the menu screen on and off and to | picture size. |
turn projection of the | return display to the previous screen. |
|
picture on and off. |
|
|
These are
Carrying handle
Pull out the handle and hold it when transporting the projector.
LENS SHIFT dial (page 15)
Turning this dial moves the lens up and down. Use it to make fine adjustments to the lens position when setting up the projector.
Remote control signal receptor (page 10) This receives the infrared signal transmissions from the remote control unit.
Focus ring (page 16) This ring is used to adjust the image focus.
Air outlet port
Projection lens
This lens enlarges the image and projects it onto the screen.
MAIN POWER switch
(page 11)
This switch turns the power supply to the projector on and off.
Fuse holder
(page 4)
Power input socket (AC IN)
The power cord which is supplied with the projector is connected here.
Lens cap
TEMP indicator (page 38)
This indicator illuminates or flashes as a warning if the temperature inside the projector reaches an abnormal level.
LAMP indicator (page 38)
This indicator illuminates when the useful life of the lamp is coming to an end, and it flashes when there is a problem with the lamp unit.
Power indicator (STAND BY (R)/ON (G)) (page 11)
This indicator illuminates red when the projector is in standby mode, green when the projector is on, and orange when in standby mode and the cooling fan is operating.
7