Adjusting the clock phase
You can use this adjustment to eliminate the flicker (localized noise) that appears on the computer screens when RGB signals are input.
About dot clock adjustment
When RGB signals are being input, you can make fine adjustments to the dot clock frequency and also adjust the clock phase. Adjustments are made by the following procedure while viewing the picture. (This is only effective when RGB signals are being input.)
Adjusting the dot clock frequency
When RGB signals are being input, you can adjust the display area of pictures sent from a computer.
Adjustment procedure
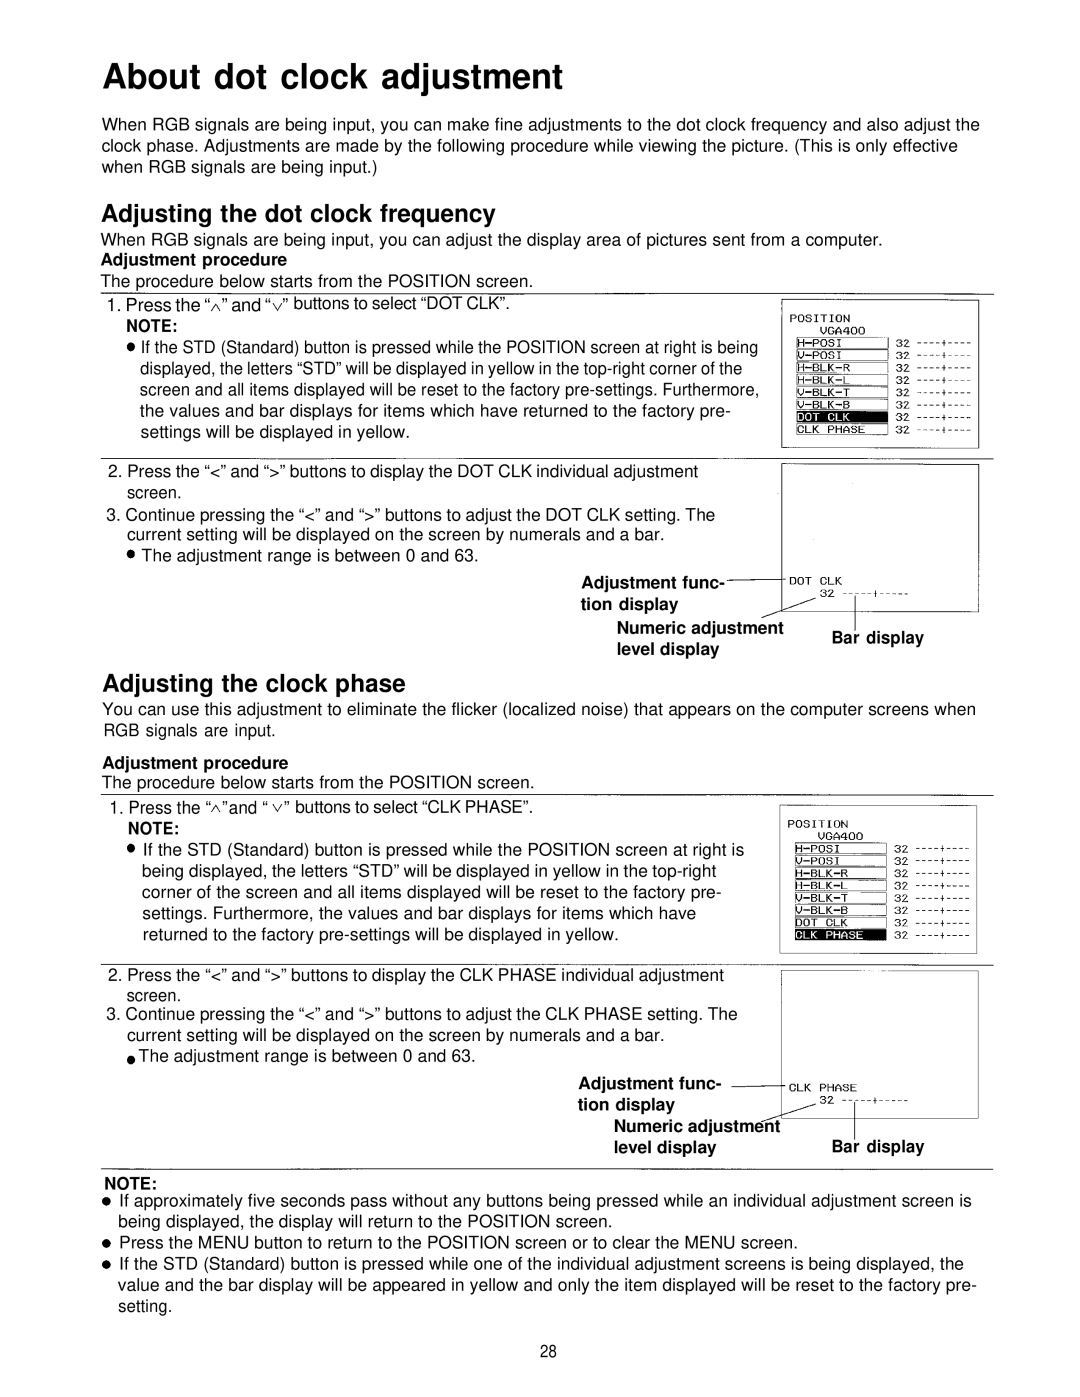
The procedure below starts from the POSITION screen. 1. Press the “ ” and “ ” buttons to select “DOT CLK”.
NOTE:
If the STD (Standard) button is pressed while the POSITION screen at right is being displayed, the letters “STD” will be displayed in yellow in the top-right corner of the screen and all items displayed will be reset to the factory pre-settings. Furthermore, the values and bar displays for items which have returned to the factory pre- settings will be displayed in yellow.
2. Press the “<” and “>” buttons to display the DOT CLK individual adjustment screen.
3. Continue pressing the “<” and “>” buttons to adjust the DOT CLK setting. The current setting will be displayed on the screen by numerals and a bar.
The adjustment range is between 0 and 63.
Adjustment func- tion display
Numeric adjustment
level display
Adjustment procedure
The procedure below starts from the POSITION screen. 1. Press the “ ” and “ ” buttons to select “CLK PHASE”.
NOTE:
If the STD (Standard) button is pressed while the POSITION screen at right is being displayed, the letters “STD” will be displayed in yellow in the top-right corner of the screen and all items displayed will be reset to the factory pre- settings. Furthermore, the values and bar displays for items which have returned to the factory pre-settings will be displayed in yellow.
2. Press the “<” and “>” buttons to display the CLK PHASE individual adjustment screen.
3. Continue pressing the “<” and “>” buttons to adjust the CLK PHASE setting. The current setting will be displayed on the screen by numerals and a bar.
The adjustment range is between 0 and 63. | |
Adjustment func- | |
tion display | |
Numeric adjustment | Bar display |
level display |
NOTE:
If approximately five seconds pass without any buttons being pressed while an individual adjustment screen is being displayed, the display will return to the POSITION screen.
Press the MENU button to return to the POSITION screen or to clear the MENU screen.
If the STD (Standard) button is pressed while one of the individual adjustment screens is being displayed, the value and the bar display will be appeared in yellow and only the item displayed will be reset to the factory pre- setting.
28