Adjusting the blanking
The picture area can be adjusted by means of blanking correction. The adjustment procedure below describes the
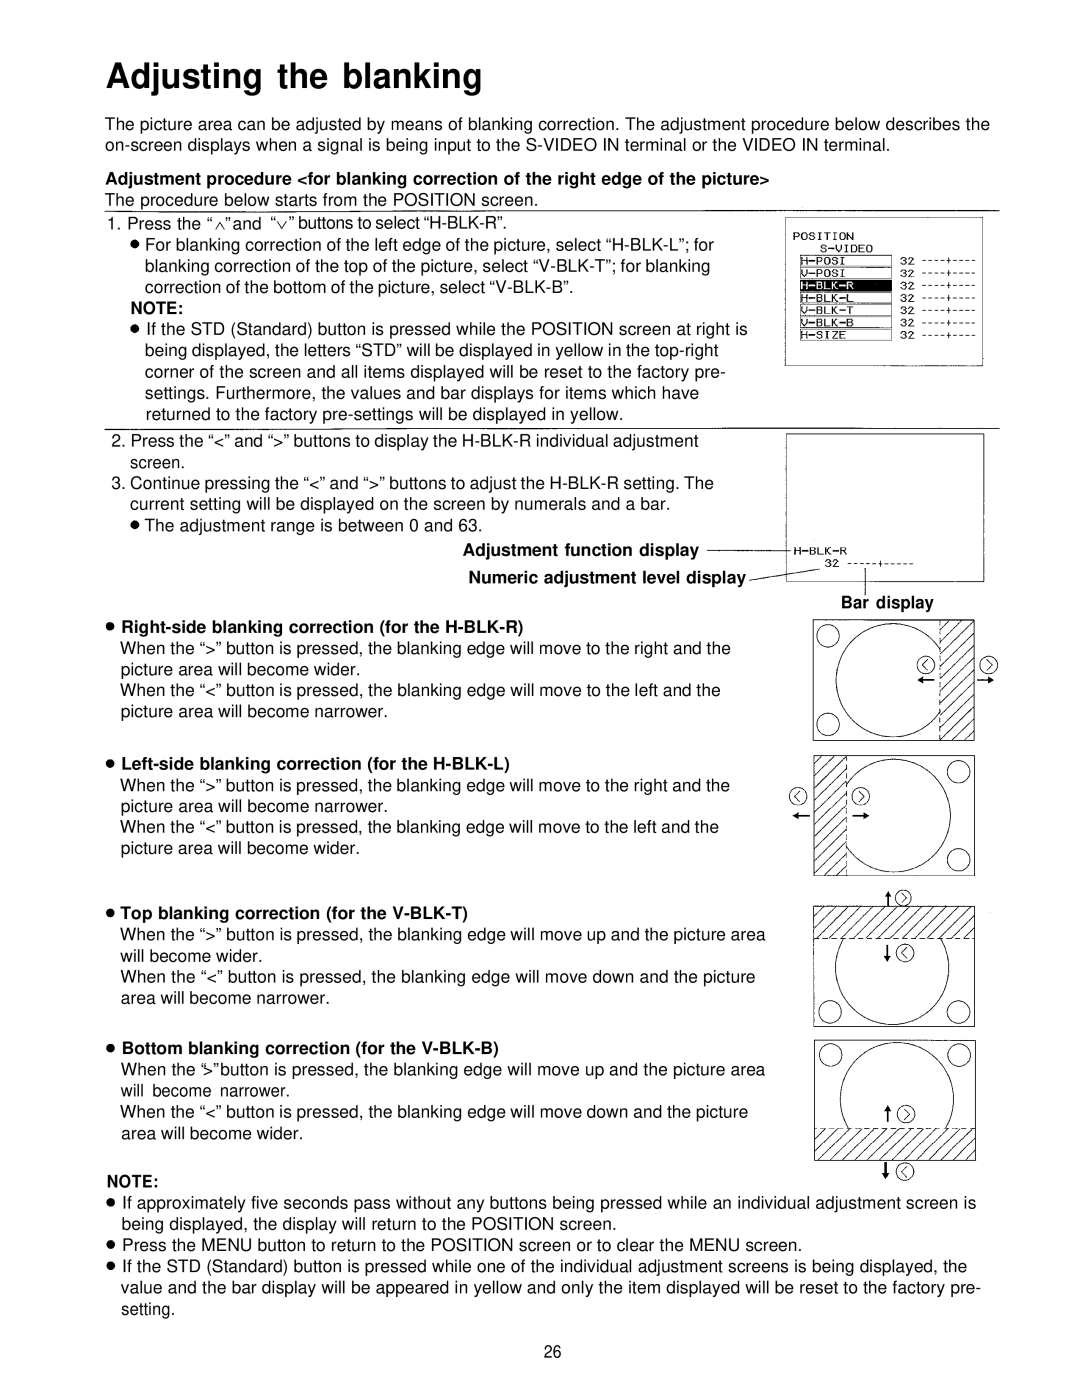
Adjustment procedure <for blanking correction of the right edge of the picture>
The procedure below starts from the POSITION screen.
1. Press the “ ” and “ ” buttons to select
For blanking correction of the left edge of the picture, select
NOTE:
If the STD (Standard) button is pressed while the POSITION screen at right is being displayed, the letters “STD” will be displayed in yellow in the
2.Press the “<” and “>” buttons to display the
3.Continue pressing the “<” and “>” buttons to adjust the
The adjustment range is between 0 and 63.
Adjustment function display
Numeric adjustment level display
Bar display
When the “>” button is pressed, the blanking edge will move to the right and the picture area will become wider.
When the “<” button is pressed, the blanking edge will move to the left and the picture area will become narrower.
Left-side blanking correction (for the H-BLK-L)
When the “>” button is pressed, the blanking edge will move to the right and the picture area will become narrower.
When the “<” button is pressed, the blanking edge will move to the left and the picture area will become wider.
Top blanking correction (for the V-BLK-T)
When the “>” button is pressed, the blanking edge will move up and the picture area will become wider.
When the “<” button is pressed, the blanking edge will move down and the picture area will become narrower.
Bottom blanking correction (for the V-BLK-B)
When the “>” button is pressed, the blanking edge will move up and the picture area will become narrower.
When the “<” button is pressed, the blanking edge will move down and the picture area will become wider.
NOTE:
If approximately five seconds pass without any buttons being pressed while an individual adjustment screen is being displayed, the display will return to the POSITION screen.
Press the MENU button to return to the POSITION screen or to clear the MENU screen.
If the STD (Standard) button is pressed while one of the individual adjustment screens is being displayed, the value and the bar display will be appeared in yellow and only the item displayed will be reset to the factory pre- setting.
26