Setup 6 Setting the date and time
Setting the date and time
Before recording, check that the date and time have been set.
The very first time that power is turned ON, a message appears prompting you to set the date and time. Select [YES], press the center of the cursor buttons and proceed to step 3 .
 1
1
2
3
 To change the date and time display
●To change an item
![]() →[SETUP]→
→[SETUP]→
[DATE/TIME]
[OFF] : Date and time are not displayed.
[D/T] : Date and time are displayed.
[DATE] : Only the date is displayed.
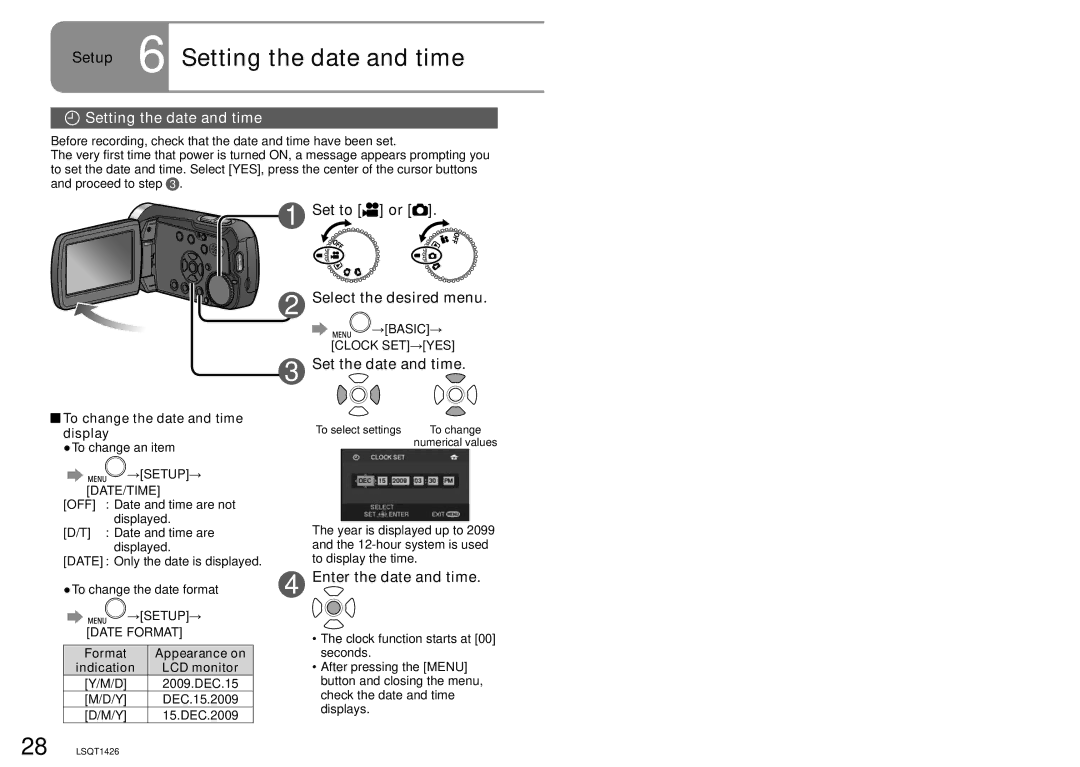
Set to [
 ] or [
 ].
].
Select the desired menu.
![]() →[BASIC]→ [CLOCK SET]→[YES]
→[BASIC]→ [CLOCK SET]→[YES]
Set the date and time.
To select settings | To change |
| numerical values |
The year is displayed up to 2099 and the
●To change the date format
![]() →[SETUP]→
→[SETUP]→
[DATE FORMAT]
Format | Appearance on |
indication | LCD monitor |
[Y/M/D] | 2009.DEC.15 |
[M/D/Y] | DEC.15.2009 |
[D/M/Y] | 15.DEC.2009 |
4 Enter the date and time.
•The clock function starts at [00] seconds.
•After pressing the [MENU] button and closing the menu, check the date and time displays.
28 LSQT1426