Manuals
/
Panasonic
/
Photography
/
Camcorder
Panasonic
SDR-S15PC Parts identification and handling, Using the hand strap supplied
Models:
SDR-S15PC
SDR-S15P
1
16
121
121
Download
121 pages
7.39 Kb
13
14
15
16
17
18
19
20
Troubleshooting
Specs
Install
Error
Self-timer
Status indicator
Disconnecting the unit
Warranty
Accessories
Setup 1 Charging
Page 16
Image 16
Parts identification and handling
(cont.)
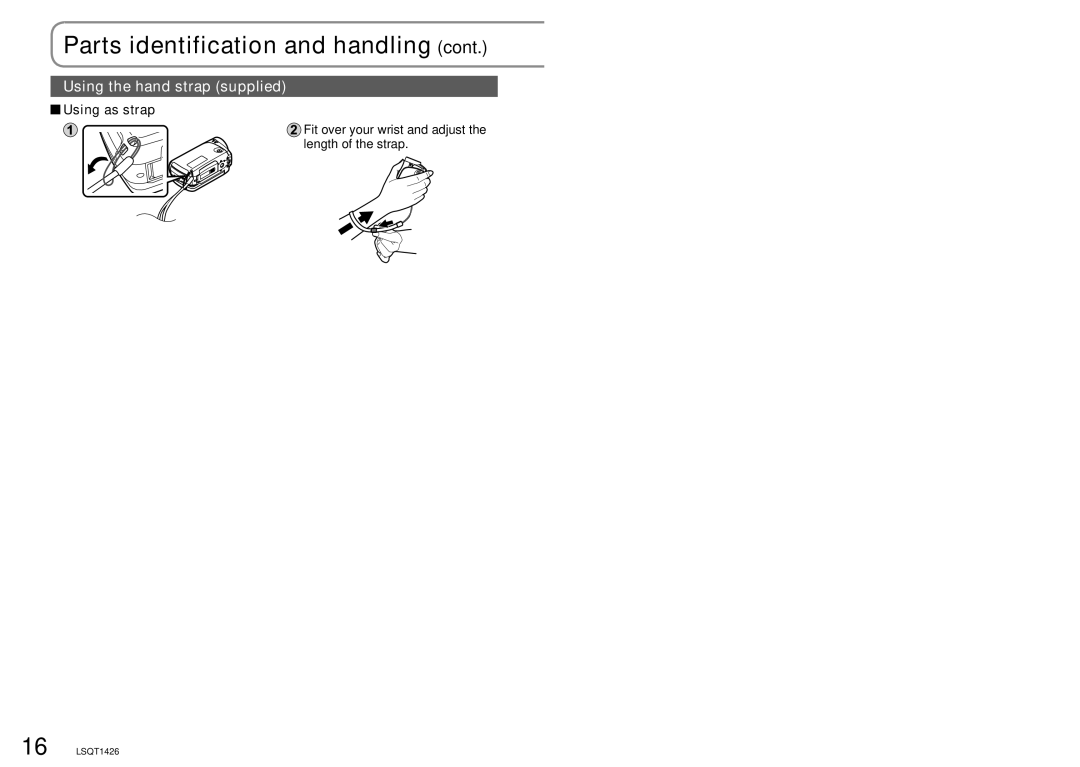
Using the hand strap (supplied)
Using as strap
Fit over your wrist and adjust the length of the strap.
16
LSQT1426
Page 15
Page 17
Page 16
Image 16
Page 15
Page 17
Contents
Model No. SDR-S15P/PC
LSQT1426 a
Things You Should Know
Thank you for choosing Panasonic
Responsible partyPanasonic Corporation of North America
SDR-S15P
One Panasonic Way, Secaucus, NJ
Important Safety Instructions
Battery pack Lithium ion battery pack
Battery
AC adaptor
Precautions
Camera and SD card sold separately temperature
Indemnity concerning recording content
For the purposes of these operating instructions
LCD monitor
Carefully observe copyright laws
Contents
Specifications
Optional accessories
Accessory Order Form
Request for Service Notice
Set the mode dial to OFF Opendoor. the card/battery
Insert the battery
Closedoor. the card/battery
Quick guide
Setting the date and time
Enter the date and time
Set to Start recording Stop recording
Set to Take picture
Display and menu language can be changed
→LANGUAGE
Set to Select and enter the picture to view
During playback
Accessories
Parts identification
Tripod mounting hole
CD-ROM LSFT0771
Mode dial P.24
Handling
Using the hand strap supplied
Using as strap
Fit over your wrist and adjust the length of the strap
Parts identification and handling
Using the LCD monitor
How to use the lens cover open lever
Recommended Panasonic SD/SDHC Memory Cards as of January
Type of card Capacity
Precautions in handling
Be careful when sharing cards between devices
Write-protecting cards
Sdhc Memory Cards can be used only with Sdhc devices
Set the mode dial to OFF
Setup 1 Charging
Insert the battery into the unit and charge it
Status indicator
If the status indicator does the following
Setup
Remaining battery capacity indication
Charging time and recordable time
Charging time Approx h 15 min
Setup 3 Inserting/Removing SD
Insert/Removecard. the SD
Setup 4 Turning power ON/OFF Selecting modes
Set to icon of desired mode
Turning power ON/OFF from the LCD monitor
When not in use, set the mode dial to OFF
Select settings from the menus. P.26
Setting Quick Start
Indicator
Quick starts
Menu displayed differs according to mode
Display the menu
Select the top menu
To return to the previous screen
Using the cursor buttons
Select an item Close the menu Enter the selected item
Changing the display language
Display and menu language can be changed. →LANGUAGE
Setup 6 Setting the date and time
Setting the date and time
Set to or Select the desired menu
To change the date and time display
Adjusting the LCD monitor
Adjusting the LCD monitor
Selectitem. and adjust
→SETUP→ Power LCD Auto
Recording 1 Before recording
Basic stance
Stand with back to sun to avoid subject being in shadow
Hold the unit firmly Body With both hands
Automatic Recording motion/still pictures
For SD cards applicable with this unit P.18
To remove sound when record button is pressed
Set to Press
To change aspect ratio to
To remove on-screen display
To change recording mode
Recording mode and recording times
If recording stops
Press To switch the modes
Recording 3 Automatic Recording still pictures
Set to Auto
To remove shutter sound
To avoid jitter
Number of recordable pictures
Picture size is 640×480 0.3 M
Enlarge Restore
Recording 4 Zoom/avoid jitter/maintain
Enlarging zoom
To enlarge further
Avoid jitter Image Stabilizer function
Picture brightness in dark locations
Apply zoom effect to sounds zoom microphone
Recording 5 Intelligent Auto Mode
To cancel Intelligent Auto Mode
Set to or Press Start recording
Portrait
Low light
Scenery
Normal
Recording 6 Recording in WEB Mode
Recording for posting videos on YouTube WEB Mode
To cancel WEB Mode
Set to
Using the video light
Brightening up dark scenes for recording
Set to or Press
OFF
Recording 7 Other recording options
Display operation icons
Change operation icons
During motion Picture Recording During still
Fade-in/Fade-out
Select in on the previous Select function to be Explained
Start recording
→ADVANCED→FADE COLOR→WHITE / Black
Self-timer
Recording 7 Othercont. recording options
Backlight Compensation function
To quit halfway through
Soft Skin Mode
MagicPix function
PRE-REC function
Aim this unit at the subject and position it securely
Self-portrait Recording function
To display the face detection frames
Face Detection function
→ADVANCED→FACE FRAMING→ON
LSQT1426
Adjusting focus manually Manual Focus Adjustment
Recording 8 Recording manually motion/still pictures
Set to or
To return to Automatic Recording
To cancel the setting
Using situation-specific settings Scene Mode
Sports
Set the mode
Setting manually
Achieve natural colors White Balance
To return to Automatic Adjustment
Auto white balance range
Adjust shutter speed
Adjusting shutter speed Shutter speed
Shutter speed adjustment range
Adjust brightness
Adjusting brightness Iris/Gain
Iris/Gain value adjustment range
Setting home city and region
Setting the city and region of your travel destination
To cancel
Recording 9 Useful functions
Avoid wind noise Wind Noise Reduction function
Restoring local date and time after returning home
→ADVANCED→GUIDE LINES→ON
To adjust the volume
Playback 1 Viewing motion pictures
Select the desired scene
Enter the picture to view
Displaying thumbnails by date
Select the date to display
Playback
Fast forward/rewind playback
Slow-motion playback
Frame-by-frame playback
Playback 2 Viewing still pictures
Set to Enter the picture to view
To change the slide interval
Thumbnails are displayed
Use a sufficiently charged battery or the AC adaptor
Editing 1 Deletingpictures motion/still
Set to or
Deleting one picture at a time
To cancel deletion halfway through
Deleted pictures cannot be restored
Deleting all pictures
Selecting and deleting multiple pictures
PICT. SETUP→LOCK SET→ YES
→SETUP→ Format CARD→YES
Preventing accidental deletion
Formatting cards
Editing 3 Setting Dpof for still Pictures
Set 0 to not print the picture. End setting
→PICT. SETUP→ Dpof SET→CANCEL ALL
Dpof SET→SET
→SETUP→EXT. DISPLAY→ON
With other 1 Playback on TV
Products
To display LCD monitor information on TV
Copying pictures using the AV cable supplied
Copying to video recorders
Or DVD recorders
With other
Printing pictures from
PictBridge printers
Print settings
To cancel printing
Settings not supported by the printer cannot be selected
PRINT→YES
Using DVD burners
Required equipment as of January
Supported discs 12 cm disc
Time required for copying Reference
Connecting this unit and a DVD burner
Copying still pictures to discs
To cancel copying
Copying all motion pictures to discs
Copying selected motion pictures to discs
Select thumbnails Select a date
Copying using a DVD burner
Playing back discs
Exiting
Deleting copied motion pictures
→EDIT SCENE→DELETE →COPIED →YES
Software on the CD-ROM
Computer
With a
Image management/DVD production software VideoCam Suite
Agreement
End User License
End User License Agreement
With a
Operating environment
Operating environment required for VideoCam Suite
CPU
Installing VideoCam Suite
If the Setup Menu does not start up automatically
Uninstalling the software
Using VideoCam Suite
Importing motion pictures and still pictures
Editing motion pictures and still pictures
Closing VideoCam Suite
First startup
Click or Simple Menu is closed
Uploading video clips to
YouTube
Concerning uploading to YouTube
Using this unit as an
Connecting the unit to a computer
Disconnecting the unit
External drive Mass storage
SD card folder structure
This unit can be used as an external drive
When the driver is not recognized
When the driver is recognized
Checking the connections
Connecting to a Macintosh
Computer
Operating environment required for external drives
Copying still pictures to computers
Set the mode dial to Top menu Submenus Purpose
Menus
Others
Recording menu
Settings/Notices Mode
Setup menu
Others 1 Menus
Settings/Notices Mode
When recording
Others 2 LCD monitor displays
Motion picture recording display
Still picture recording display
During playback
Motion picture playback display
Still picture playback display
Operating status P.58
Messages
Message
Environment TOO DARK, or Lens Cover Closed
Others 4 Troubleshooting
Power does not turn on
Motion picture recording stops on its own
Data cannot be deleted
Error
Is Adobe Acrobat Reader 5.0 or later, or Adobe
Disc which cannot be used or a disc which cannot
Be written on has been inserted into the DVD burner
Appears on the LCD Use a new disc Monitor
Function cannot be used or selected
When using the unit
Others 5 Cautions for use
Battery
SD cards
LCD monitor
AC adaptor
Keep the AC adaptor near both the AC outlet and the AC plug
Cleaning
Condensation
Others 6 Specifications
SD Video Camera Information for your safety
AC adaptor Information for your safety
Specifications may change without prior notice
Others 7 Optional accessories
Accessory No Description
Accessory Order Form For USA and Puerto Rico Customers
Visa
Request for Service Notice USA and Puerto Rico Only
Failure to do so will delay your repair
Npcparts@us.panasonic.com
Limited Warranty United States and Puerto Rico
Panasonic Video Products Limited Warranty
Limited Warranty Coverage
LSQT1426
Warranty For Canadian Customers
Panasonic Product Limited Warranty
Economy Mode
Index
Spanish Quick Use Guide/Guía española
Inserte la batería
Cierre la tapa de la tarjeta/batería
Conecte el adaptador de CA suministrado
Abra la cubierta del terminal
Para el uso rápido
Introduzcahora. la fecha y la
El idioma de la visualización y del menú se puede cambiar
Imágenes en movimiento
Panasonic Corporation
Top
Page
Image
Contents
 Using as strap
 Fit over your wrist and adjust the length of the strap.