Photo mode
Supported file format ![]() (p. 68)
(p. 68)
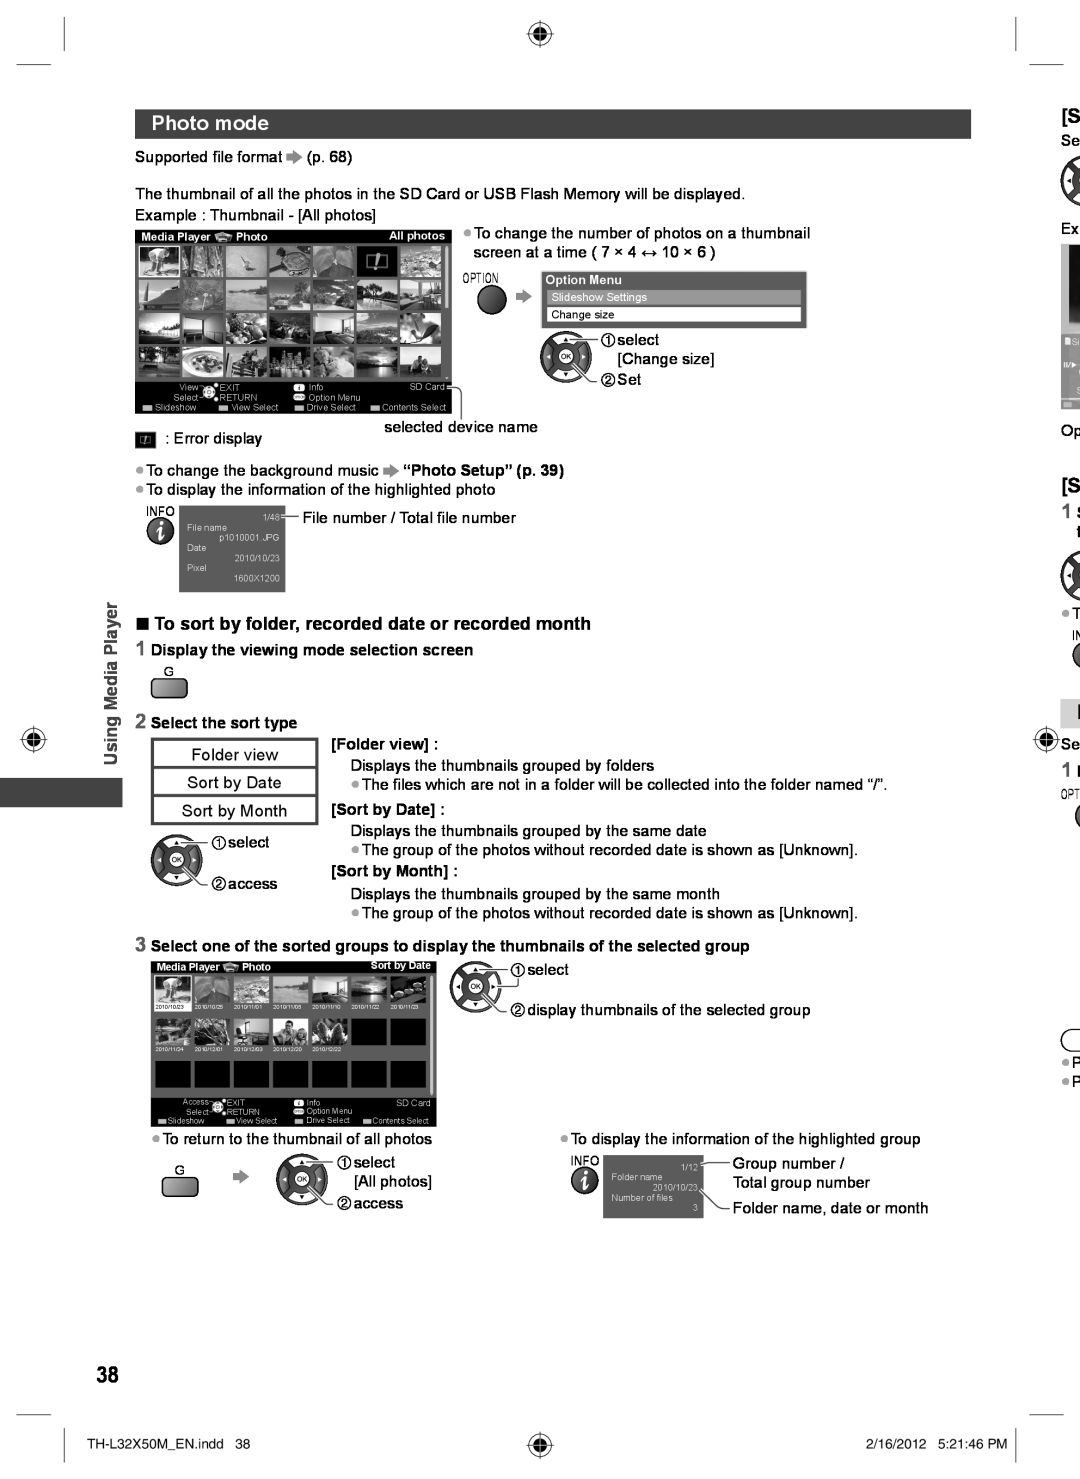
The thumbnail of all the photos in the SD Card or USB Flash Memory will be displayed.
[S
Se
Example : Thumbnail - [All photos]
Media Player | Photo | All photos | ||
|
|
|
|
|
|
|
|
|
|
|
|
|
|
|
View | EXIT | Info | SD Card |
Select | RETURN | OPTION Option Menu | Contents Select |
Slideshow | View Select | Drive Select |
●To change the number of photos on a thumbnail screen at a time ( 7 × 4 ↔ 10 × 6 )
OPTION | Option Menu |
| Slideshow Settings |
| Change size |
| select |
| [Change size] |
![]() Set
Set
Ex
![]() Si
Si
S
: Error display
selected device name
Op
●To change the background music ![]() “Photo Setup” (p. 39)
“Photo Setup” (p. 39)
●To display the information of the highlighted photo
INFO | 1/48 |
| File number / Total file number |
|
| ||
| File name |
|
|
| p1010001.JPG |
|
|
| Date |
|
|
| 2010/10/23 |
|
|
| Pixel |
|
|
| 1600X1200 |
|
|
|
|
|
|
|
|
| Player | ■ To sort by folder, recorded date or recorded month | ||||
|
|
| 1 Display the viewing mode selection screen | |||||
|
|
| Media |
| G |
| ||
|
|
|
|
|
| |||
|
|
| Using | 2 Select the sort type | [Folder view] : | |||
|
|
| ||||||
|
|
|
|
|
|
| ||
|
| Folder view | ||||||
|
|
|
|
| ||||
|
|
|
|
|
|
|
| Displays the thumbnails grouped by folders |
|
|
|
|
|
| Sort by Date | ||
|
|
|
|
|
| ●The files which are not in a folder will be collected into the folder named “/”. | ||
|
|
|
| |||||
|
|
|
|
|
| Sort by Month | [Sort by Date] : | |
|
|
|
| |||||
|
|
|
|
|
|
| select | Displays the thumbnails grouped by the same date |
|
|
|
|
|
|
| ●The group of the photos without recorded date is shown as [Unknown]. | |
|
|
|
|
|
|
| ||
|
|
|
|
|
|
|
| |
|
|
|
|
|
|
| access | [Sort by Month] : |
|
|
|
|
|
|
| Displays the thumbnails grouped by the same month | |
|
|
|
|
|
|
|
| |
●The group of the photos without recorded date is shown as [Unknown].
3 Select one of the sorted groups to display the thumbnails of the selected group
[S 1 S f
●T
IN
![]() P
P
![]() Se
Se
1 D
OPT
Media Player | Photo | Sort by Date |
2010/10/23 | 2010/10/25 | 2010/11/01 | 2010/11/05 | 2010/11/10 | 2010/11/22 | 2010/11/23 |
2010/11/24 2010/12/01 2010/12/03 2010/12/20 2010/12/22
|
|
|
|
|
|
|
|
|
|
|
|
|
|
|
|
|
|
|
|
|
|
|
|
|
|
|
|
|
|
|
|
|
|
|
|
|
|
|
|
|
|
|
|
|
|
|
|
|
|
|
| Access | EXIT | Info |
|
| SD Card | ||||||||||
| Select | RETURN | OPTION Option Menu |
|
|
|
| |||||||||
| Slideshow |
| View Select | Drive Select | Contents Select | |||||||||||
![]()
![]() select
select
![]() display thumbnails of the selected group
display thumbnails of the selected group
●P ●P
●To return to the thumbnail of all photos | ●To display the information of the highlighted group | |||
G | select | INFO | 1/12 | Group number / |
[All photos] |
| Folder name | Total group number | |
|
| 2010/10/23 | ||
| access |
| Number of files | Folder name, date or month |
|
| 3 | ||
38
2/16/2012 5:21:46 PM