Contents
DVDR985
For Customer Use
Dear Philips product owner
It to us right now
Contents
Safety Information
Safety Information cont’d
Example of Antenna Grounding Per National Electrical Code
Introduction
Playable Discs
Discs for Recording and Playing
Discs Unsuitable for Recording or Playing
Discs for Playing Only
General Information
Using an RF Modulator
Hookups
Determining the best possible connection
Before you begin
Connecting to a TV Only TV has Component Video In Jacks
Hookups cont’d
Connecting to a TV Only TV has an S-Video In Jack
Connecting to a TV Only TV has a yellow Cvbs Video In jack
Example only Antenna Or Cable TV Signal
Set the Digital output accordingly. Details are on
To copy videotapes, see the Quick Start Guide
Cable Box/Satellite Receiver
VCR/DVD Player
English, Espanol, or Francais, then press the OK button
Initial Setup
Press ON/OFFy to turn on the Recorder
Press System Menu
Initial Setup cont’d
From previous
Quick Disc Playback
To stop playback at any time, press Stop C
Quick Recording
DVD+RW DVD+R
Remote Control Buttons
Timer Button
Slow H Button
Forward D Button
Play Button
Front Panel
Display
HQ, SP, LP, or EP
MPEG, DIGITAL, DTS, or PCM Audio format of the current Disc
DB scale
Rear Panel
Menu Bars
Menu Bar
On-screen Symbols, Status Box
On-screen Symbols
Status Box
Disc status icons
Tuner Information box
Timer Information box
Information Boxes
Press Disc Menu during Disc playback
Title/Disc menus
Chapter/Track Selection
Audio Language
Subtitles
Button
During playback, press the Subtitle Z button
Camera Angle
Zoom, Camera Angle
Zoom
Press System Menu to remove the Menu Bar
Sound
Still Picture/Frame-by-frame Playback
Forward and Reverse Searching
Slow Motion, Forward and Reverse Searching
Slow Motion
Scan
Time Search, Scan
Time Search
Repeat A-B
Repeat, Repeat A-B
Repeat
Title Settings Menu
Index Picture Screen
Titles
Disc Bar
Installation Automatic Channel Programming
Installation VCR Plus+ Ch
Installation Clock Setting
Time/Date Automatic
Installation Clock Setting cont’d
Time/Date Manual
One-Touch Recording
Timer Recording
Remote control
VCR Plus+ Timer Recording
Erasing Timer Recordings
Error Messages
Title Settings Menu
Play full title
Erase this title
Press to return to the Index Picture Screen if necessary
Append recording
Manual Recording Volume
You can adjust manually the volume level during recording
Record Settings
Chapter Markers
Finalize Disc DVD+R only, if not finalized already
Erase disc DVD+RW only
Make edits compatible DVD+RW only
Editing
DVD+R DVD+RW
Press 9 repeatedly to select Change code, then press
Access Control
Change Code
Access Control cont’d
Child Lock
Play unless you enter your four-digit code
Press System Menu to remove the menus
Locking or Unlocking Specific Discs
Screen. Child Lock should be Locked. Details are on
Parental Level
Play
Access Control contd
Change Country
User Preference Settings
Off no
Picture Settings
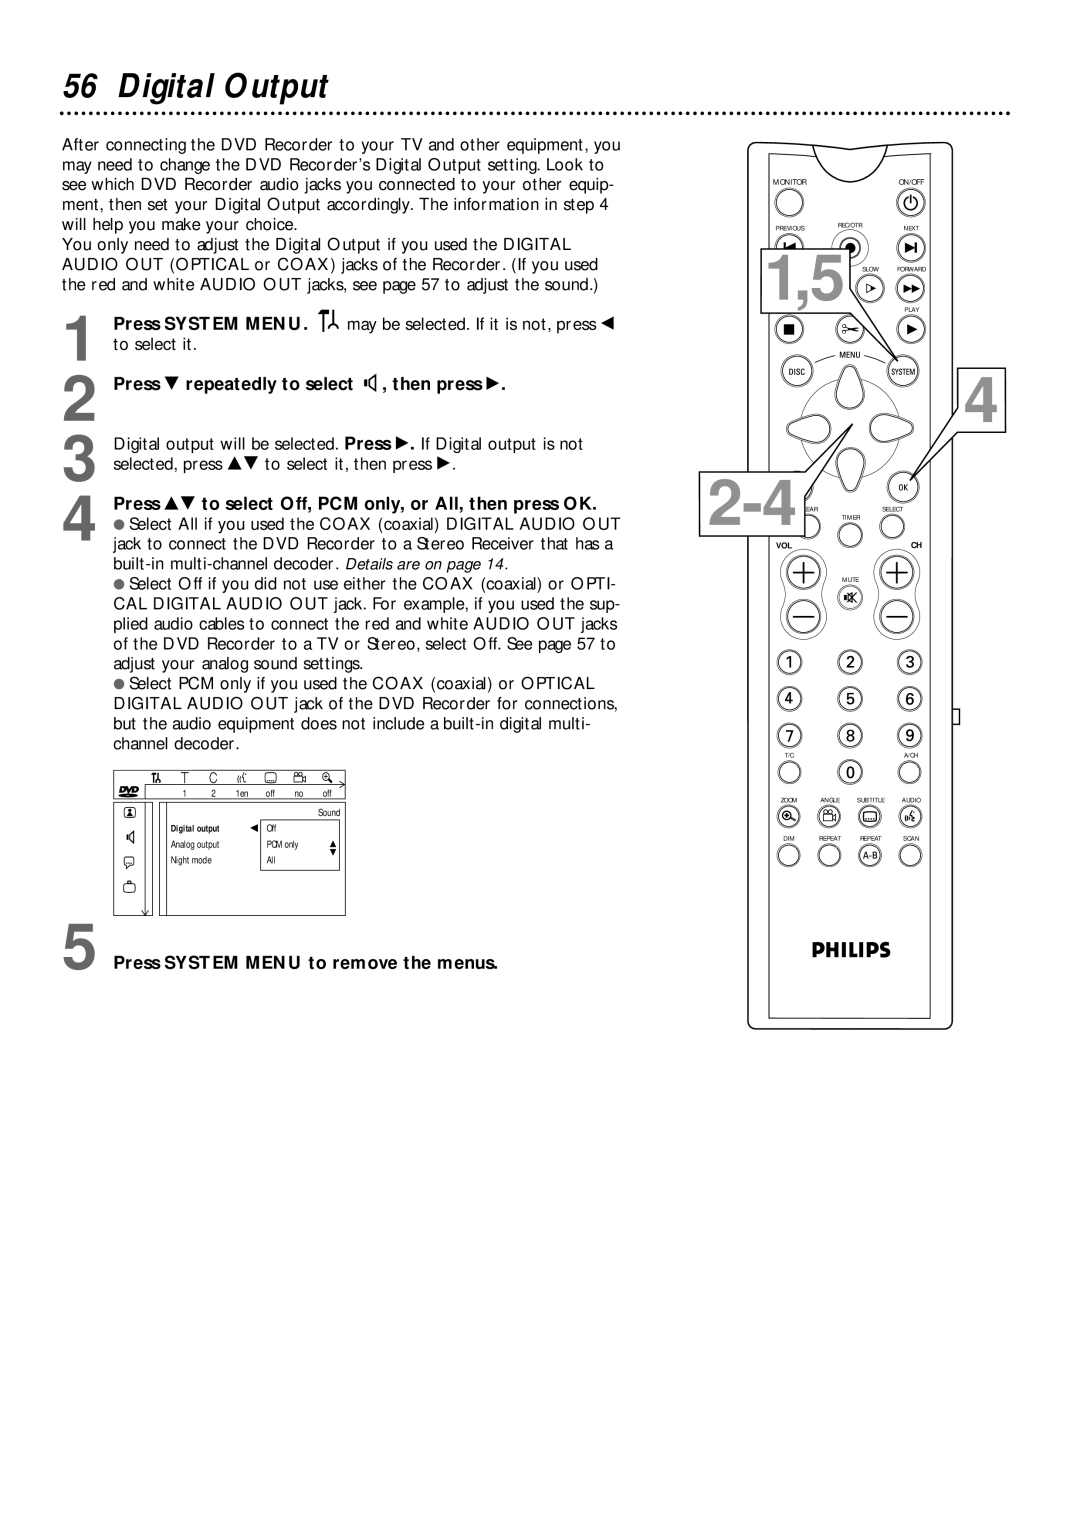
Press 89 to select Off, PCM only, or All, then press OK
Digital Output
To select it Press 9 repeatedly to select G, then press
Analog Output
Recording Audio
Language Settings, Recording Audio
Language Settings
Remote Control Settings
Night Mode, Remote Control Settings
Night Mode
Manual Remote Setup
Using Your Recorder’s Remote Control with Your TV
Automatic Remote Setup
Using Your Recorder’s Remote Control with Your TV cont’d
Helpful Hints
Helpful Hints contd
Glossary
Diagnostic Test
Specifications
Disc Formats Supported
Renewed
Information Index
49-53

