Rear Panel 25
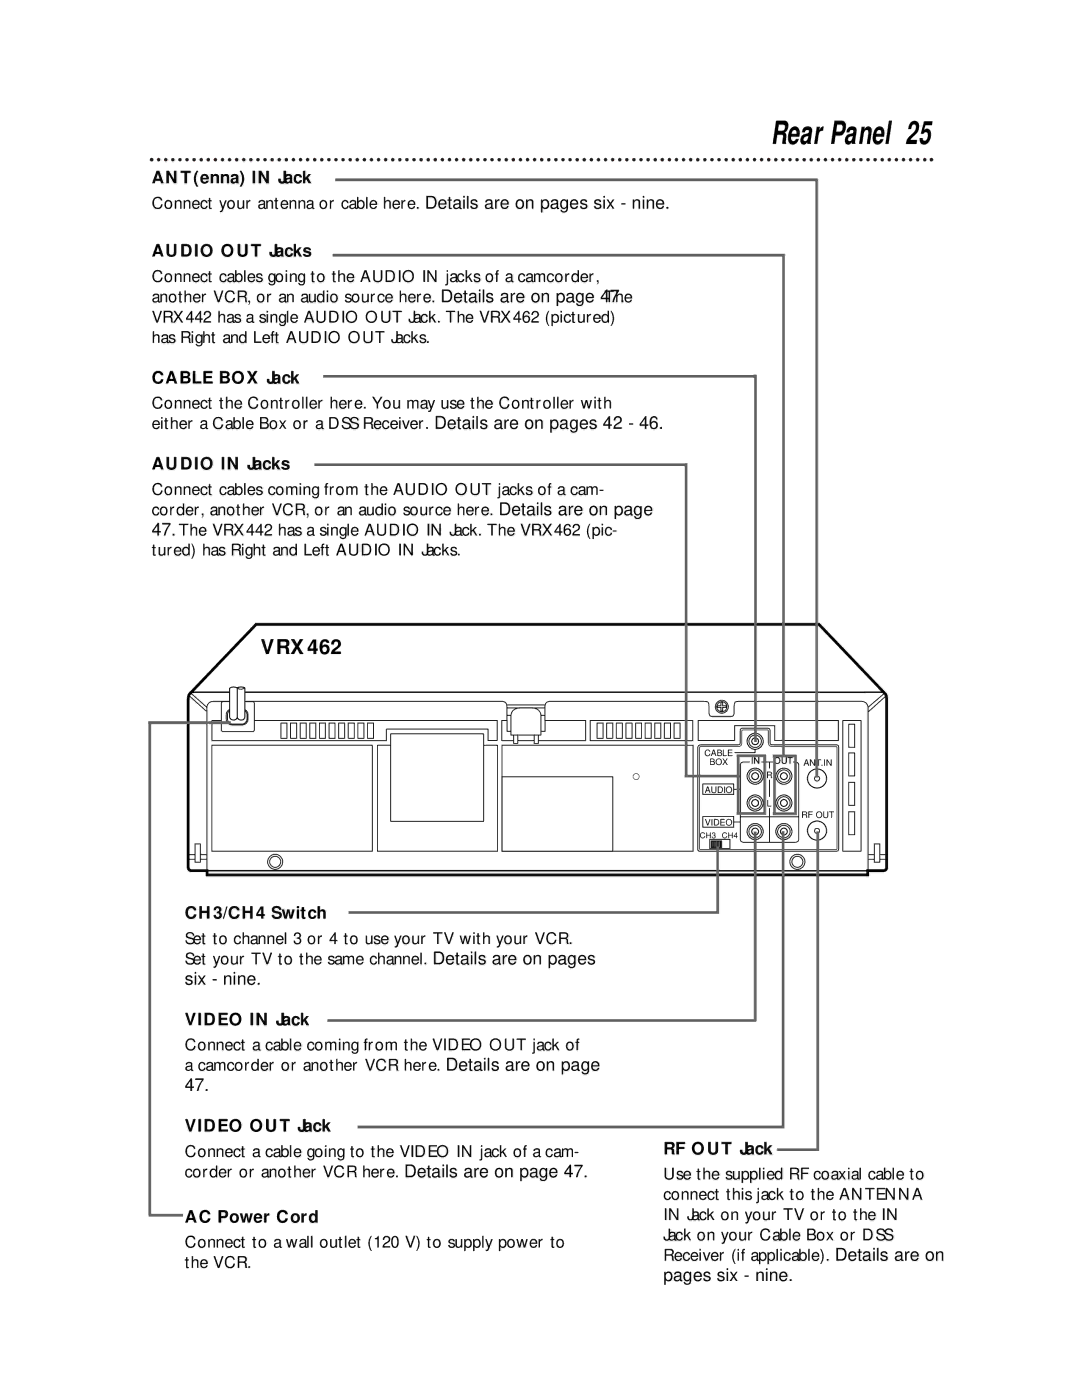
ANT(enna) IN Jack
Connect your antenna or cable here. Details are on pages six - nine.
AUDIO OUT Jacks
Connect cables going to the AUDIO IN jacks of a camcorder, another VCR, or an audio source here. Details are on page 47. The VRX442 has a single AUDIO OUT Jack. The VRX462 (pictured) has Right and Left AUDIO OUT Jacks.
CABLE BOX Jack
Connect the Controller here. You may use the Controller with either a Cable Box or a DSS Receiver. Details are on pages 42 - 46.
AUDIO IN Jacks
Connect cables coming from the AUDIO OUT jacks of a cam- corder, another VCR, or an audio source here. Details are on page
47.The VRX442 has a single AUDIO IN Jack. The VRX462 (pic- tured) has Right and Left AUDIO IN Jacks.
VRX462
CABLE ![]()
BOX IN OUT
ANT.IN
AUDIO![]()
VIDEO ![]()
CH3 CH4
![]() R
R ![]()
![]() L
L ![]()
RF OUT
CH3/CH4 Switch
Set to channel 3 or 4 to use your TV with your VCR. Set your TV to the same channel. Details are on pages six - nine.
VIDEO IN Jack
Connect a cable coming from the VIDEO OUT jack of a camcorder or another VCR here. Details are on page 47.
VIDEO OUT Jack
Connect a cable going to the VIDEO IN jack of a cam- corder or another VCR here. Details are on page 47.
AC Power Cord
Connect to a wall outlet (120 V) to supply power to the VCR.
RF OUT Jack
Use the supplied RF coaxial cable to connect this jack to the ANTENNA IN Jack on your TV or to the IN Jack on your Cable Box or DSS Receiver (if applicable). Details are on pages six - nine.