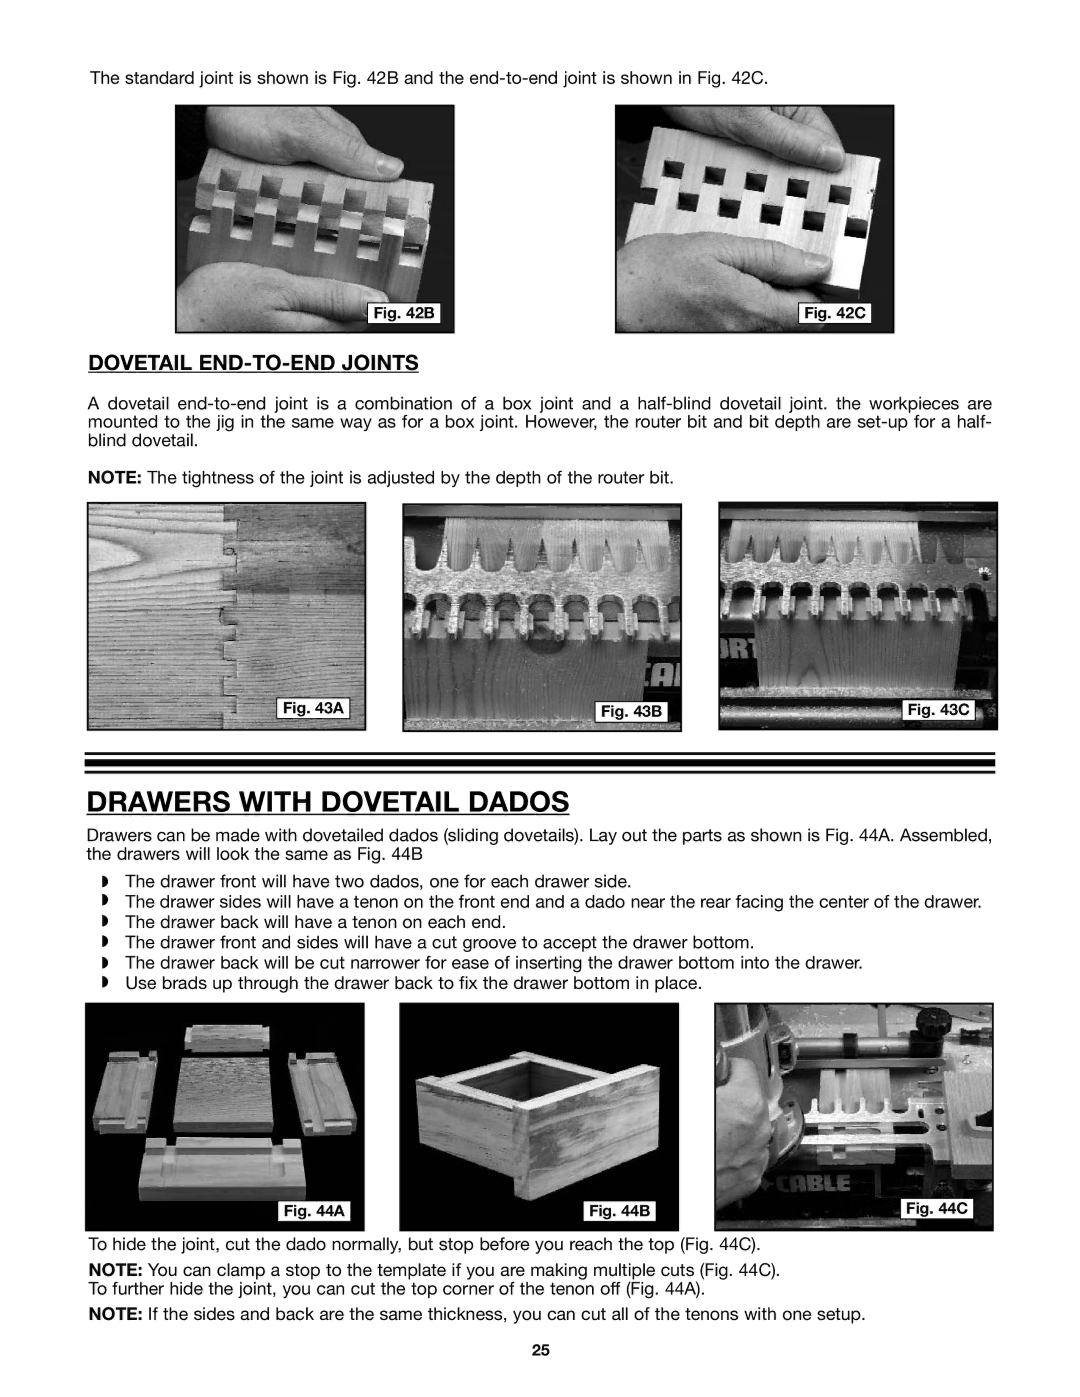
The standard joint is shown is Fig. 42B and the
Fig. 42B
Fig. 42C
DOVETAIL END-TO-END JOINTS
A dovetail
NOTE: The tightness of the joint is adjusted by the depth of the router bit.
Fig. 43A
Fig. 43B
Fig. 43C
DRAWERS WITH DOVETAIL DADOS
Drawers can be made with dovetailed dados (sliding dovetails). Lay out the parts as shown is Fig. 44A. Assembled, the drawers will look the same as Fig. 44B
◗The drawer front will have two dados, one for each drawer side.
◗The drawer sides will have a tenon on the front end and a dado near the rear facing the center of the drawer.
◗The drawer back will have a tenon on each end.
◗The drawer front and sides will have a cut groove to accept the drawer bottom.
◗The drawer back will be cut narrower for ease of inserting the drawer bottom into the drawer.
◗Use brads up through the drawer back to fix the drawer bottom in place.
Fig. 44A
Fig. 44B
Fig. 44C
To hide the joint, cut the dado normally, but stop before you reach the top (Fig. 44C).
NOTE: You can clamp a stop to the template if you are making multiple cuts (Fig. 44C). To further hide the joint, you can cut the top corner of the tenon off (Fig. 44A).
NOTE: If the sides and back are the same thickness, you can cut all of the tenons with one setup.
25
