CUTTING THE TAILS
Step 1 -
Step 2 -
Step 3 -
Step 4 -
Step 5 -
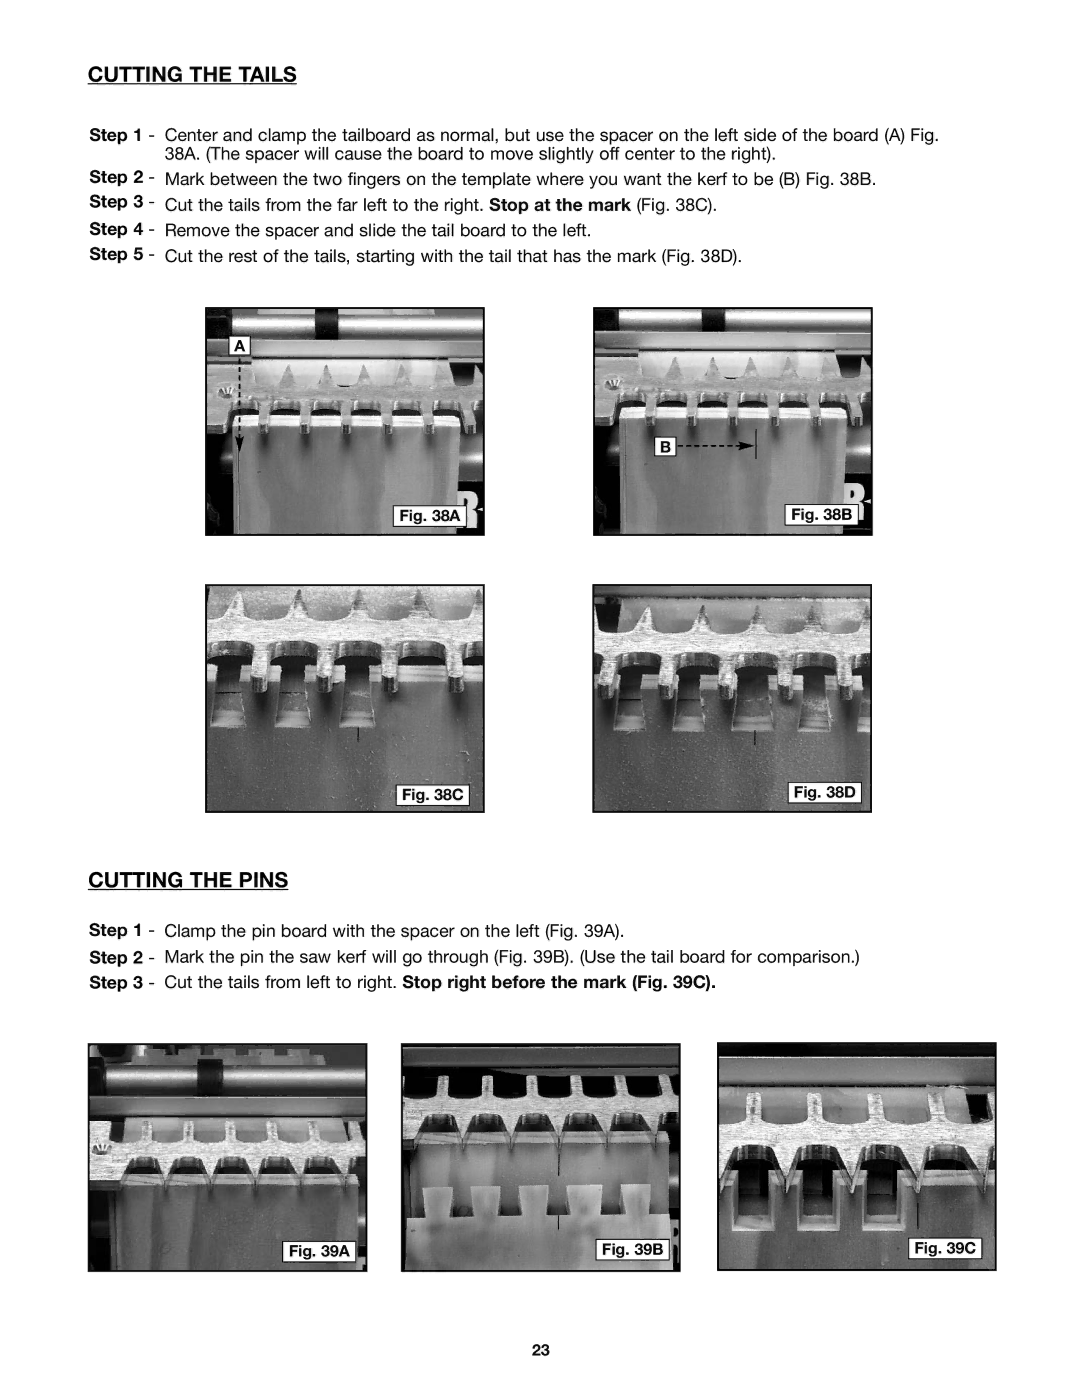
Center and clamp the tailboard as normal, but use the spacer on the left side of the board (A) Fig. 38A. (The spacer will cause the board to move slightly off center to the right).
Mark between the two fingers on the template where you want the kerf to be (B) Fig. 38B.
Cut the tails from the far left to the right. Stop at the mark (Fig. 38C).
Remove the spacer and slide the tail board to the left.
Cut the rest of the tails, starting with the tail that has the mark (Fig. 38D).
A
B ![]()
![]()
![]()
Fig. 38A
Fig. 38B
Fig. 38C
Fig. 38D
CUTTING THE PINS
Step 1 - Clamp the pin board with the spacer on the left (Fig. 39A).
Step 2 - Mark the pin the saw kerf will go through (Fig. 39B). (Use the tail board for comparison.)
Step 3 - Cut the tails from left to right. Stop right before the mark (Fig. 39C).
Fig. 39A
Fig. 39B
Fig. 39C
23
