CUTTING THE PINS
Step 1 -
Step 2 -
Step 3 -
Step 4 -
Step 5 -
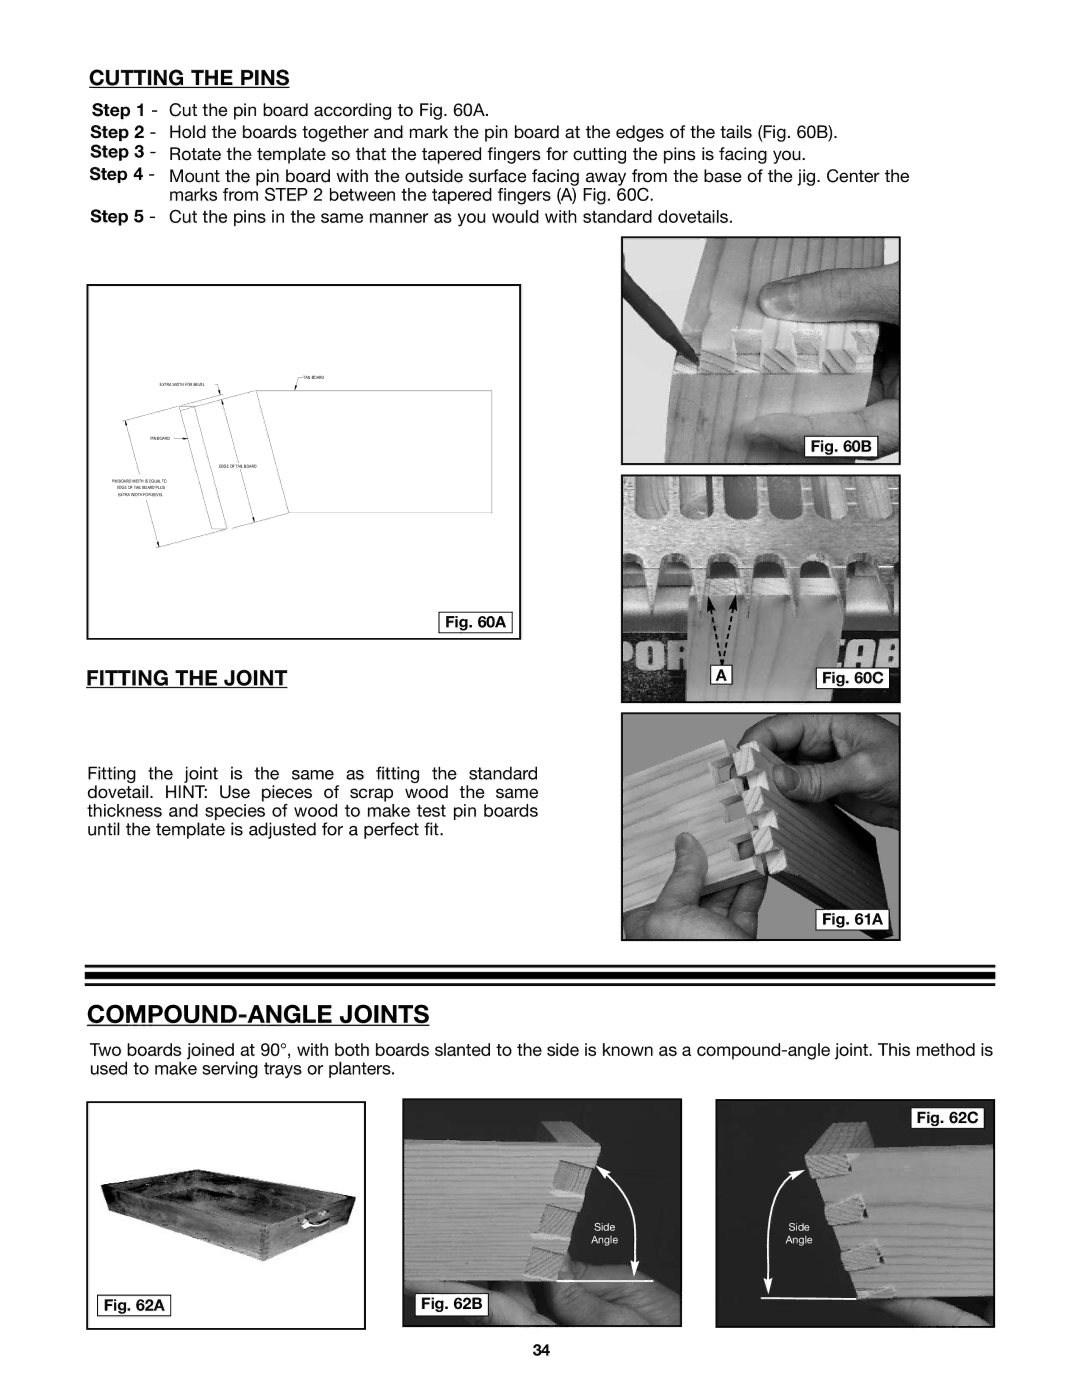
Cut the pin board according to Fig. 60A.
Hold the boards together and mark the pin board at the edges of the tails (Fig. 60B). Rotate the template so that the tapered fingers for cutting the pins is facing you.
Mount the pin board with the outside surface facing away from the base of the jig. Center the marks from STEP 2 between the tapered fingers (A) Fig. 60C.
Cut the pins in the same manner as you would with standard dovetails.
TAIL BOARD
EXTRA WIDTH FOR BEVEL
PIN BOARD
EDGE OF TAIL BOARD
PIN BOARD WIDTH IS EQUAL TO
EDGE OF TAIL BOARD PLUS
EXTRA WIDTH FOR BEVEL
Fig. 60B
Fig. 60A
FITTING THE JOINT
A
Fig. 60C
Fitting the joint is the same as fitting the standard dovetail. HINT: Use pieces of scrap wood the same thickness and species of wood to make test pin boards until the template is adjusted for a perfect fit.
Fig. 61A
COMPOUND-ANGLE JOINTS
Two boards joined at 90°, with both boards slanted to the side is known as a
Fig. 62C
Side
Angle
Side
Angle
Fig. 62A
Fig. 62B
34
