C O M M E R C I A L P R O D U C T S D I V I S I O N
ADDITIONAL TOOLS NEEDED
Obtain the following tools before assembling the C846.
❑
❑Wire cutter
ASSEMBLY INSTRUCTIONS
Take the following steps to assemble the C846 Upright and C846 Recumbent Cycle.
Note:The C846 Upright and C846 Recumbent have similar assembly instructions except for adjusting the seat.
1.Obtain assistance. Ask for assistance to help assemble the C846. Have the assistant(s) place the shipping carton close to the location where you plan to use the C846. Breakdown the sidewalls of the shipping carton so that they lie flat.
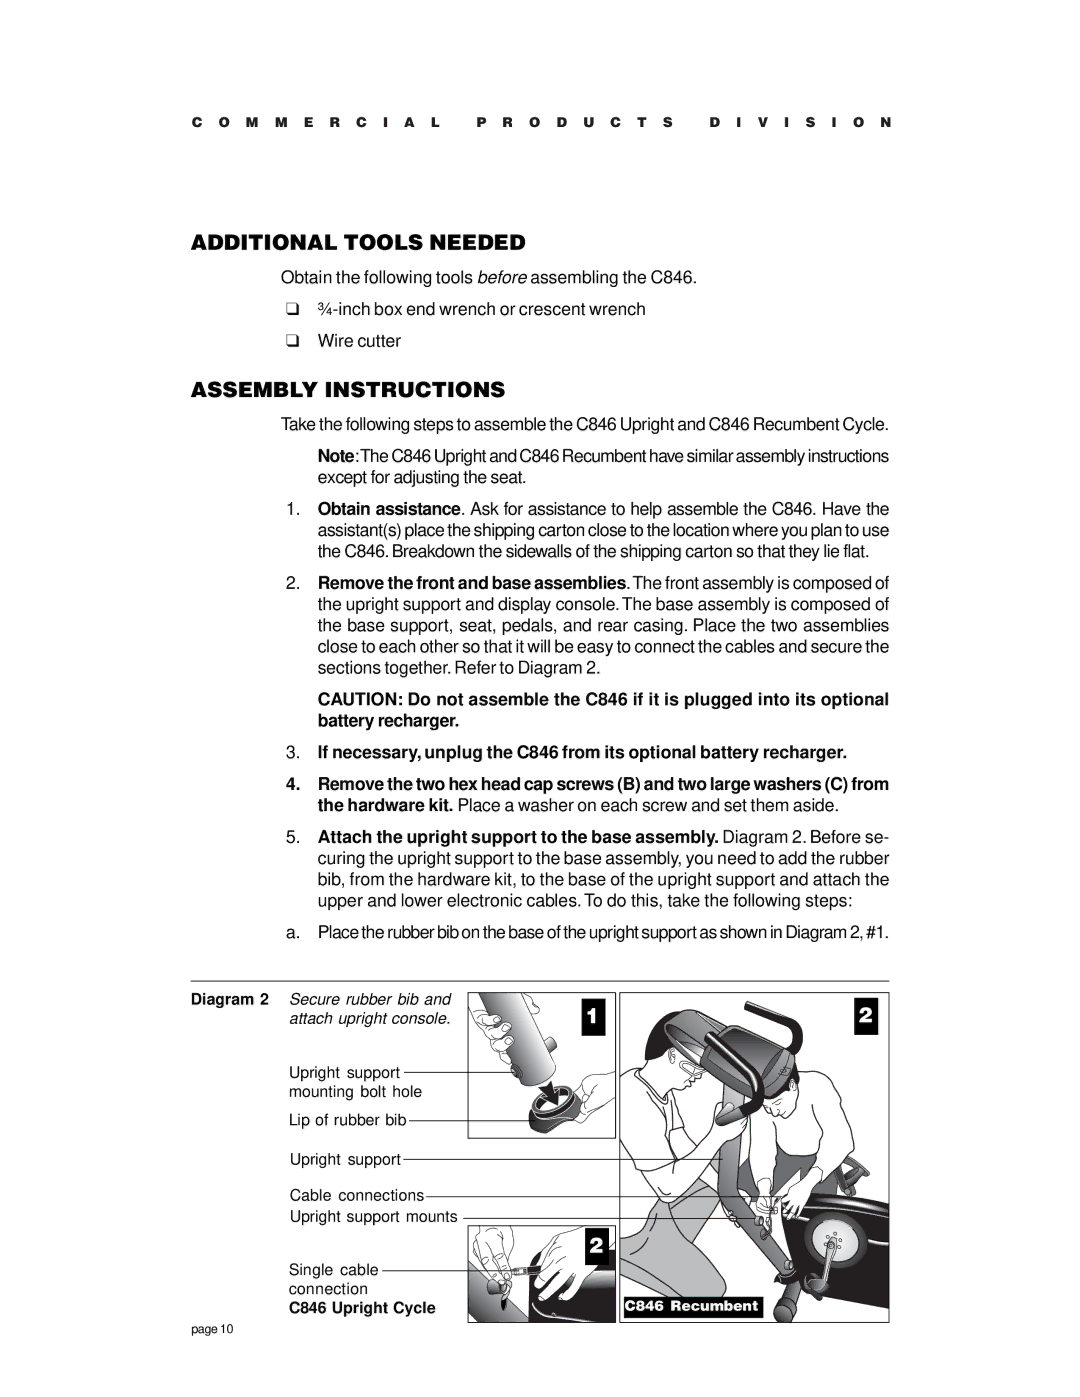
2.Remove the front and base assemblies.The front assembly is composed of the upright support and display console. The base assembly is composed of the base support, seat, pedals, and rear casing. Place the two assemblies close to each other so that it will be easy to connect the cables and secure the sections together. Refer to Diagram 2.
CAUTION: Do not assemble the C846 if it is plugged into its optional battery recharger.
3.If necessary, unplug the C846 from its optional battery recharger.
4.Remove the two hex head cap screws (B) and two large washers (C) from the hardware kit. Place a washer on each screw and set them aside.
5.Attach the upright support to the base assembly. Diagram 2. Before se- curing the upright support to the base assembly, you need to add the rubber bib, from the hardware kit, to the base of the upright support and attach the upper and lower electronic cables. To do this, take the following steps:
a. Place the rubber bib on the base of the upright support as shown in Diagram 2, #1.
Diagram 2 Secure rubber bib and | 1 | 2 |
attach upright console. |
Upright support ![]() mounting bolt hole
mounting bolt hole
Lip of rubber bib
Upright support |
|
Cable connections |
|
Upright support mounts |
|
| 2 |
Single cable |
|
connection | C846 Recumbent |
C846 Upright Cycle |
page 10
