C O M M E R C I A L P R O D U C T S D I V I S I O N
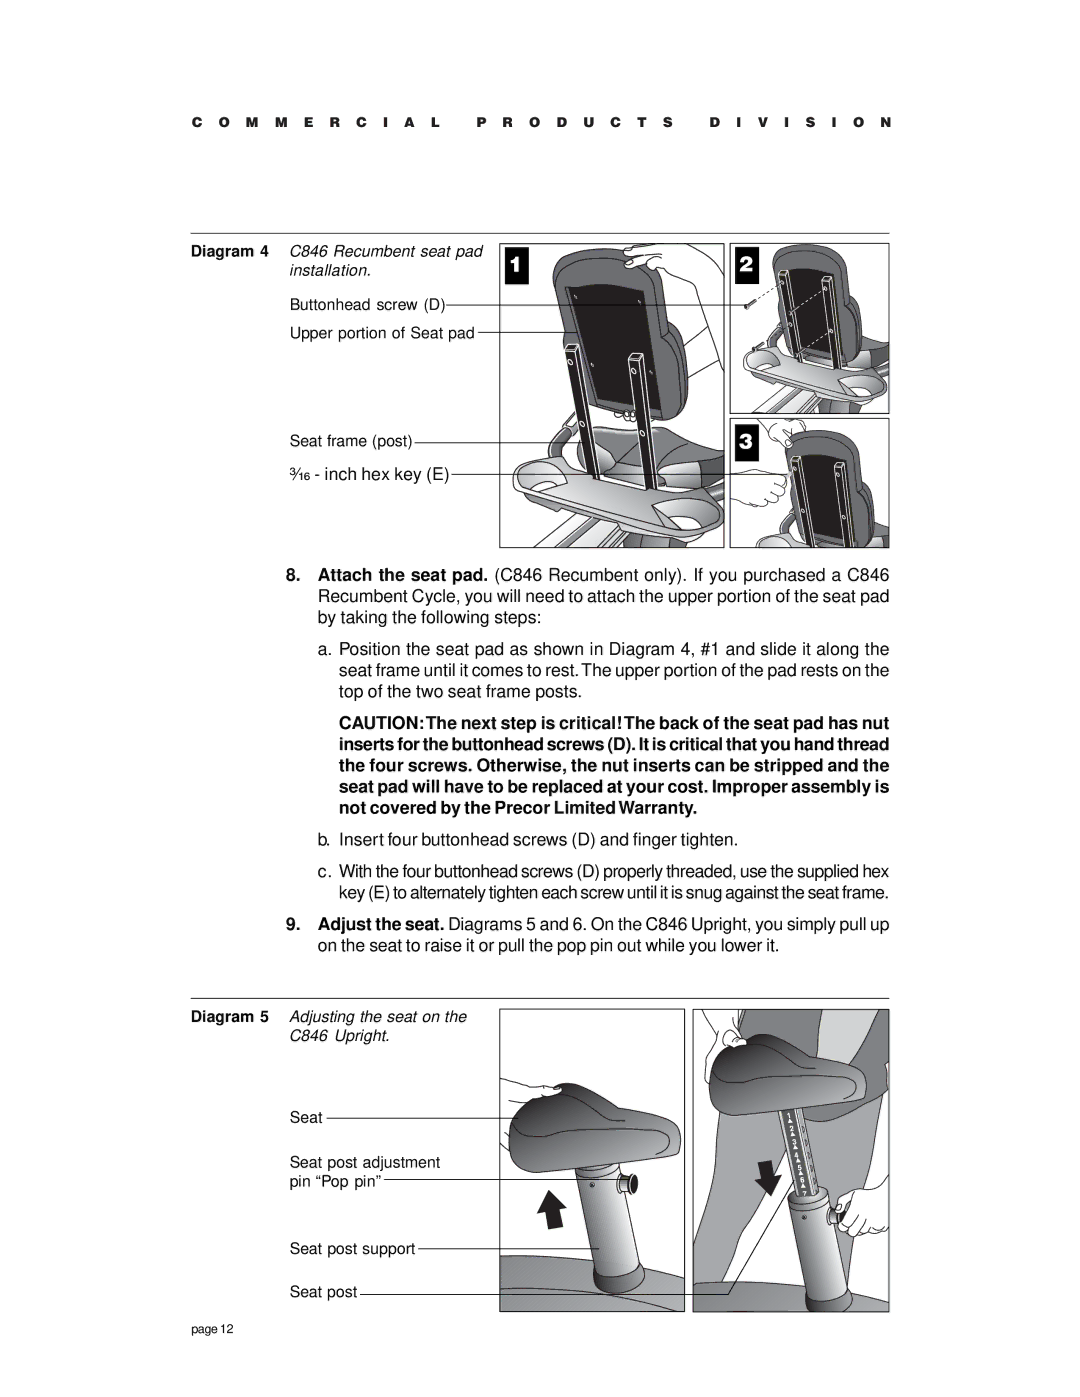
Diagram 4 C846 Recumbent seat pad | 1 | 2 |
installation. | ||
Buttonhead screw (D) |
|
|
Upper portion of Seat pad |
|
|
Seat frame (post) |
| 3 |
C\zn - inch hex key (E) |
|
|
8.Attach the seat pad. (C846 Recumbent only). If you purchased a C846 Recumbent Cycle, you will need to attach the upper portion of the seat pad by taking the following steps:
a.Position the seat pad as shown in Diagram 4, #1 and slide it along the seat frame until it comes to rest. The upper portion of the pad rests on the top of the two seat frame posts.
CAUTION:The next step is critical! The back of the seat pad has nut inserts for the buttonhead screws (D). It is critical that you hand thread the four screws. Otherwise, the nut inserts can be stripped and the seat pad will have to be replaced at your cost. Improper assembly is not covered by the Precor Limited Warranty.
b.Insert four buttonhead screws (D) and finger tighten.
c.With the four buttonhead screws (D) properly threaded, use the supplied hex key (E) to alternately tighten each screw until it is snug against the seat frame.
9.Adjust the seat. Diagrams 5 and 6. On the C846 Upright, you simply pull up on the seat to raise it or pull the pop pin out while you lower it.
Diagram 5 Adjusting the seat on the
C846 Upright.
Seat
Seat post adjustment pin “Pop pin”
Seat post support
Seat post
page 12
