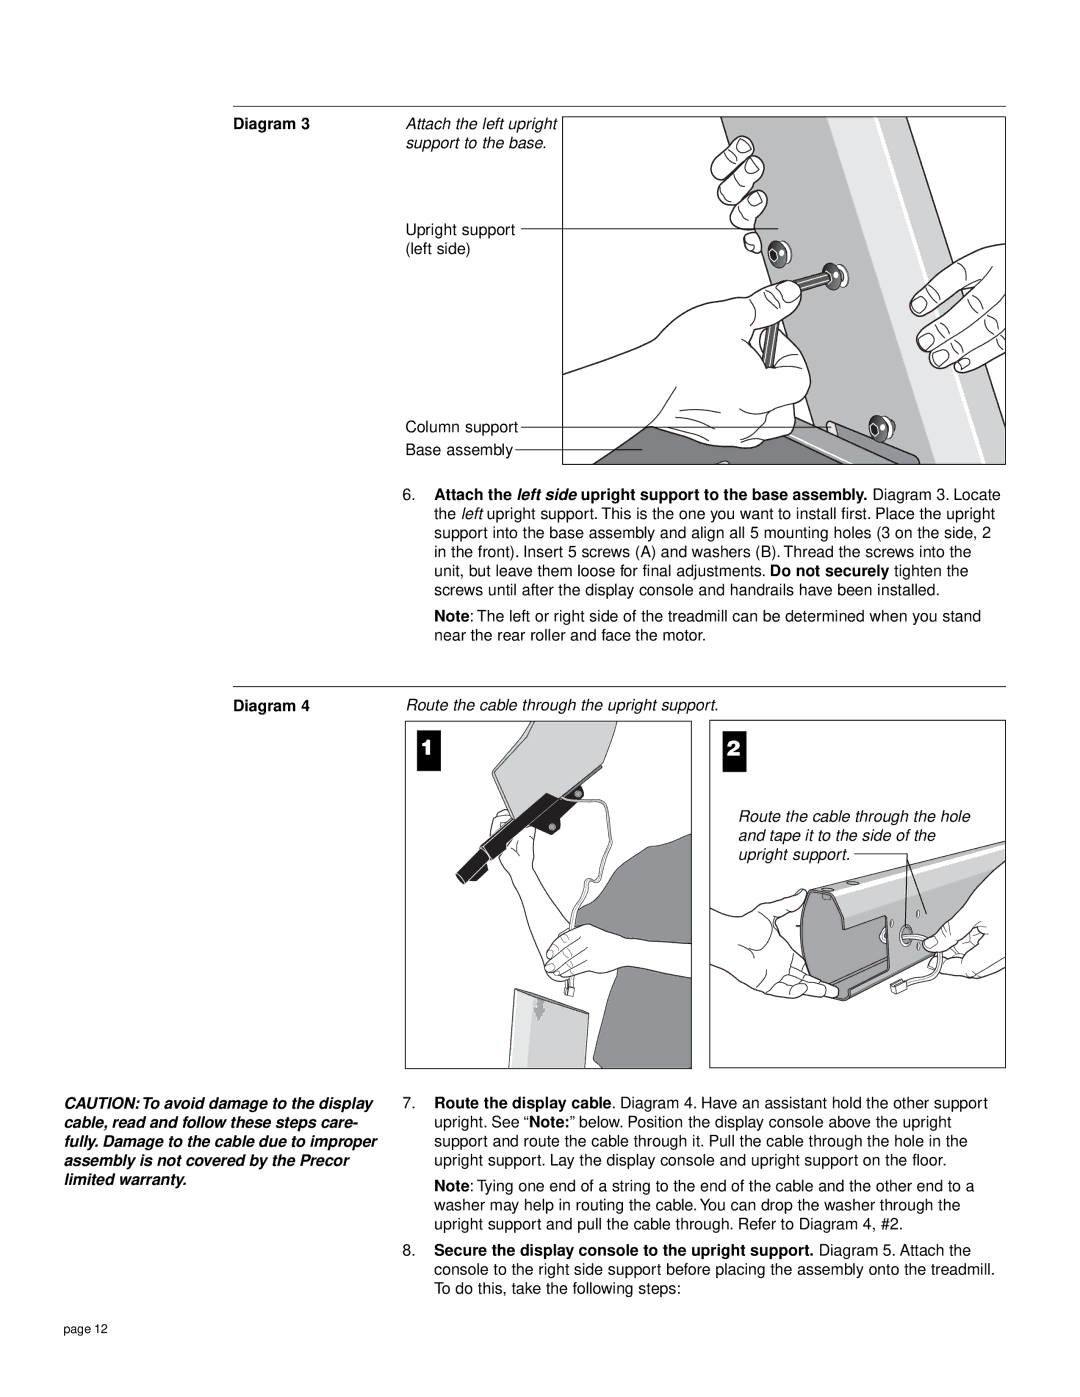
Diagram 3 | Attach the left upright |
| support to the base. |
Upright support (left side)
Column support
Base assembly
6.Attach the left side upright support to the base assembly. Diagram 3. Locate the left upright support. This is the one you want to install first. Place the upright support into the base assembly and align all 5 mounting holes (3 on the side, 2 in the front). Insert 5 screws (A) and washers (B). Thread the screws into the unit, but leave them loose for final adjustments. Do not securely tighten the screws until after the display console and handrails have been installed.
Note: The left or right side of the treadmill can be determined when you stand near the rear roller and face the motor.
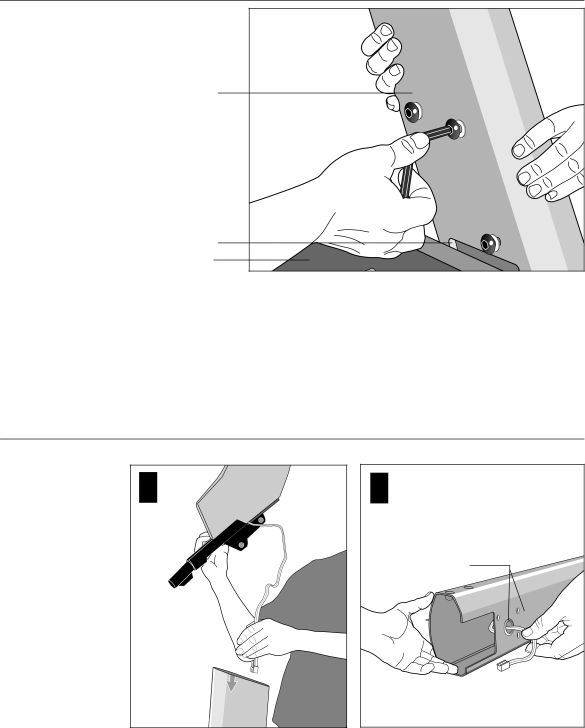
Diagram 4 | Route the cable through the upright support. |
1
2
Route the cable through the hole and tape it to the side of the upright support.
CAUTION: To avoid damage to the display cable, read and follow these steps care- fully. Damage to the cable due to improper assembly is not covered by the Precor limited warranty.
7.Route the display cable. Diagram 4. Have an assistant hold the other support upright. See “Note:” below. Position the display console above the upright support and route the cable through it. Pull the cable through the hole in the upright support. Lay the display console and upright support on the floor.
Note: Tying one end of a string to the end of the cable and the other end to a washer may help in routing the cable. You can drop the washer through the upright support and pull the cable through. Refer to Diagram 4, #2.
8.Secure the display console to the upright support. Diagram 5. Attach the console to the right side support before placing the assembly onto the treadmill. To do this, take the following steps:
page 12