manual
After you have selected the image file for the first floor plan, you can align it with the grid so that the walls are exactly horizontal and vertical. This will make it much simpler to draw in the walls later. To align the plan, rotate it using the slider, then use the left and right arrow keys for finer adjustments.
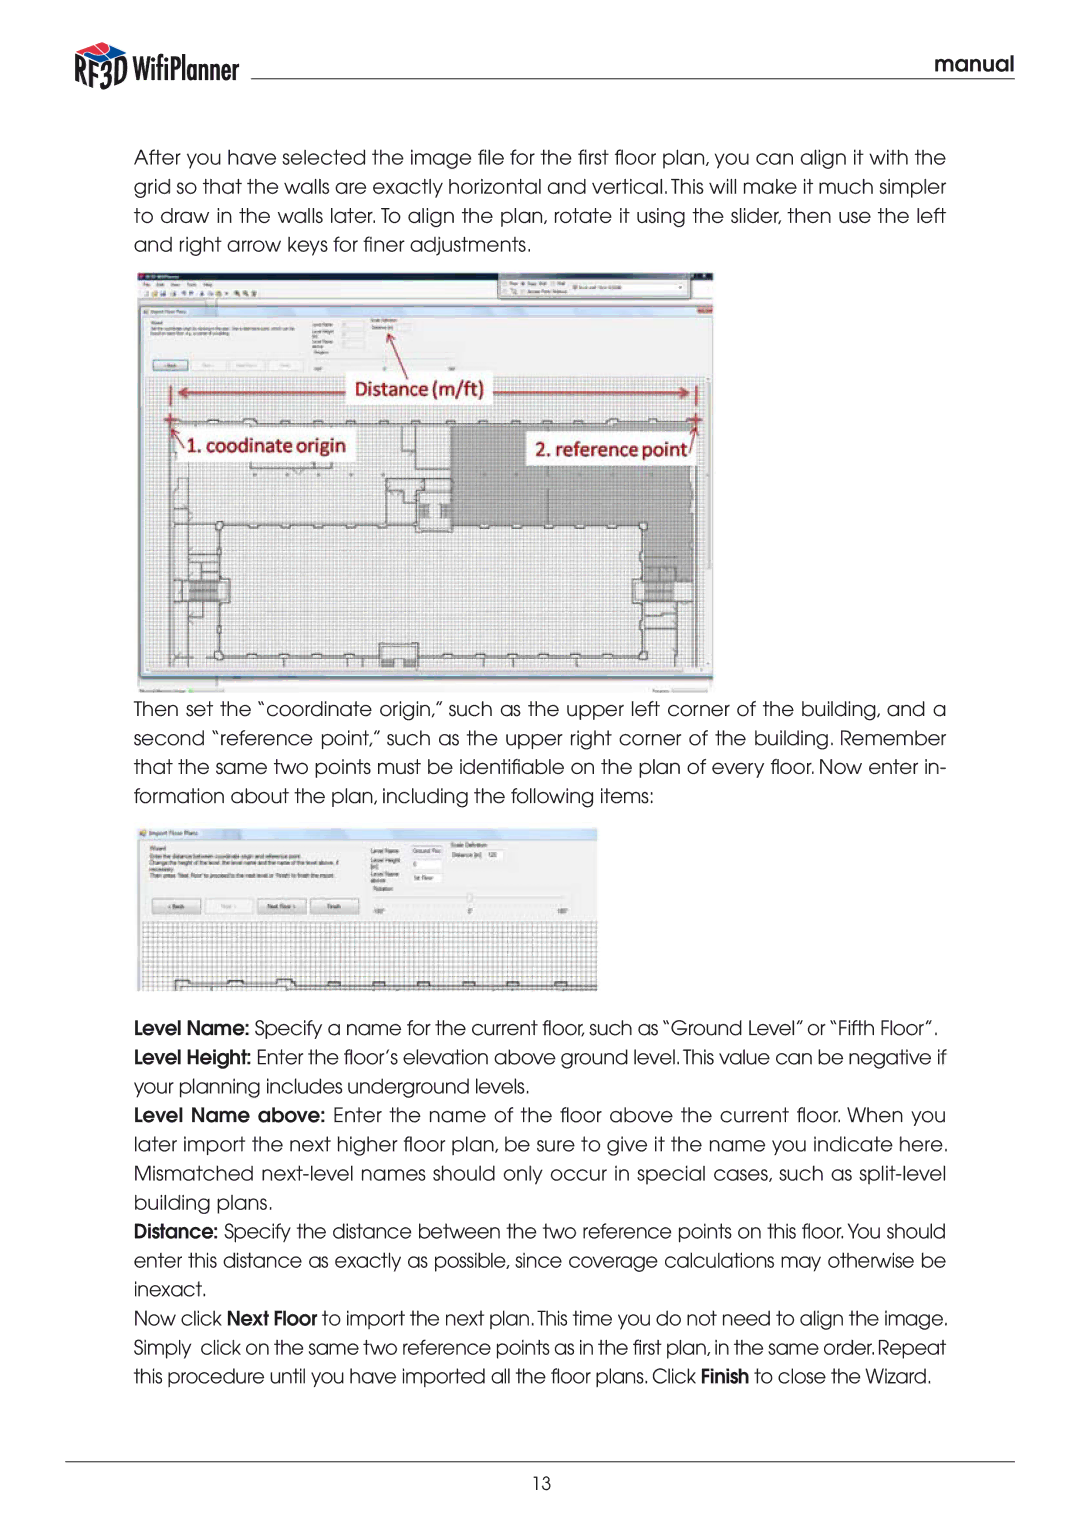
Then set the “coordinate origin,” such as the upper left corner of the building, and a second “reference point,” such as the upper right corner of the building. Remember that the same two points must be identifiable on the plan of every floor. Now enter in- formation about the plan, including the following items:
Level Name: Specify a name for the current floor, such as “Ground Level” or “Fifth Floor”.
Level Height: Enter the floor’s elevation above ground level.This value can be negative if your planning includes underground levels.
Level Name above: Enter the name of the floor above the current floor. When you later import the next higher floor plan, be sure to give it the name you indicate here. Mismatched
Distance: Specify the distance between the two reference points on this floor.You should enter this distance as exactly as possible, since coverage calculations may otherwise be inexact.
Now click Next Floor to import the next plan.This time you do not need to align the image. Simply click on the same two reference points as in the first plan,in the same order.Repeat this procedure until you have imported all the floor plans. Click Finish to close the Wizard.
13