LOGOUT
Selecting the Shutdown icon in the Main Menu will open the Shut Down window.
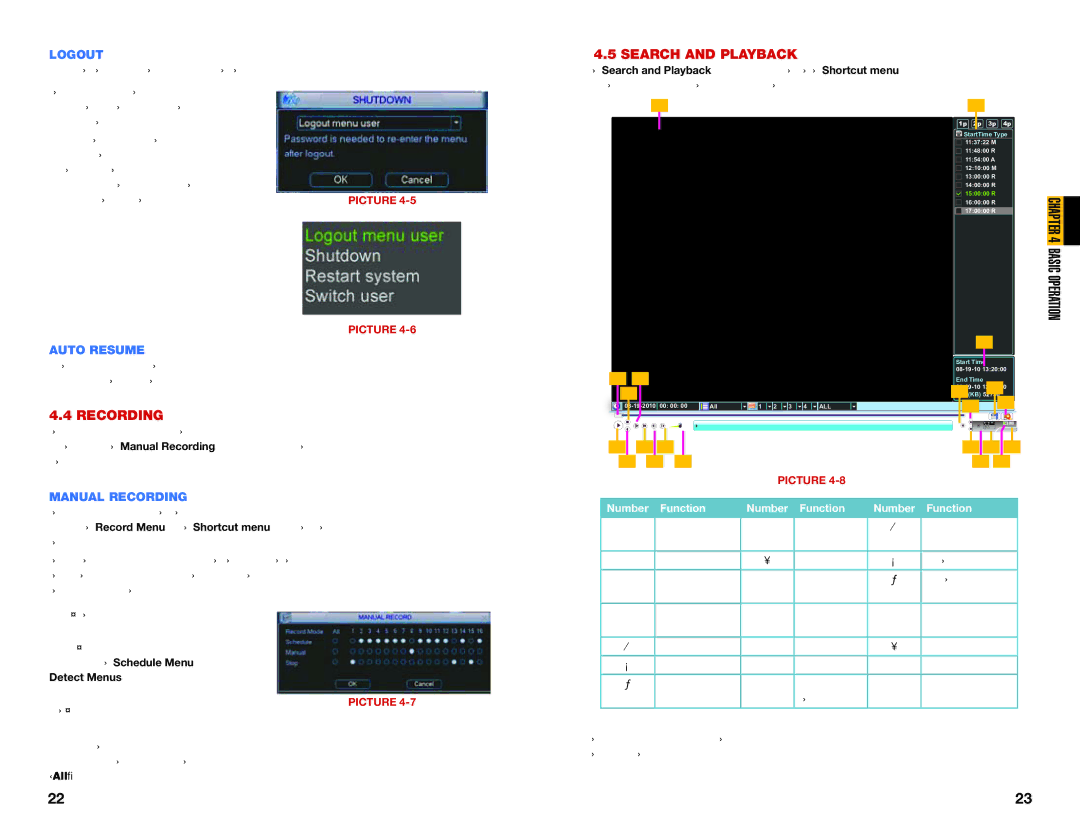
4.5 SEARCH AND PLAYBACK
The Search and Playback window can be accessed through the Shortcut menu. You can view the playback from any camera that was activate during the recording session.
This window allows you to choose to log out as a user, shut down the system, restart the system or switch users.
In addition, the DVR can also be shut down by pressing on the front panel power button for three seconds. The system will stop operating and it can then be turned off via the Power button on the rear of the DVR.
AUTO RESUME
PICTURE
PICTURE
|
|
|
1 | 2 |
1p 2p 3p 4p
![]() StartTime Type
StartTime Type
11:37:22 M
11:48:00 R
11:54:00 A
12:10:00 M
13:00:00 R
14:00:00 R
15:00:00 R
16:00:00 R 17:00:00 R
3
CHAPTER 4 BASIC OPERATION![]()
In the event of a power failure, the DVR will automatically save any video files it is currently recording and will then resume scheduled operations once power is restored.
4.4 RECORDING
The DVR must be configured to record on a schedule, but you can start recording on any and all channels using the Manual Recording option. For information on how to set recording schedules and motion detection recording, please see Sections 4.6 and 4.7.
MANUAL RECORDING
4 | 6 |
|
|
|
5 |
|
|
|
|
00: 00: 00 All | CH 1 2 3 4 ALL | |||
7 | 9 | 11 |
|
|
8 | 10 | 12 |
| |
PICTURE
Start Time
End Time | 15 |
Size(KB) |
|
13 | 16 |
14 |
17 19 21
18 20
This window allows you to override the scheduled recording times of selected cameras. You can access the Record Menu via the Shortcut menu or by pushing the Record button on the remote.
There are three status modes: Schedule, Manual and Stop. The status of each channel is shown by the filled circle under its number. Each camera can only have one status at a time. Changes take effect once the OK button is selected.
Manual – The selected cameras will begin recording
Schedule – Cameras record based on your settings made in the Schedule Menu or Detect Menus (See Sections 4.6 and 4.7 respectively)
PICTURE
Stop – All selected cameras stop recording
You can assign the same values to all cameras by selecting the desired status in the “All” column.
Number | Function | Number | Function | Number | Function |
|
|
|
|
|
|
1 | Playback | 8 | Reverse | 15 | Backup |
| Window |
|
|
|
|
|
|
|
|
|
|
2 | File List | 9 | Fast Play | 16 | Search |
|
|
|
|
|
|
3 | File Information | 10 | Previous | 17 | Next Channel |
|
|
| Frame |
|
|
|
|
|
|
|
|
4 | Playback | 11 | Next Frame | 18 | Next File |
| Progress Bar |
|
|
|
|
|
|
|
|
|
|
5 | Stop | 12 | Volume | 19 | Video Clip |
|
|
|
|
|
|
6 | Slow Play | 13 | Previous File | 20 | Repeat Playback |
|
|
|
|
|
|
7 | Play | 14 | Previous | 21 | Full Screen |
|
|
| Channel |
|
|
The playback screen can be set to display the recordings from one camera or as many channels as you have.
22 | 23 |
