Step 2: Attach the
If using Telnet for setup, refer to the Console mode section, Chapter 9, and Chapter 5, then power up the
Step 3: If using Windows, install the Quatech
Step 4: Power on the
Step 5: Start the Quatech
Step 6: Select Search to find the
Step 7: When found,
Step 8: Refer to the Server Properties section, Chapter 5 for details on the Configuration parameters for each field. Configure and then Save/Update.
Step 9: If you want to use Virtual COM ports with Windows, install the Virtual COM port or ports on each computer requiring access to the
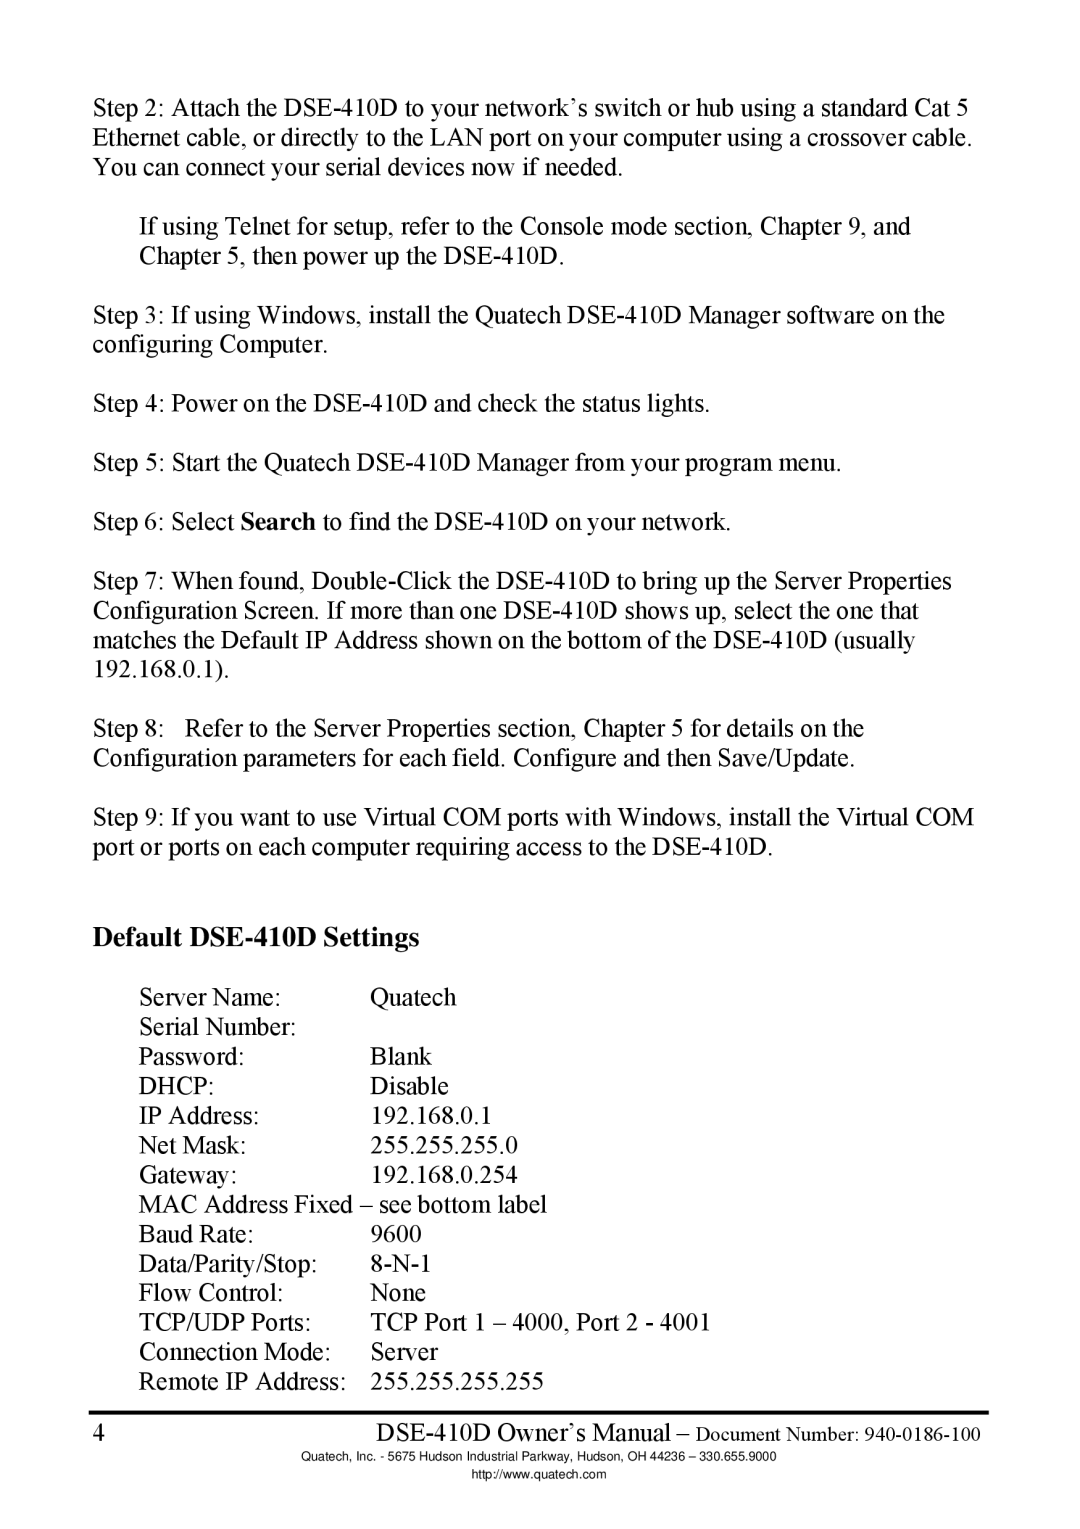
Default DSE-410D Settings
Server Name: | Quatech |
Serial Number: |
|
Password: | Blank |
DHCP: | Disable |
IP Address: | 192.168.0.1 |
Net Mask: | 255.255.255.0 |
Gateway: | 192.168.0.254 |
MAC Address Fixed – see bottom label | |
Baud Rate: | 9600 |
Data/Parity/Stop: | |
Flow Control: | None |
TCP/UDP Ports: | TCP Port 1 – 4000, Port 2 - 4001 |
Connection Mode: | Server |
Remote IP Address: | 255.255.255.255 |
|
|
4 | |
Quatech, Inc. - 5675 Hudson Industrial Parkway, Hudson, OH 44236 – 330.655.9000
http://www.quatech.com