INSTALLATION
BRICK PANEL INSTALLATION
IMPORTANT: Must install 1 set of brick panels. The operation of this unit without the brick panels is prohibited.
Dangerous operating conditions may occur if the panels are broken.
Handle with care. DO NOT FORCE INTO POSITION.
INSTALLATION
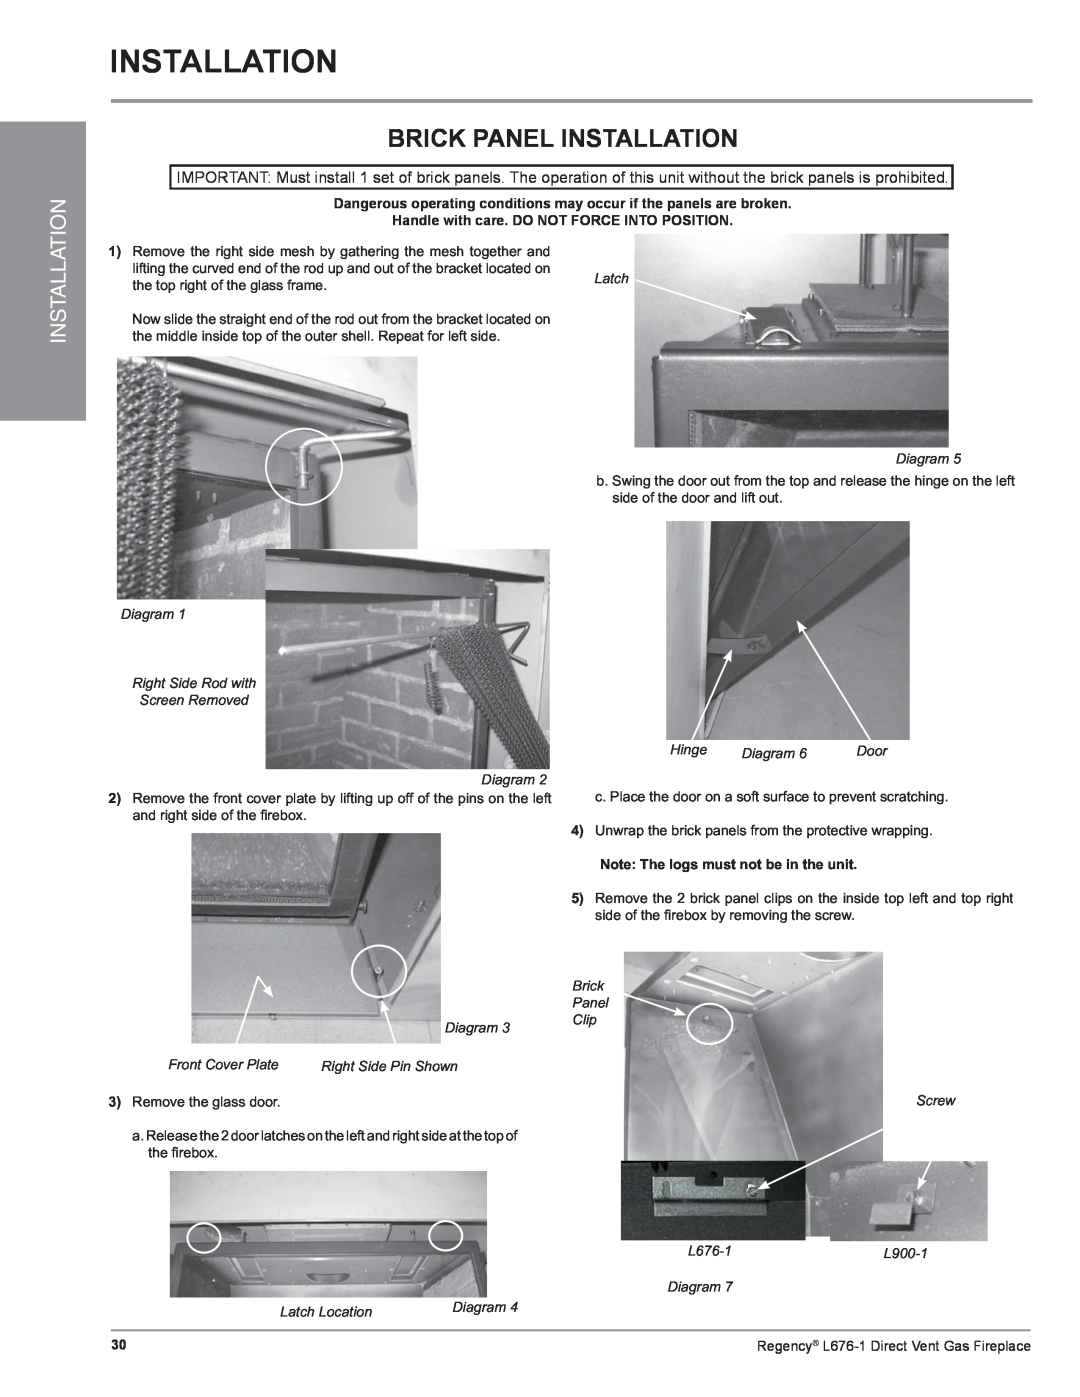
1)Remove the right side mesh by gathering the mesh together and lifting the curved end of the rod up and out of the bracket located on the top right of the glass frame.
Now slide the straight end of the rod out from the bracket located on the middle inside top of the outer shell. Repeat for left side.
Diagram 1
Right Side Rod with
Screen Removed
Diagram 2
2)Remove the front cover plate by lifting up off of the pins on the left and right side of the fi rebox.
Latch
Diagram 5
b. Swing the door out from the top and release the hinge on the left side of the door and lift out.
Hinge | Diagram 6 | Door |
c. Place the door on a soft surface to prevent scratching.
4)Unwrap the brick panels from the protective wrapping.
Note: The logs must not be in the unit.
5)Remove the 2 brick panel clips on the inside top left and top right side of the fi rebox by removing the screw.
Diagram 3
Front Cover Plate | Right Side Pin Shown |
3)Remove the glass door.
a. Release the 2 door latches on the left and right side at the top of the fi rebox.
Latch Location | Diagram 4 |
|
Brick
Panel ![]()
Clip
Screw
Diagram 7
30 | Regency® |
