Miter Cut
When a miter cut is required, move the saw to the desired angle. Move with the handle to the miter angle to make the cut.
There are settings on the miter scale for angles (degrees) and crown molding.
NOTE: Remember to unlock the miter
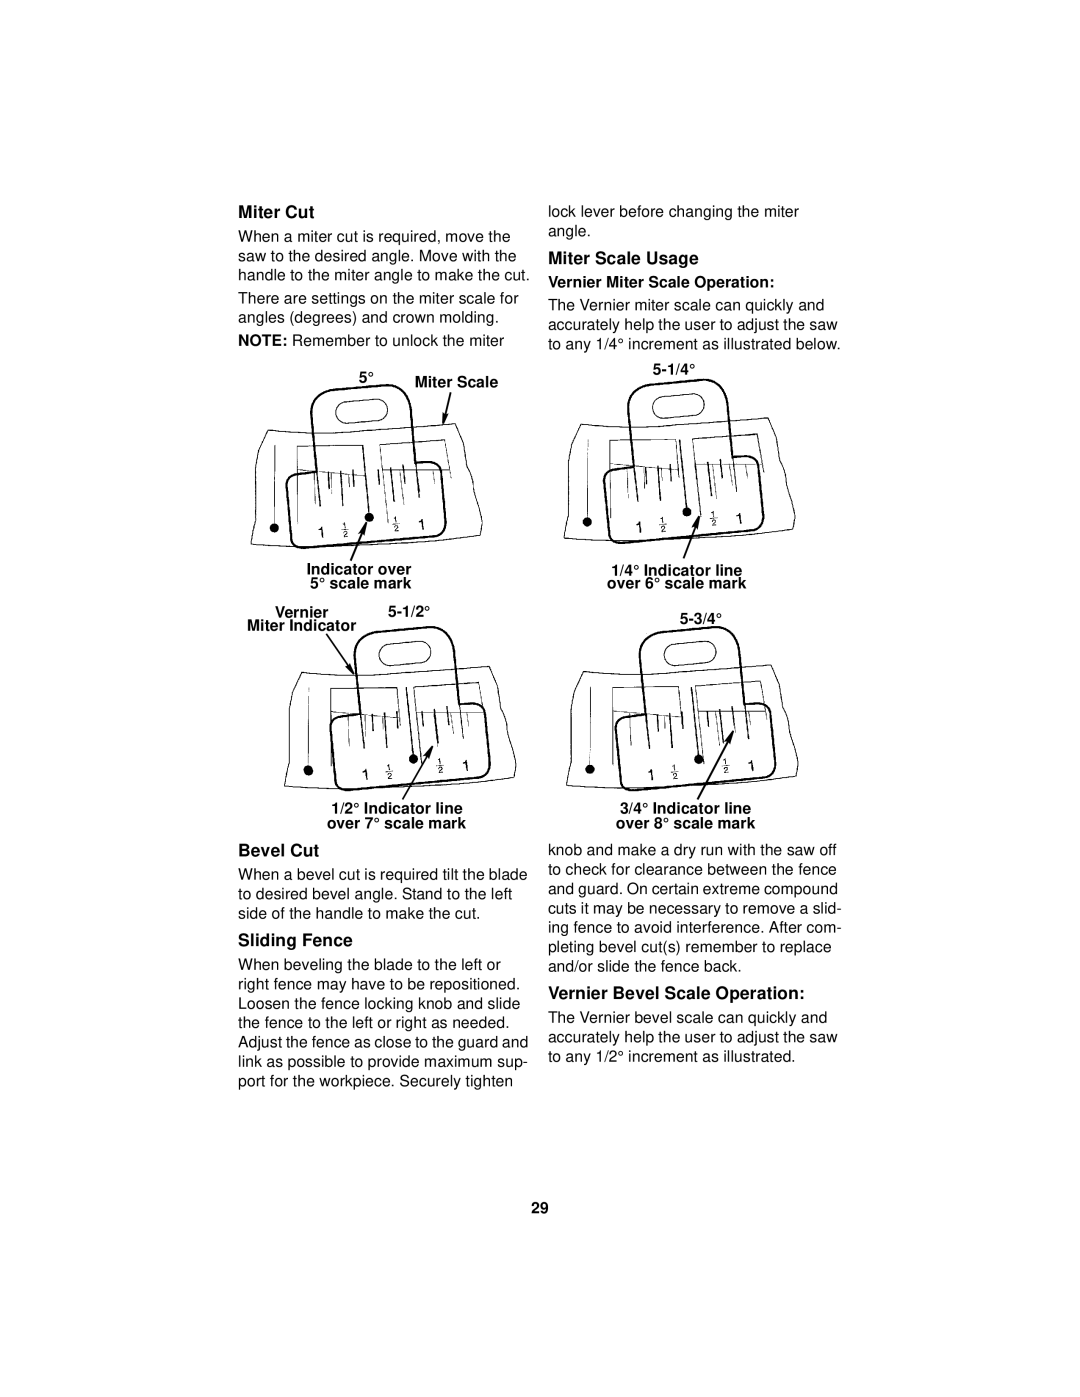
5° | Miter Scale |
|
Indicator over 5° scale mark
Vernier
Miter Indicator
1/2° Indicator line over 7° scale mark
Bevel Cut
When a bevel cut is required tilt the blade to desired bevel angle. Stand to the left side of the handle to make the cut.
Sliding Fence
When beveling the blade to the left or right fence may have to be repositioned. Loosen the fence locking knob and slide the fence to the left or right as needed. Adjust the fence as close to the guard and link as possible to provide maximum sup- port for the workpiece. Securely tighten
lock lever before changing the miter angle.
Miter Scale Usage
Vernier Miter Scale Operation:
The Vernier miter scale can quickly and accurately help the user to adjust the saw to any 1/4° increment as illustrated below.
1/4° Indicator line over 6° scale mark
3/4° Indicator line over 8° scale mark
knob and make a dry run with the saw off to check for clearance between the fence and guard. On certain extreme compound cuts it may be necessary to remove a slid- ing fence to avoid interference. After com- pleting bevel cut(s) remember to replace and/or slide the fence back.
Vernier Bevel Scale Operation:
The Vernier bevel scale can quickly and accurately help the user to adjust the saw to any 1/2° increment as illustrated.
29