Basic Saw Operations (continued)
Cutting Crown Moldings
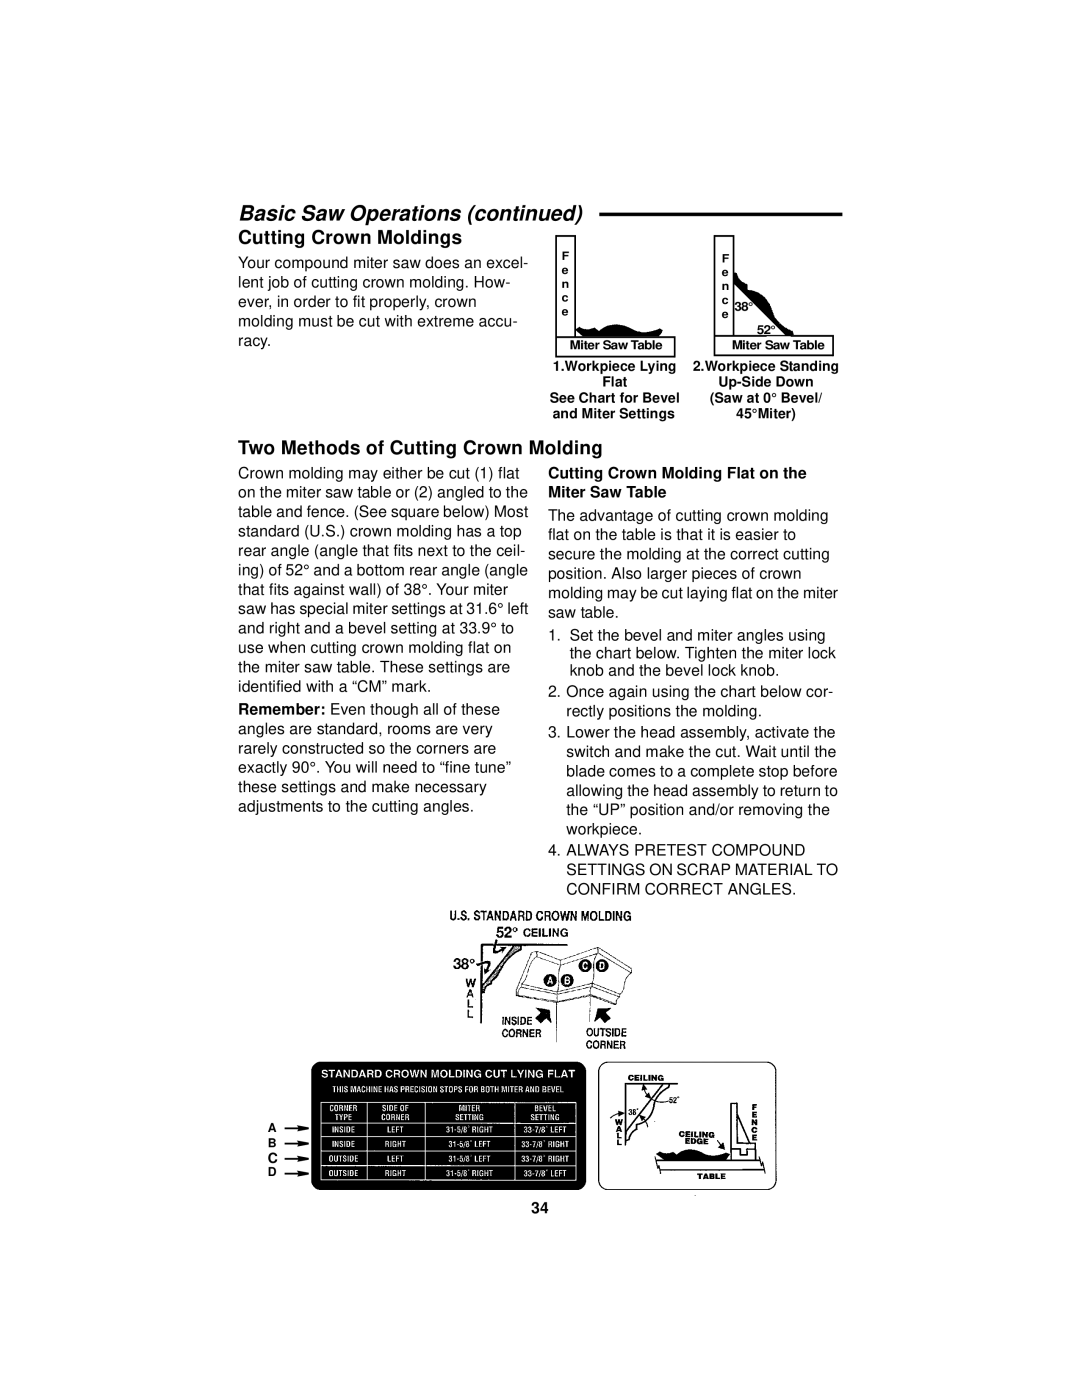
Your compound miter saw does an excel- lent job of cutting crown molding. How- ever, in order to fit properly, crown molding must be cut with extreme accu- racy.
| F |
|
|
| F |
|
|
|
|
| e |
|
|
| e |
|
|
|
|
| n |
|
|
| n |
|
|
|
|
| c |
|
|
| ec | 38° |
|
|
|
| e |
|
|
|
|
|
| ||
|
|
|
|
|
| 52° |
|
| |
|
| Miter Saw Table |
|
| Miter | Saw | Table |
| |
1.Workpiece Lying | 2.Workpiece Standing | ||||||||
|
| Flat |
| ||||||
See Chart for Bevel | (Saw at 0° Bevel/ | ||||||||
and Miter Settings |
|
| 45°Miter) | ||||||
Two Methods of Cutting Crown Molding
Crown molding may either be cut (1) flat on the miter saw table or (2) angled to the table and fence. (See square below) Most standard (U.S.) crown molding has a top rear angle (angle that fits next to the ceil- ing) of 52° and a bottom rear angle (angle that fits against wall) of 38°. Your miter saw has special miter settings at 31.6° left and right and a bevel setting at 33.9° to use when cutting crown molding flat on the miter saw table. These settings are identified with a “CM” mark.
Remember: Even though all of these angles are standard, rooms are very rarely constructed so the corners are exactly 90°. You will need to “fine tune” these settings and make necessary adjustments to the cutting angles.
Cutting Crown Molding Flat on the Miter Saw Table
The advantage of cutting crown molding flat on the table is that it is easier to secure the molding at the correct cutting position. Also larger pieces of crown molding may be cut laying flat on the miter saw table.
1.Set the bevel and miter angles using the chart below. Tighten the miter lock knob and the bevel lock knob.
2.Once again using the chart below cor- rectly positions the molding.
3.Lower the head assembly, activate the switch and make the cut. Wait until the blade comes to a complete stop before allowing the head assembly to return to the “UP” position and/or removing the workpiece.
4.ALWAYS PRETEST COMPOUND SETTINGS ON SCRAP MATERIAL TO CONFIRM CORRECT ANGLES.
A![]()
B![]()
C![]()
D![]()
34