Bevel Lock Lever Adjustment
With the blade set at an “unindexed” bevel position (other than 0°, 22.5°,
Considerable effort should be required to move the blade. While it is always possi- ble to force the blade to move, it should resist moving when a reasonable amount of force is applied.
To check, follow these steps:
1.Release the bevel lock lever and posi- tion the blade at an “unindexed” posi- tion. Lock the bevel lock lever.
2.Try and bevel the blade. If the blade moves easily:
a.Release the bevel lock lever.
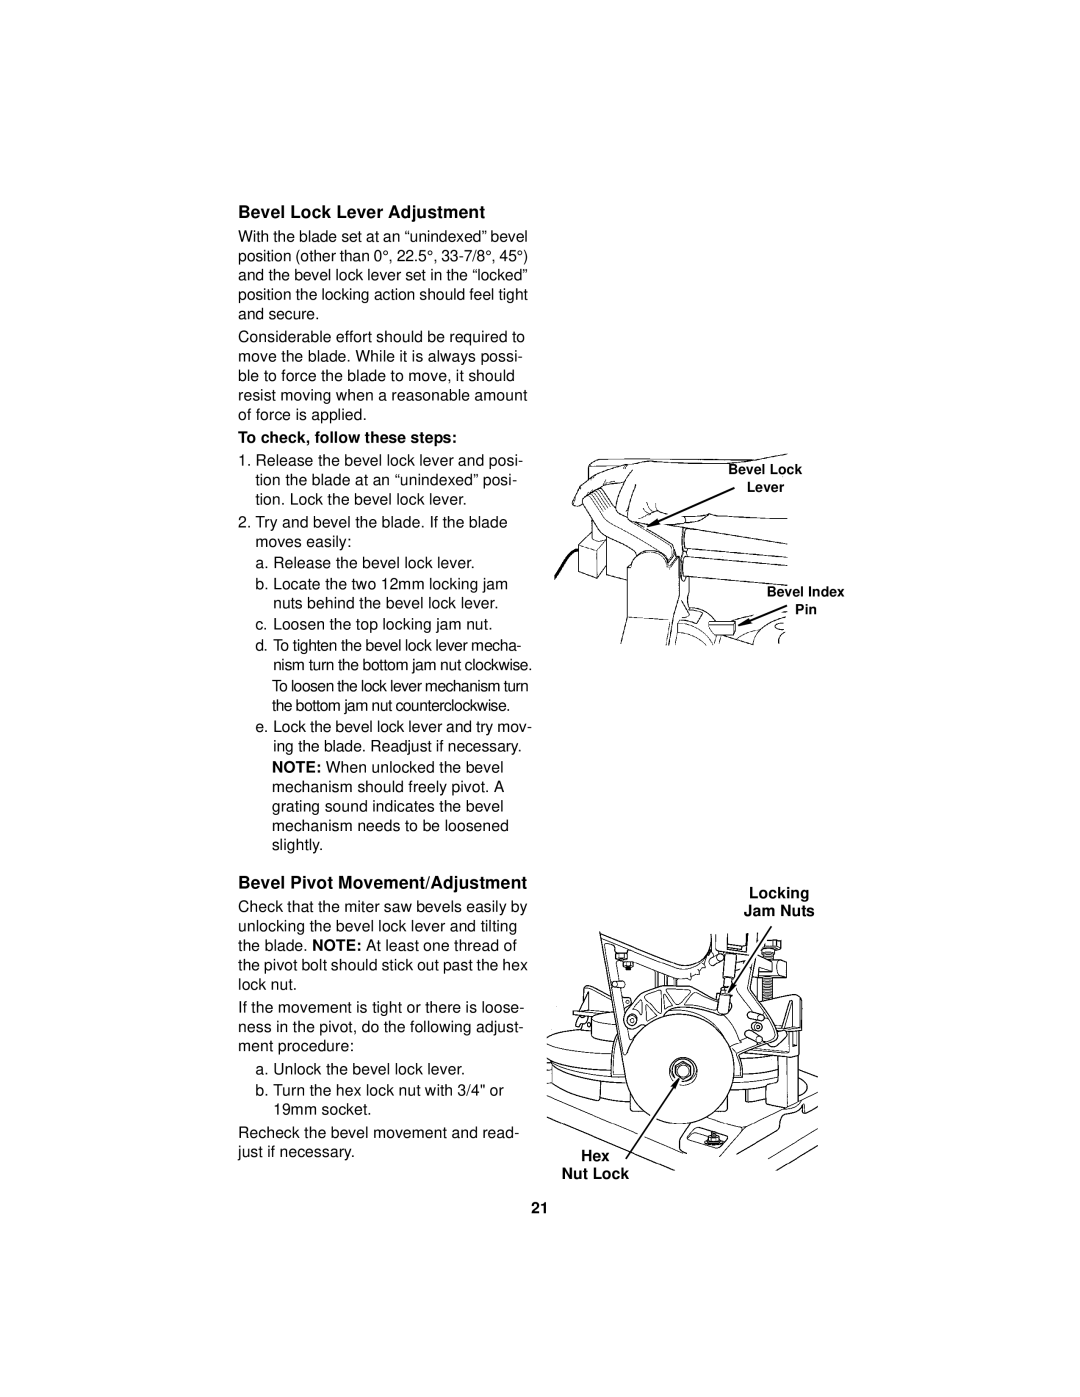
b.Locate the two 12mm locking jam nuts behind the bevel lock lever.
c.Loosen the top locking jam nut.
d.To tighten the bevel lock lever mecha- nism turn the bottom jam nut clockwise. To loosen the lock lever mechanism turn the bottom jam nut counterclockwise.
e.Lock the bevel lock lever and try mov- ing the blade. Readjust if necessary. NOTE: When unlocked the bevel mechanism should freely pivot. A grating sound indicates the bevel mechanism needs to be loosened slightly.
Bevel Pivot Movement/Adjustment
Check that the miter saw bevels easily by unlocking the bevel lock lever and tilting the blade. NOTE: At least one thread of the pivot bolt should stick out past the hex lock nut.
If the movement is tight or there is loose- ness in the pivot, do the following adjust- ment procedure:
a. Unlock the bevel lock lever.
b. Turn the hex lock nut with 3/4" or 19mm socket.
Recheck the bevel movement and read-
just if necessary.Hex
Nut Lock
Bevel Lock
Lever
Bevel Index ![]() Pin
Pin
Locking
Jam Nuts
21