Unpacking and Checking Contents
Tools Needed
|
|
| Combination Square Must be True | ||
|
| Draw Light | Straight Edge of | ||
Hex “L” Wrench | Hex “L” Wrench | Line on Board | |||
Board 3/4" Thick | |||||
1/4" (supplied) | 4mm, 5mm, 6mm | Along this Edge | |||
This Edge Must | |||||
|
|
|
| ||
|
|
|
| be Perfectly | |
19 mm Socket |
|
|
| Straight | |
|
|
|
| ||
Combination | Combination Square |
| |||
| Should be no Gap or Overlap when Square | ||||
Wrench (2) 12 mm | is Flipped Over in Dotted Position | ||||
|
|
|
| ||
Unpacking |
|
| 1. Before removing the miter saw from the | ||
|
|
| carton tighten the slide lock knob to | ||
WARNING: To reduce the risk of | |||||
| guard against sudden movement. | ||||
injury from unexpected starting |
| ||||
or electrical shock, do not plug |
| 2. Remove the miter saw from the carton by | |||
the power cord into a power |
| lifting the saw with the carrying handle. | |||
source outlet during unpacking |
| 3. Place the saw on a secure, stationary | |||
and assembly. This cord must |
| work surface and look the saw over | |||
remain unplugged whenever you |
| carefully. |
| ||
are working on the saw. |
|
|
| ||
| WARNING: If any part is missing | ||||
|
|
| |||
This Miter Saw is shipped complete in |
| or damaged, do not plug the saw | |||
one box. |
|
| in until the missing or damaged | ||
|
|
| part is correctly replaced. To | ||
WARNING: Although compact, | |||||
| avoid electric shock, use only | ||||
this saw is heavy. To reduce the |
| ||||
| identical replacement parts when | ||||
risk of back injury, get help when- |
| ||||
| servicing double insulated tools. | ||||
ever you have to lift the saw. |
| ||||
|
|
| |||
|
|
|
|
| |
|
|
|
| ||
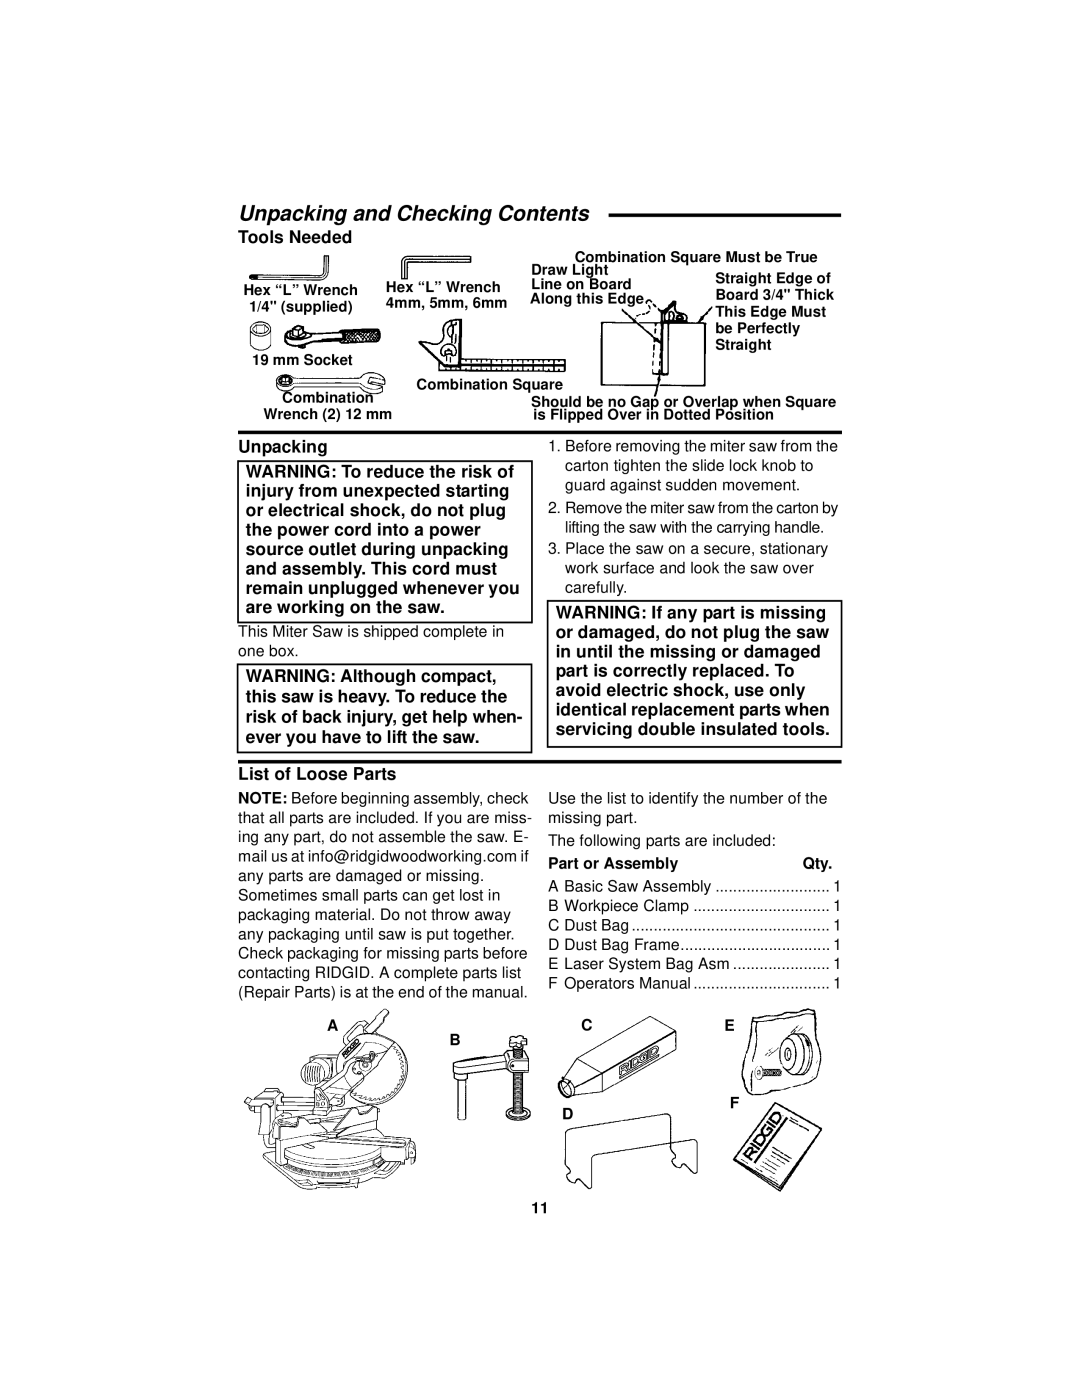
List of Loose Parts |
|
|
| ||
NOTE: Before beginning assembly, check that all parts are included. If you are miss- ing any part, do not assemble the saw. E- mail us at info@ridgidwoodworking.com if any parts are damaged or missing.
Sometimes small parts can get lost in packaging material. Do not throw away any packaging until saw is put together. Check packaging for missing parts before contacting RIDGID. A complete parts list (Repair Parts) is at the end of the manual.
Use the list to identify the number of the missing part.
The following parts are included: |
|
Part or Assembly | Qty. |
A Basic Saw Assembly | 1 |
B Workpiece Clamp | 1 |
C Dust Bag | 1 |
D Dust Bag Frame | 1 |
E Laser System Bag Asm | 1 |
F Operators Manual | 1 |
ACE
B
D
F
11