6.Remove the arbor screw, arbor washer, and outer blade collar.
NOTE: The Exactline™ Laser System will replace the outer blade collar. Retain the outer blade collar, arbor screw and blade washer to operate the saw when the laser system is not mounted.
7.Place the laser system onto the saw arbor, aligning the double “D” flats in the laser system with the flats on the arbor. Press the arbor lock and turn the com- bination wrench counterclockwise to secure the blade. Tighten arbor screw using moderate force, but do not over- tighten.
8.Lower the lower blade guard until the slot in cover plate rests all the way down on the cover plate stop screw. Tighten the screw with the Phillips end of the combination wrench.
DANGER: Never use the saw without guard cover plate securely in place. It keeps the arbor screw from falling out if it accidentally loosens, and pre- vents the spinning blade from coming off the machine.
9.Be sure the arbor lock is released so the blade turns freely.
NOTE: The arbor lock can be damaged by improper use. If the arbor lock will not hold, lower the blade down on to a scrap piece of wood positioned against the fence. This will serve as an alternate lock- ing means.
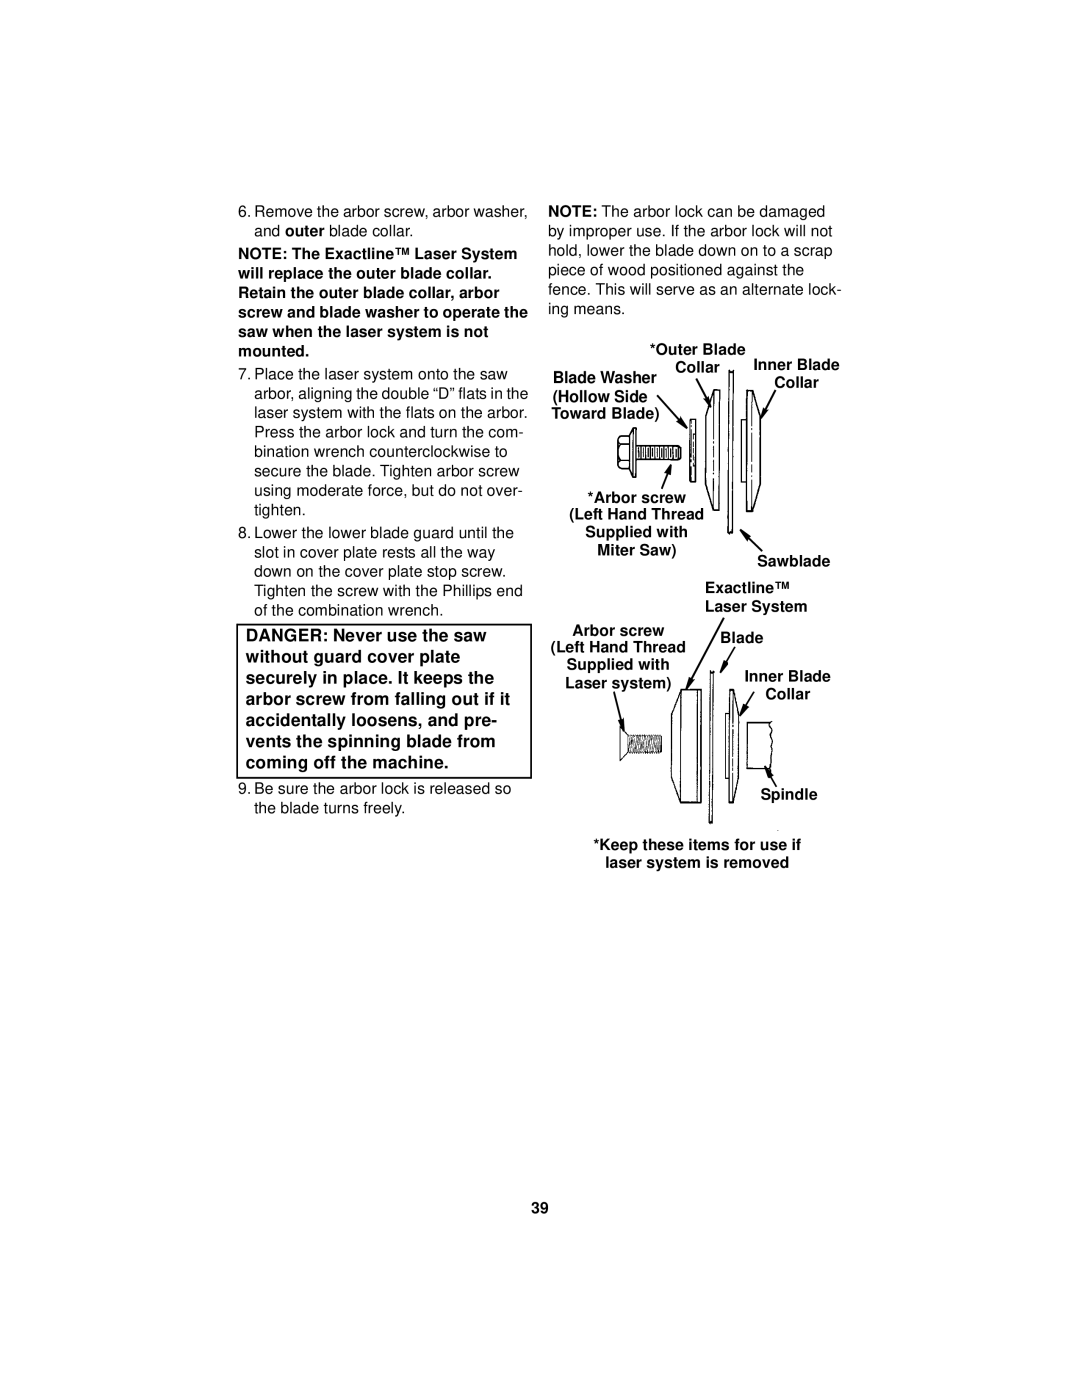
*Outer Blade | Inner Blade | |
Blade Washer | Collar | |
| Collar | |
(Hollow Side
Toward Blade)
*Arbor screw |
| |
(Left Hand Thread |
| |
Supplied with |
| |
Miter Saw) | Sawblade | |
| ||
| Exactline™ | |
| Laser System | |
Arbor screw | Blade | |
(Left Hand Thread | ||
| ||
Supplied with | Inner Blade | |
Laser system) | ||
Collar | ||
|
Spindle
*Keep these items for use if
laser system is removed
39