Alignment
Square Blade to Table for Crosscutting
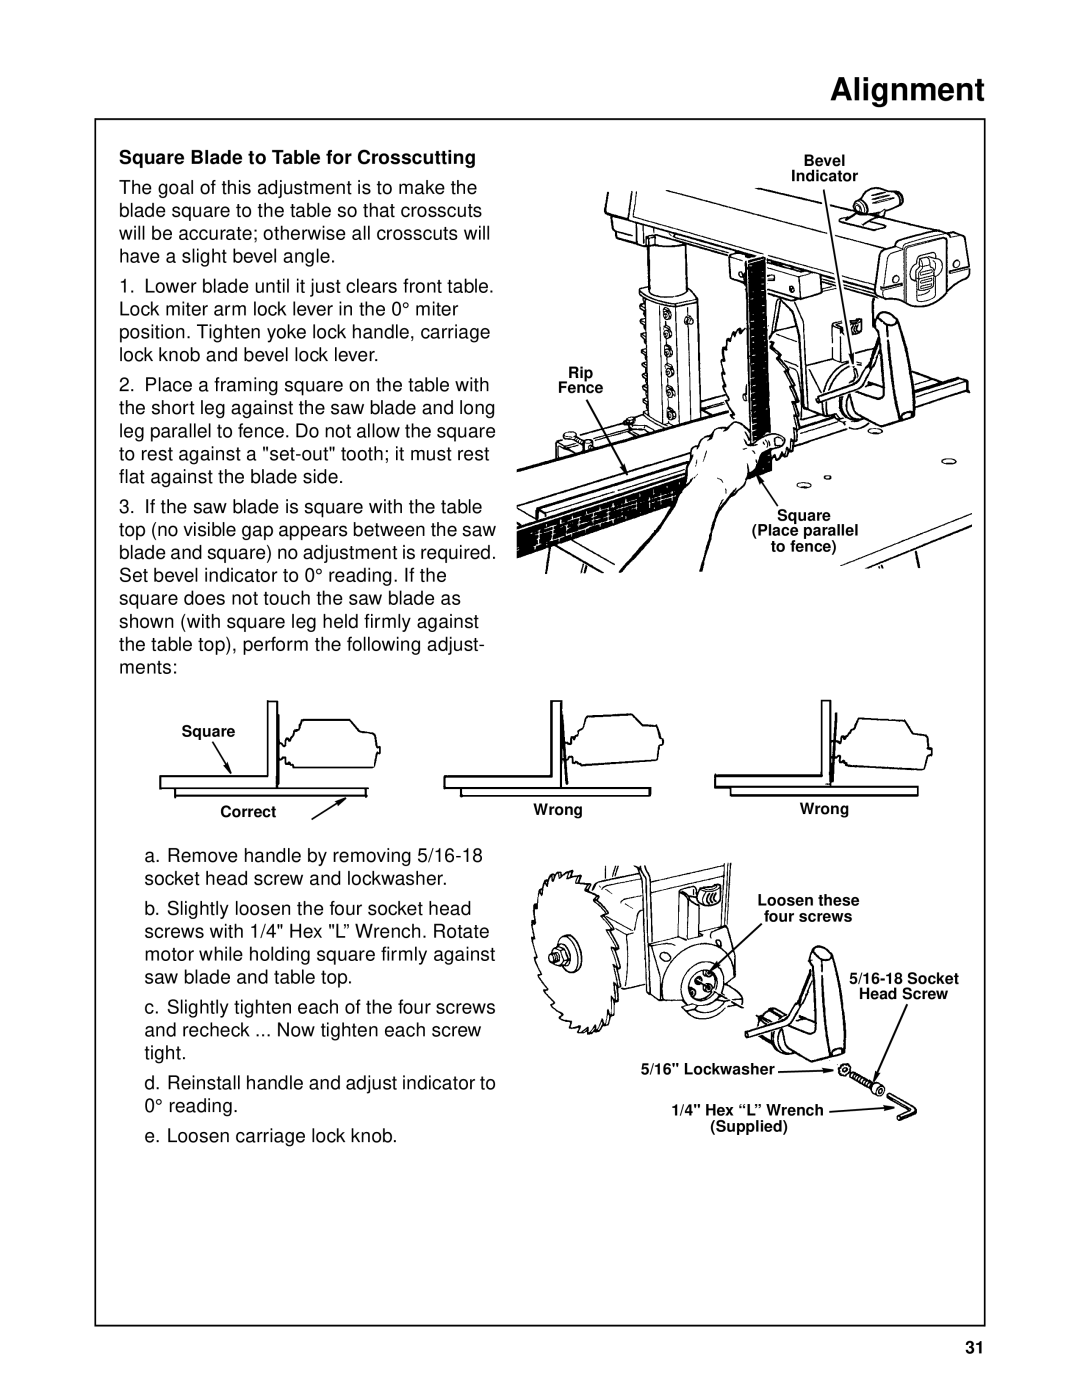
The goal of this adjustment is to make the blade square to the table so that crosscuts will be accurate; otherwise all crosscuts will have a slight bevel angle.
1.Lower blade until it just clears front table. Lock miter arm lock lever in the 0° miter position. Tighten yoke lock handle, carriage lock knob and bevel lock lever.
Rip
2. Place a framing square on the table with Fence the short leg against the saw blade and long
leg parallel to fence. Do not allow the square to rest against a
3.If the saw blade is square with the table top (no visible gap appears between the saw blade and square) no adjustment is required. Set bevel indicator to 0° reading. If the square does not touch the saw blade as shown (with square leg held firmly against the table top), perform the following adjust- ments:
Square
Correct | Wrong |
a.Remove handle by removing
b.Slightly loosen the four socket head screws with 1/4" Hex "L” Wrench. Rotate motor while holding square firmly against saw blade and table top.
c.Slightly tighten each of the four screws and recheck ... Now tighten each screw tight.
d.Reinstall handle and adjust indicator to 0° reading.
e.Loosen carriage lock knob.
Bevel
Indicator
Square (Place parallel to fence)
Wrong
Loosen these four screws
Head Screw
5/16" Lockwasher ![]()
![]()
1/4" Hex “L” Wrench ![]()
![]() (Supplied)
(Supplied)
31
