Adjustments
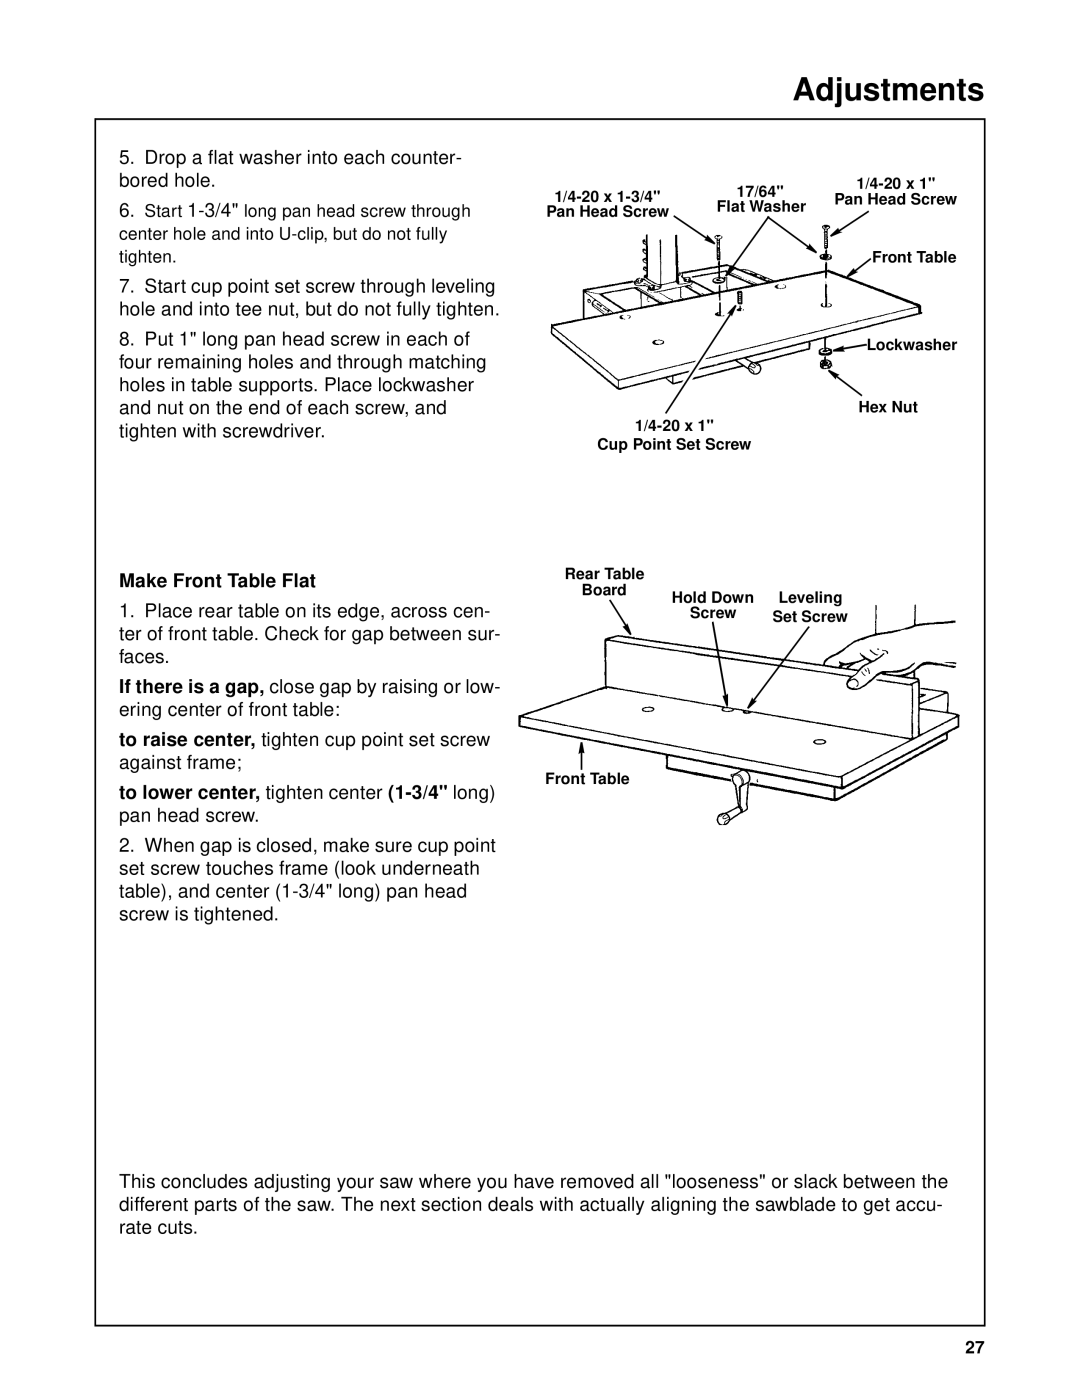
5.Drop a flat washer into each counter- bored hole.
6.Start
7.Start cup point set screw through leveling hole and into tee nut, but do not fully tighten.
8.Put 1" long pan head screw in each of four remaining holes and through matching holes in table supports. Place lockwasher and nut on the end of each screw, and tighten with screwdriver.
17/64" | ||
Flat Washer | ||
Pan Head Screw | ||
|
Cup Point Set Screw
Pan Head Screw
Front Table
![]() Lockwasher
Lockwasher
Hex Nut
Make Front Table Flat
1.Place rear table on its edge, across cen- ter of front table. Check for gap between sur- faces.
If there is a gap, close gap by raising or low- ering center of front table:
to raise center, tighten cup point set screw against frame;
to lower center, tighten center (1-3/4" long) pan head screw.
2.When gap is closed, make sure cup point set screw touches frame (look underneath table), and center
Rear Table |
|
|
Board | Hold Down | Leveling |
| ||
| Screw | Set Screw |
Front Table
This concludes adjusting your saw where you have removed all "looseness" or slack between the different parts of the saw. The next section deals with actually aligning the sawblade to get accu- rate cuts.
27