Cutting Aides
![]() WARNING
WARNING
To reduce the risk of shock, burns or lacerations form accidental start up of saw, turn power switch off and unplug saw before taking off blade, adding or changing accessories and before doing any maintenance or servicing saw.
Molding/Sanding
Instructions for operating the molding head are contained in a booklet furnished with the molding head.
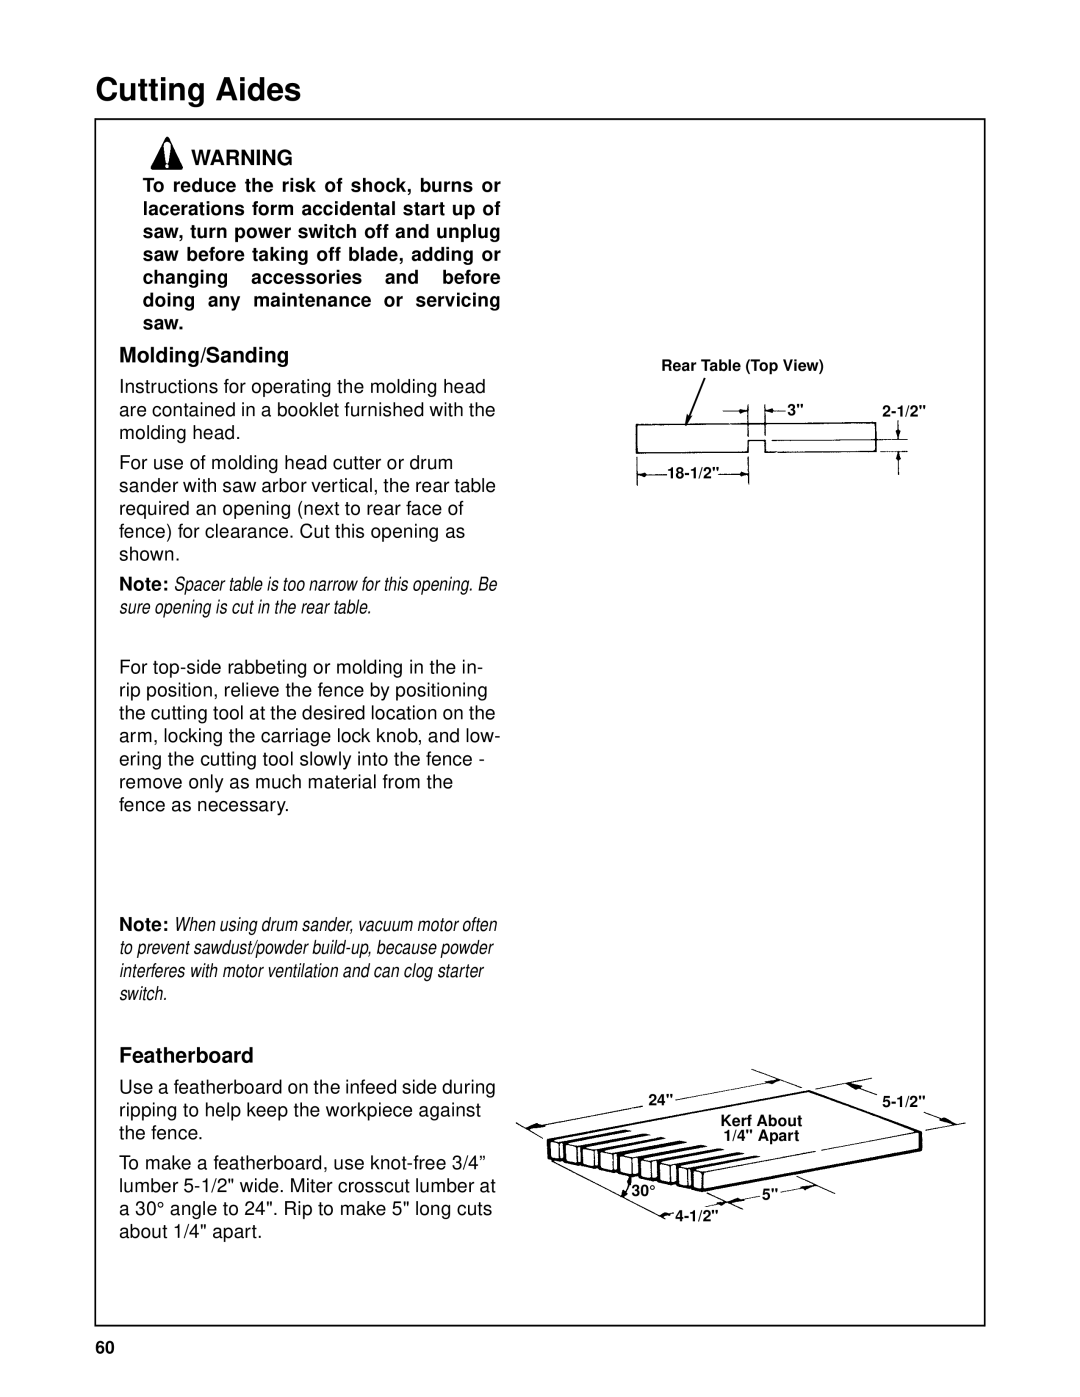
For use of molding head cutter or drum sander with saw arbor vertical, the rear table required an opening (next to rear face of fence) for clearance. Cut this opening as shown.
Note: Spacer table is too narrow for this opening. Be sure opening is cut in the rear table.
For
Note: When using drum sander, vacuum motor often to prevent sawdust/powder
Featherboard
Use a featherboard on the infeed side during ripping to help keep the workpiece against the fence.
To make a featherboard, use
Rear Table (Top View)
3"2-1/2"
24"5-1/2"
Kerf About
1/4" Apart
30°5"
60
