Creating and playing a loop
Changing the settings of part 1
You can change the playback pitch and playback region of the sound that
you captured in part 1.
C1 knob | C2 knob | C3 knob |
|
|
|
|
|
|
Playback pitch | Location at which the | Length at which the |
| sound will begin | sound will begin |
| (Position) | (Length) |
|
|
|
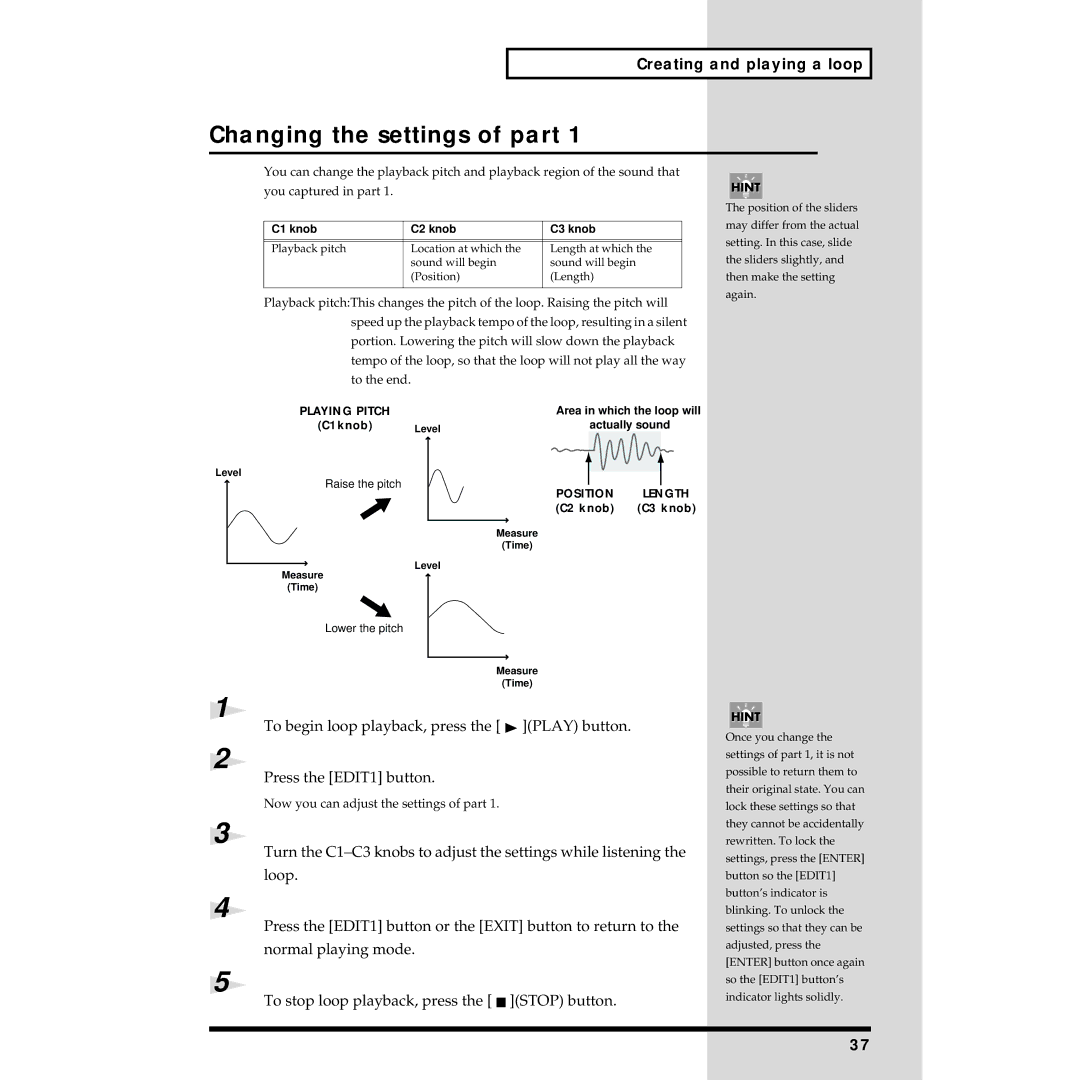
Playback pitch:This changes the pitch of the loop. Raising the pitch will speed up the playback tempo of the loop, resulting in a silent portion. Lowering the pitch will slow down the playback tempo of the loop, so that the loop will not play all the way to the end.
fig.3-2b
PLAYING PITCH |
| Area in which the loop will | |
(C1knob) | Level | actually sound | |
Level |
|
|
|
Raise the pitch |
| POSITION | LENGTH |
|
| ||
|
| (C2 knob) | (C3 knob) |
Measure
(Time)
Level
Measure
(Time)
The position of the sliders may differ from the actual setting. In this case, slide the sliders slightly, and then make the setting again.
Lower the pitch
1
2
3
4
5
Measure
(Time)
To begin loop playback, press the [ ![]() ](PLAY) button.
](PLAY) button.
Press the [EDIT1] button.
Now you can adjust the settings of part 1.
Turn the
Press the [EDIT1] button or the [EXIT] button to return to the normal playing mode.
To stop loop playback, press the [  ](STOP) button.
Once you change the settings of part 1, it is not possible to return them to their original state. You can lock these settings so that they cannot be accidentally rewritten. To lock the settings, press the [ENTER] button so the [EDIT1] button’s indicator is blinking. To unlock the settings so that they can be adjusted, press the [ENTER] button once again so the [EDIT1] button’s indicator lights solidly.
37