Applying an effect
The
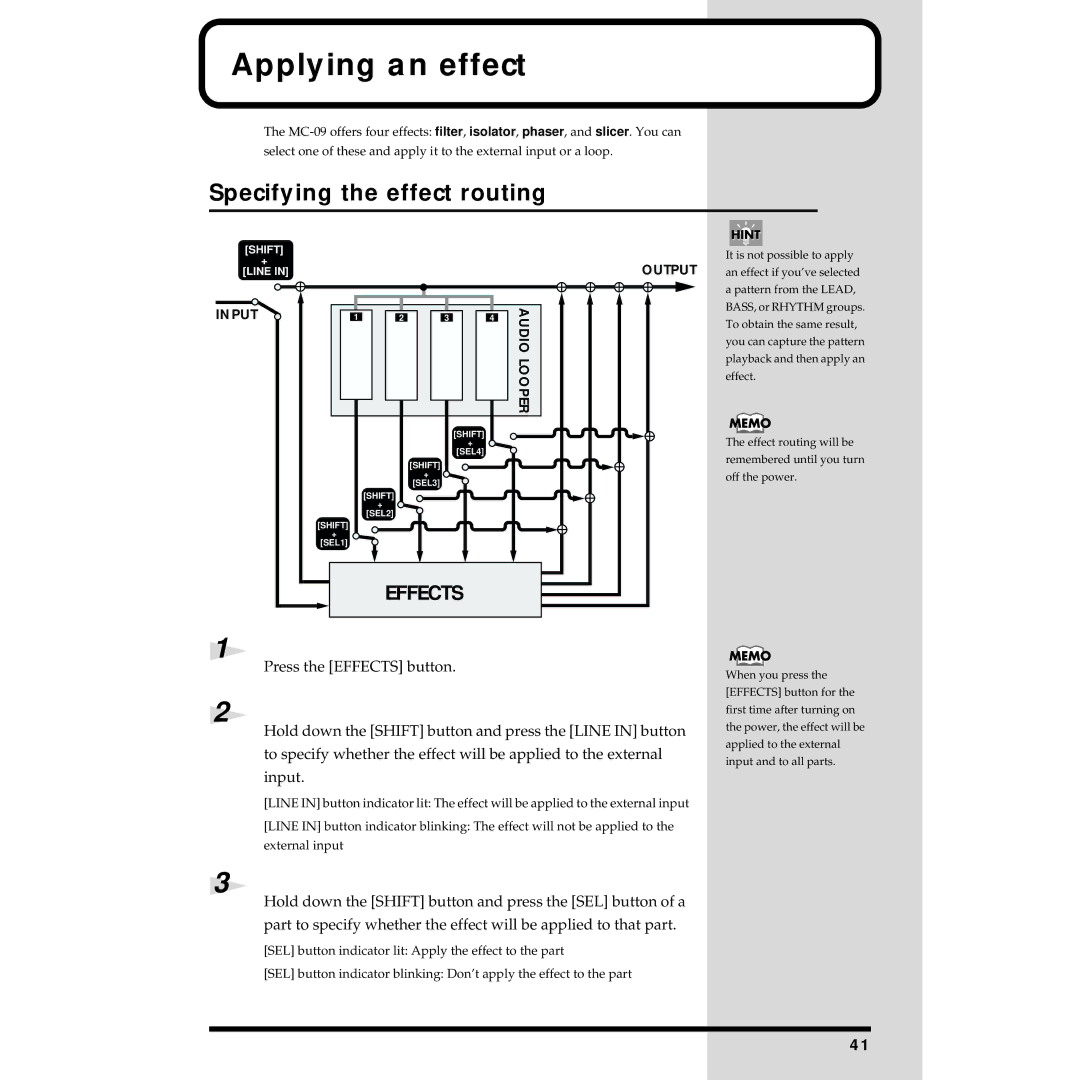
select one of these and apply it to the external input or a loop.
Specifying the effect routing
[SHIFT]
+
[LINE IN]
INPUT![]()
|
|
| OUTPUT |
1 | 2 | 3 | 4 |
|
|
| AUDIOLOOPER |
|
| [SHIFT] |
|
|
| + |
|
|
| [SEL4] |
|
|
| [SHIFT] |
|
|
| + |
|
|
| [SEL3] |
|
| [SHIFT] |
|
|
| + |
|
|
| [SEL2] |
|
|
[SHIFT] |
|
|
|
+ |
|
|
|
[SEL1] |
|
|
|
| EFFECTS |
| |
It is not possible to apply an effect if you’ve selected a pattern from the LEAD, BASS, or RHYTHM groups. To obtain the same result, you can capture the pattern playback and then apply an effect.
The effect routing will be remembered until you turn off the power.
1
Press the [EFFECTS] button.
2
Hold down the [SHIFT] button and press the [LINE IN] button to specify whether the effect will be applied to the external input.
[LINE IN] button indicator lit: The effect will be applied to the external input
[LINE IN] button indicator blinking: The effect will not be applied to the external input
3
Hold down the [SHIFT] button and press the [SEL] button of a part to specify whether the effect will be applied to that part.
[SEL] button indicator lit: Apply the effect to the part
[SEL] button indicator blinking: Don’t apply the effect to the part
When you press the [EFFECTS] button for the first time after turning on the power, the effect will be applied to the external input and to all parts.
41
