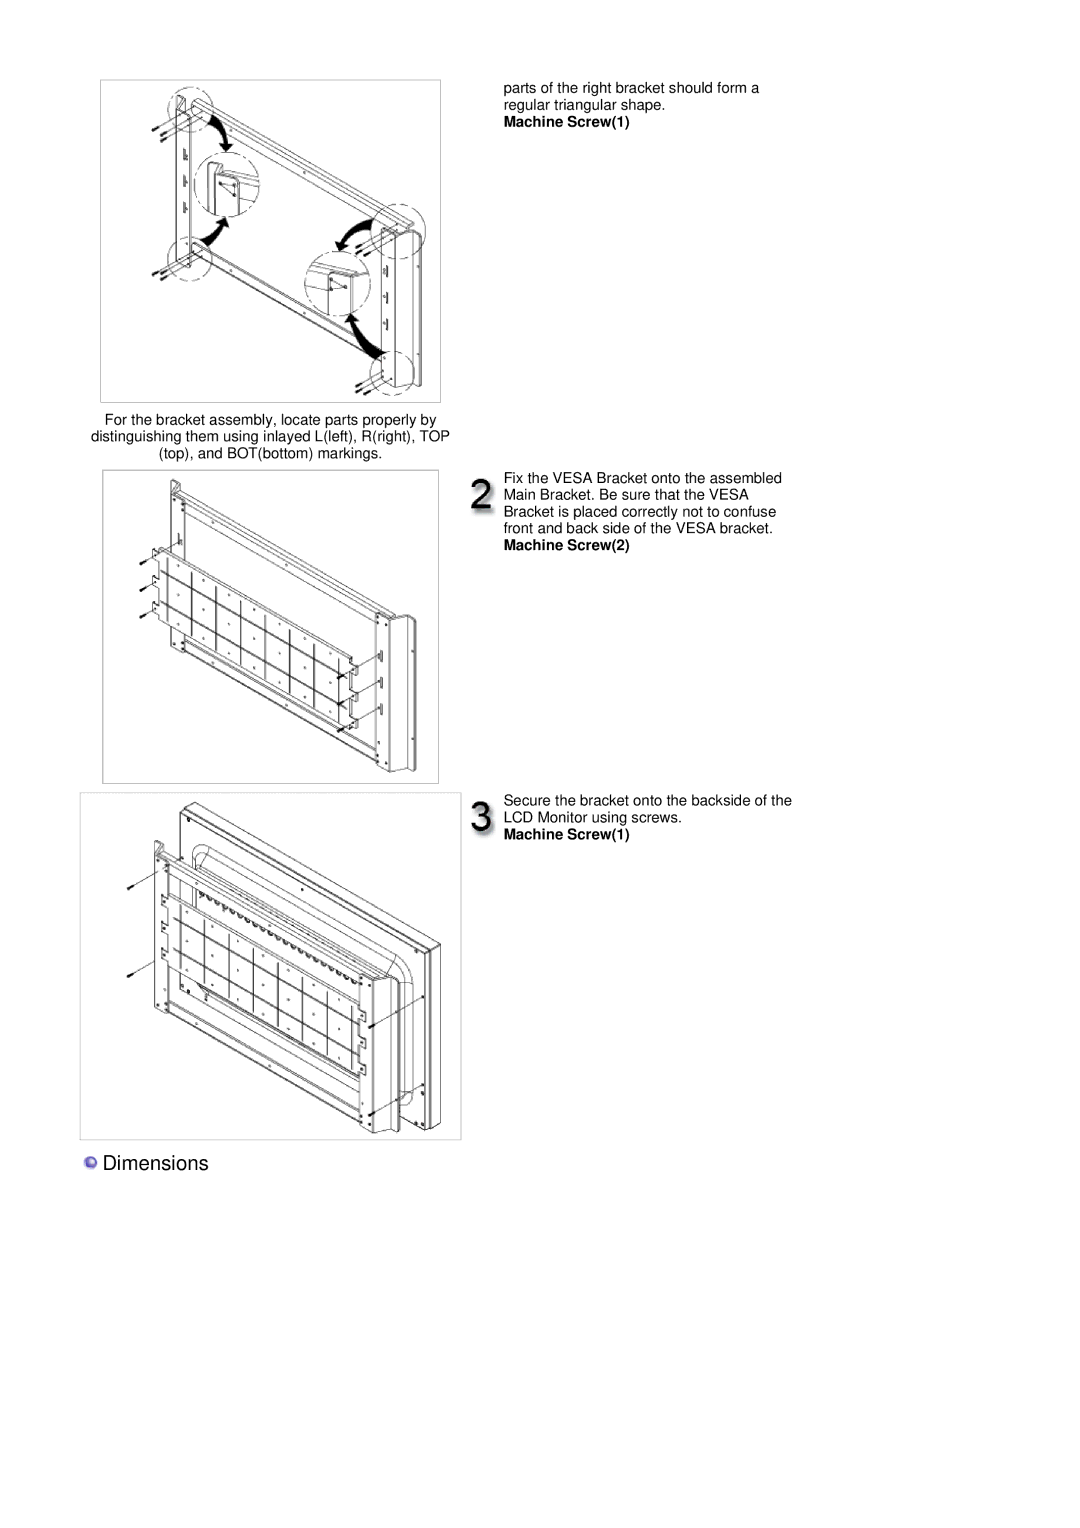
parts of the right bracket should form a regular triangular shape.
Machine Screw(1)
For the bracket assembly, locate parts properly by distinguishing them using inlayed L(left), R(right), TOP (top), and BOT(bottom) markings.
Fix the VESA Bracket onto the assembled Main Bracket. Be sure that the VESA Bracket is placed correctly not to confuse front and back side of the VESA bracket.
Machine Screw(2)
Secure the bracket onto the backside of the
LCD Monitor using screws.
Machine Screw(1)