5 | Press the Volume key to zoom in or out. | |
6 | Select | to start recording. |
7 | Select | to stop recording. |
The video is saved automatically.
The camera may not be able to properly record videos to a memory card with a slow transfer speed.
After recording videos, select ![]() to view the recorded videos.
to view the recorded videos.
•To view more videos, scroll left or right.
•To send a video to others, select Share.
•To play a video, select Play.
•To delete a video, select Delete.
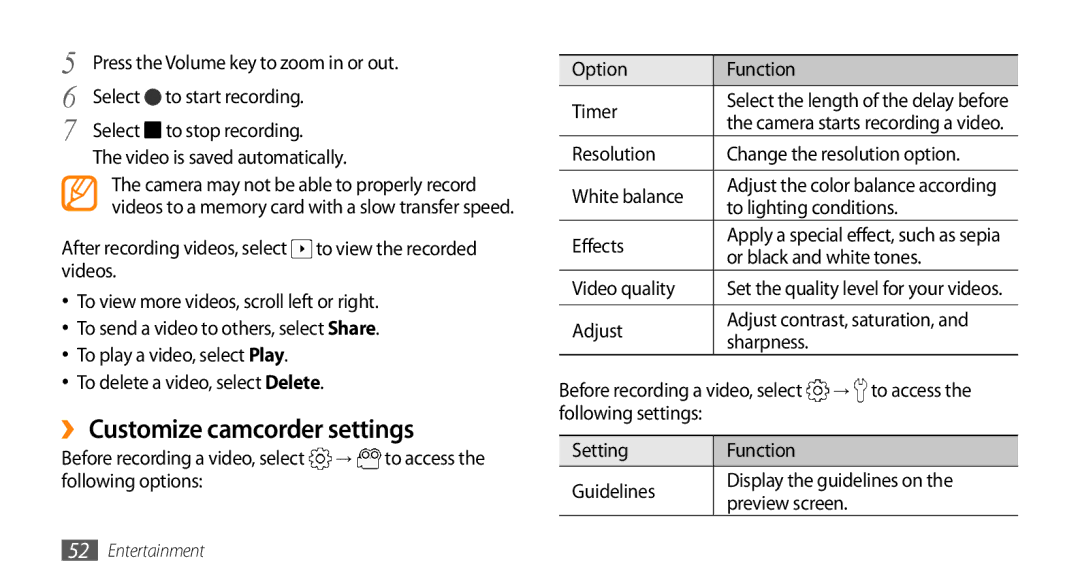
››Customize camcorder settings
Before recording a video, select | → | to access the |
following options: |
|
|
Option | Function |
| |
Timer | Select the length of the delay before | ||
the camera starts recording a video. | |||
| |||
Resolution | Change the resolution option. | ||
|
| ||
White balance | Adjust the color balance according | ||
to lighting conditions. | |||
| |||
Effects | Apply a special effect, such as sepia | ||
or black and white tones. | |||
| |||
Video quality | Set the quality level for your videos. | ||
|
| ||
Adjust | Adjust contrast, saturation, and | ||
sharpness. |
| ||
|
| ||
Before recording a video, select | → to access the | ||
following settings: |
|
| |
|
|
| |
Setting | Function |
| |
Guidelines | Display the guidelines on the | ||
preview screen. | |||
| |||
52Entertainment