Share Mark
You can set the share mark on a video and directly upload the marked file to the YouTube site.
PRECHECK!
•Insert a memory card. ¬page 27
•Select the Play mode by pressing the Mode (![]() ) button, and then touch the Video (
) button, and then touch the Video ( ![]() ) tab. ¬page 23
) tab. ¬page 23
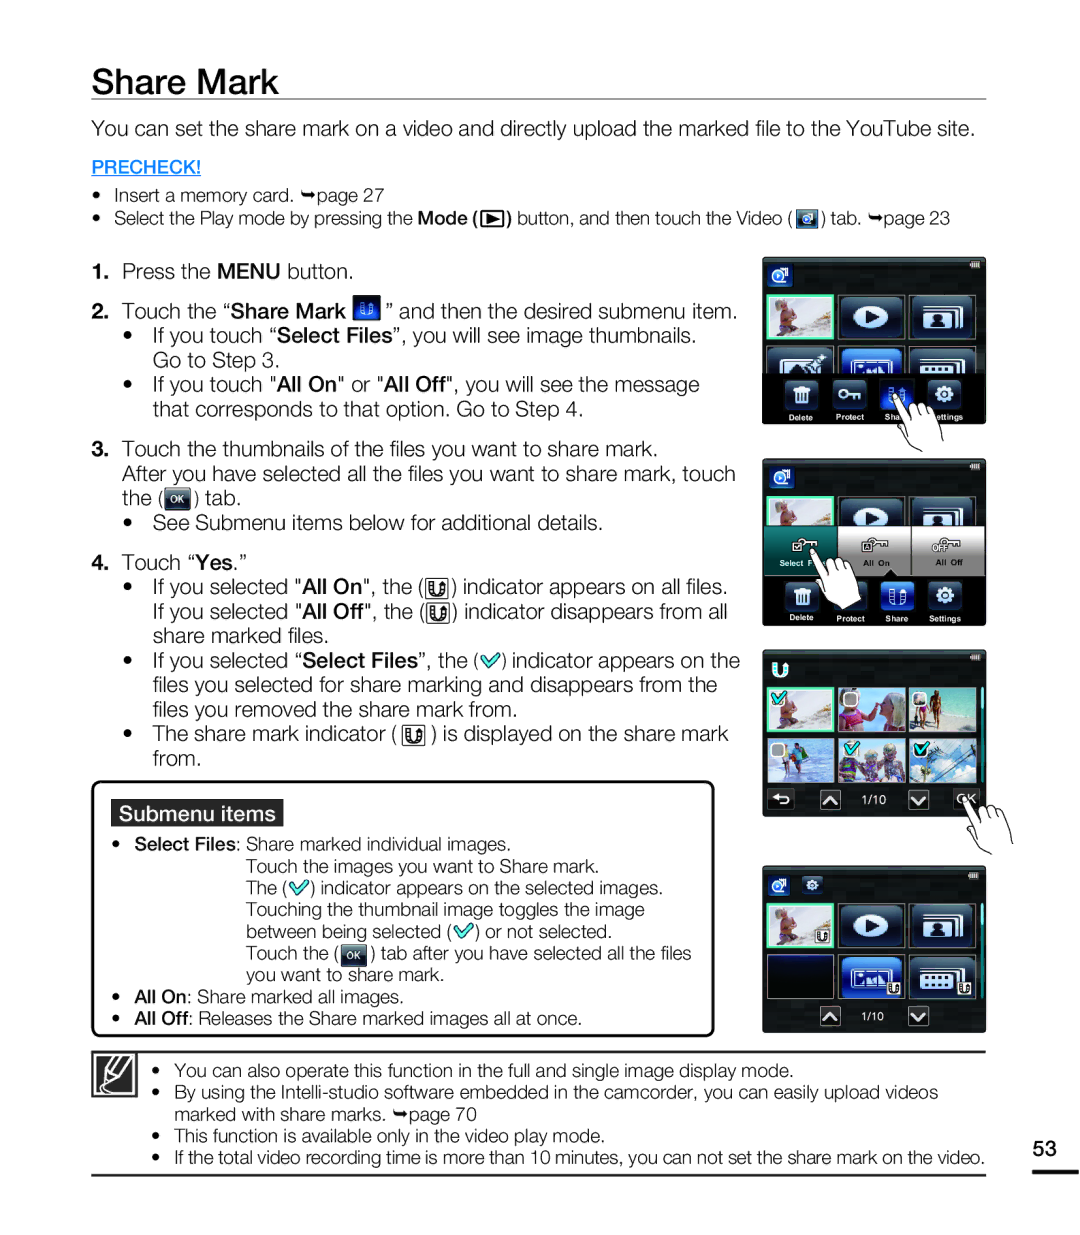
1.Press the MENU button.
2.Touch the “Share Mark ![]() ” and then the desired submenu item.
” and then the desired submenu item.
•If you touch “Select Files”, you will see image thumbnails. Go to Step 3.
•If you touch "All On" or "All Off", you will see the message that corresponds to that option. Go to Step 4.
Delete Protect Share![]() Settings
Settings
3.Touch the thumbnails of the files you want to share mark.
After you have selected all the files you want to share mark, touch
the (![]() ) tab.
) tab.
•See Submenu items below for additional details.
4.Touch “Yes.”
•If you selected "All On", the (![]() ) indicator appears on all files. If you selected "All Off", the (
) indicator appears on all files. If you selected "All Off", the (![]() ) indicator disappears from all share marked files.
) indicator disappears from all share marked files.
•If you selected “Select Files”, the (![]() ) indicator appears on the files you selected for share marking and disappears from the files you removed the share mark from.
) indicator appears on the files you selected for share marking and disappears from the files you removed the share mark from.
•The share mark indicator ( ![]() ) is displayed on the share mark from.
) is displayed on the share mark from.
Select Files | All On | All Off |
Delete Protect Share![]() Settings
Settings
Submenu items
•Select Files: Share marked individual images.
Touch the images you want to Share mark.
The (![]() ) indicator appears on the selected images. Touching the thumbnail image toggles the image between being selected (
) indicator appears on the selected images. Touching the thumbnail image toggles the image between being selected (![]() ) or not selected.
) or not selected.
Touch the (![]() ) tab after you have selected all the files you want to share mark.
) tab after you have selected all the files you want to share mark.
•All On: Share marked all images.
• All Off: Releases the Share marked images all at once.
• You can also operate this function in the full and single image display mode.
• By using the
• | marked with share marks. ¬page 70 |
| ||
This function is available only in the video play mode. | 53 | |||
• | If the total video recording time is more than 10 minutes, you can not set the share mark on the video. |
| ||
| ||||