Using NCE (Natural Color Expert)
Preparing for Calibration
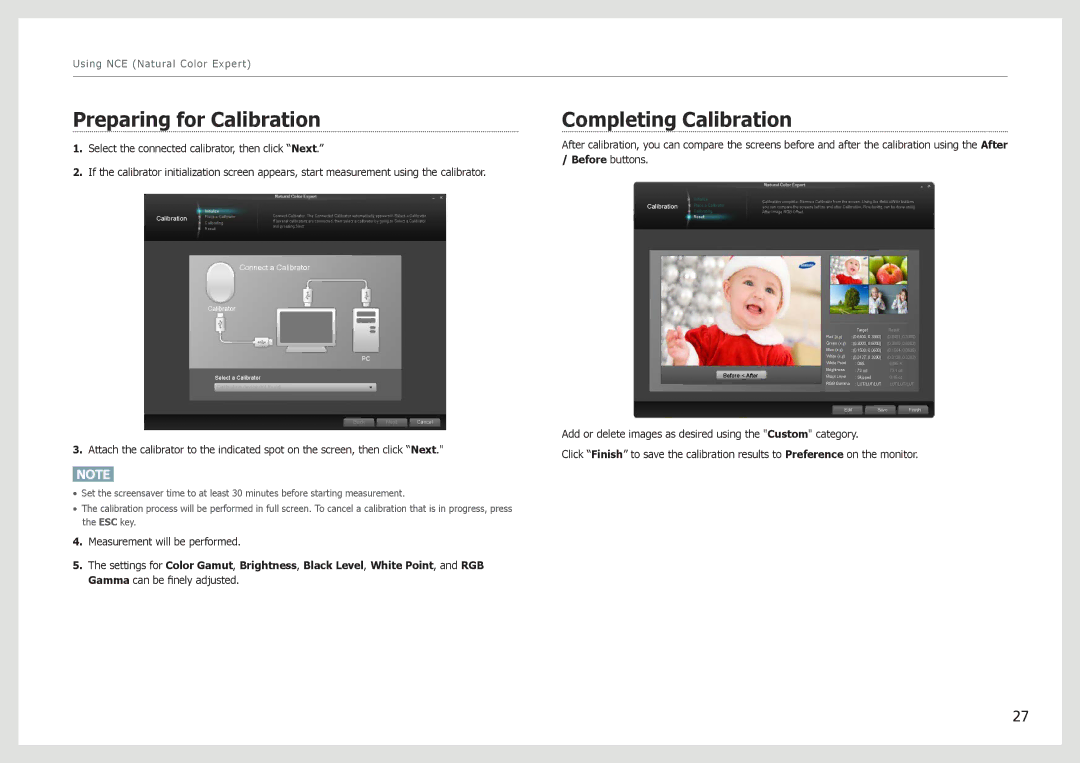
1.Select the connected calibrator, then click “Next.”
2.If the calibrator initialization screen appears, start measurement using the calibrator.
| Initialize | Connect Calibrator. The Connected Calibrator automatically appears in Select a Calibrator. |
Calibration | Place a Calibrator | |
Calibrating | If several calibrators are connected, then select a calibrator by going to Select a Calibrator | |
| and pressing Next. | |
| Result | |
|
|
Connect a Calibrator
Calibrator
Select a Calibrator
Calibration device not found
Back Next Cancel
3.Attach the calibrator to the indicated spot on the screen, then click “Next."
NOTE
• Set the screensaver time to at least 30 minutes before starting measurement.
• The calibration process will be performed in full screen. To cancel a calibration that is in progress, press the ESC key.
4.Measurement will be performed.
5.The settings for Color Gamut, Brightness, Black Level, White Point, and RGB Gamma can be finely adjusted.
Completing Calibration
After calibration, you can compare the screens before and after the calibration using the After
/Before buttons.
| Initialize | Calibration complete. Remove Calibrator from the screen. Using the Before/After buttons | |
Calibration | Place a Calibrator | ||
you can compare the screens before and after Calibration, | |||
|
| ||
| Calibrating | After Image RGB Offset. | |
| Result |
|
|
| Target | Result |
| Red (x,y) | : (0.6400, 0.3300) | (0.6401, 0.3300) |
| Green (x,y) | : (0.3000, 0.6000) | (0.3000, 0.6002) |
| Blue (x,y) | : (0.1500, 0.0600) | (0.1564, 0.0635) |
| White (x,y) | : (0.3127, 0.3290) | (0.3128, 0.3292) |
| White Point | : D65 | 6495 K |
Before < After | Brightness | : 73 cd | 73.1 cd |
Black Level | : Skipped | 0.16 cd | |
| RGB Gamma | : LUT/LUT/LUT | LUT/LUT/LUT |
EditSave Finish
Add or delete images as desired using the "Custom" category.
Click “Finish” to save the calibration results to Preference on the monitor.
27