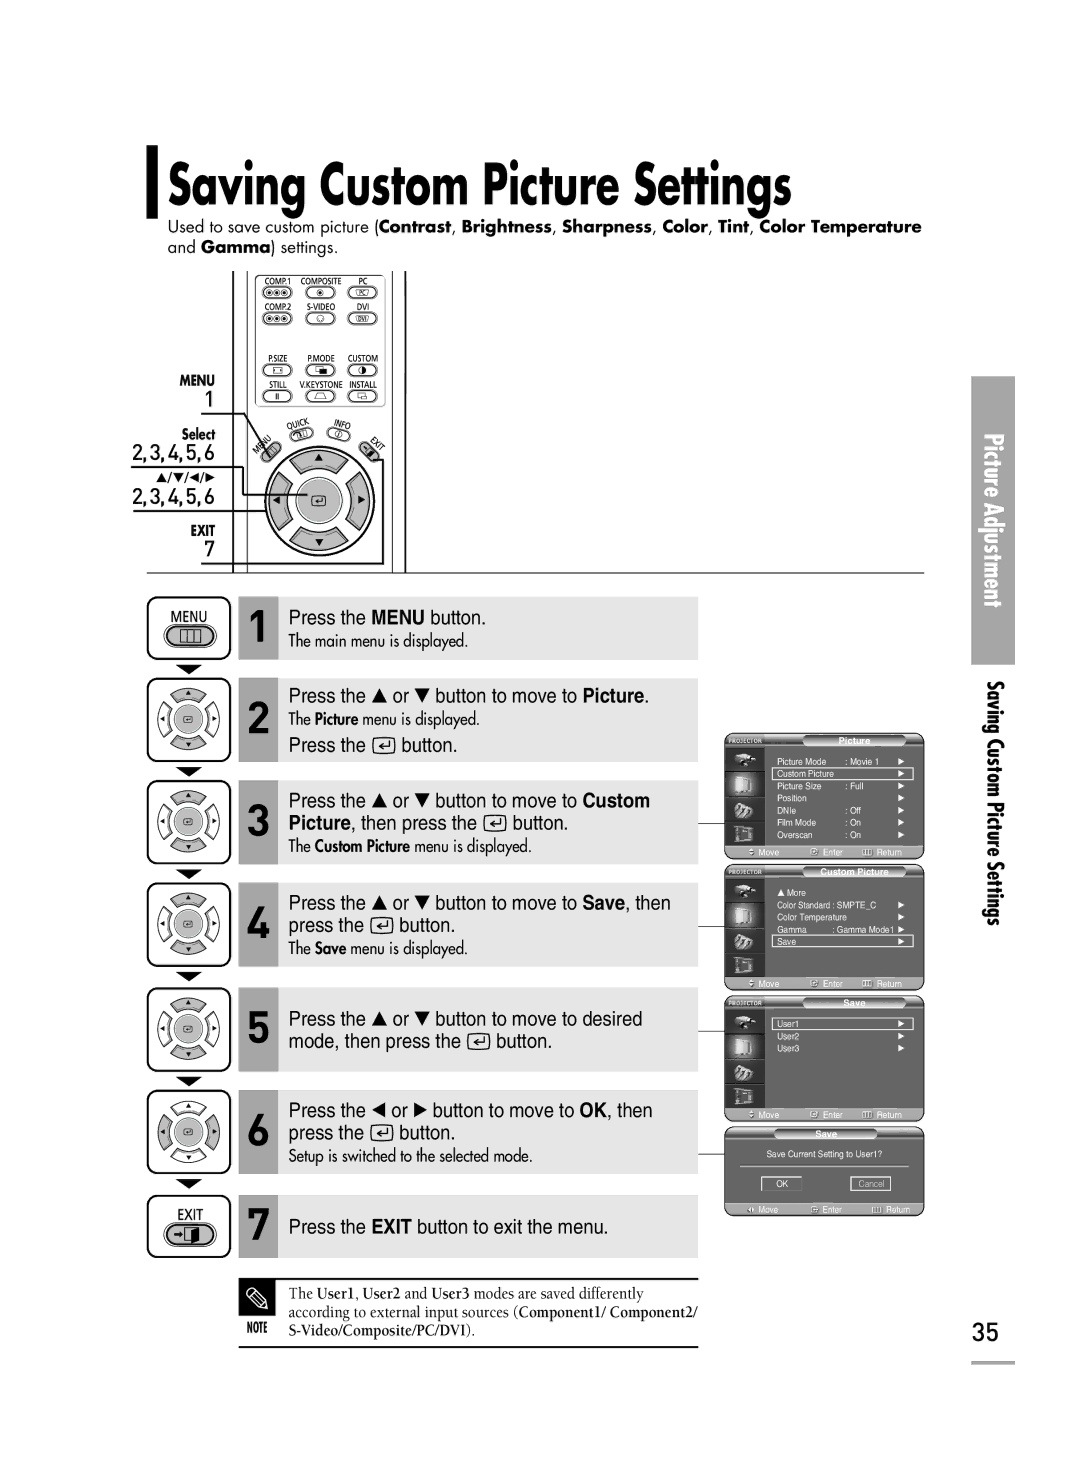
Saving Custom Picture Settings
Used to save custom picture (Contrast, Brightness, Sharpness, Color, Tint, Color Temperature and Gamma) settings.
MENU
1
Select
2,3,4,5,6
…/†/œ/√
2,3,4,5,6
EXIT
7
Picture Adjustment
![]() 1
1
 2
2
 3
3
Press the MENU button.
The main menu is displayed.
Press the ▲ or ▼ button to move to Picture.
The Picture menu is displayed.
Press the ![]() button.
button.
Press the ▲ or ▼ button to move to Custom
Picture, then press the ![]() button.
button.
The Custom Picture menu is displayed.
| Picture |
| |
Picture Mode | : Movie 1 | √ | |
Custom Picture |
| √ | |
Picture Size |
| : Full | √ |
Position |
|
| √ |
DNIe |
| : Off | √ |
Film Mode |
| : On | √ |
Overscan |
| : On | √ |
Move | Enter | Return | |
Saving Custom Picture
 4
4
 5
5
Press the ▲ or ▼ button to move to Save, then
press the ![]() button.
button.
The Save menu is displayed.
Press the ▲ or ▼ button to move to desired
mode, then press the ![]() button.
button.
| Custom Picture | |
… More |
|
|
Color Standard : SMPTE_C | √ | |
Color Temperature | √ | |
Gamma | : Gamma Mode1 √ | |
Save |
| √ |
Move | Enter | Return |
| Save |
|
User1 |
| √ |
User2 |
| √ |
User3 |
| √ |
Settings
6 | Press the œ or √ button to move to OK, then | Move | Enter | Return | |
press the | button. |
| Save |
| |
|
|
|
|
| |
Setup is switched to the selected mode. | Save Current Setting to User1? |
OK | Cancel |
7 | Move | Enter | Return |
Press the EXIT button to exit the menu. |
|
|
The User1, User2 and User3 modes are saved differently according to external input sources (Component1/ Component2/
NOTE | 35 | |
|