assembly and alignment
BE positive switch is "OFF" and power cord unplugged
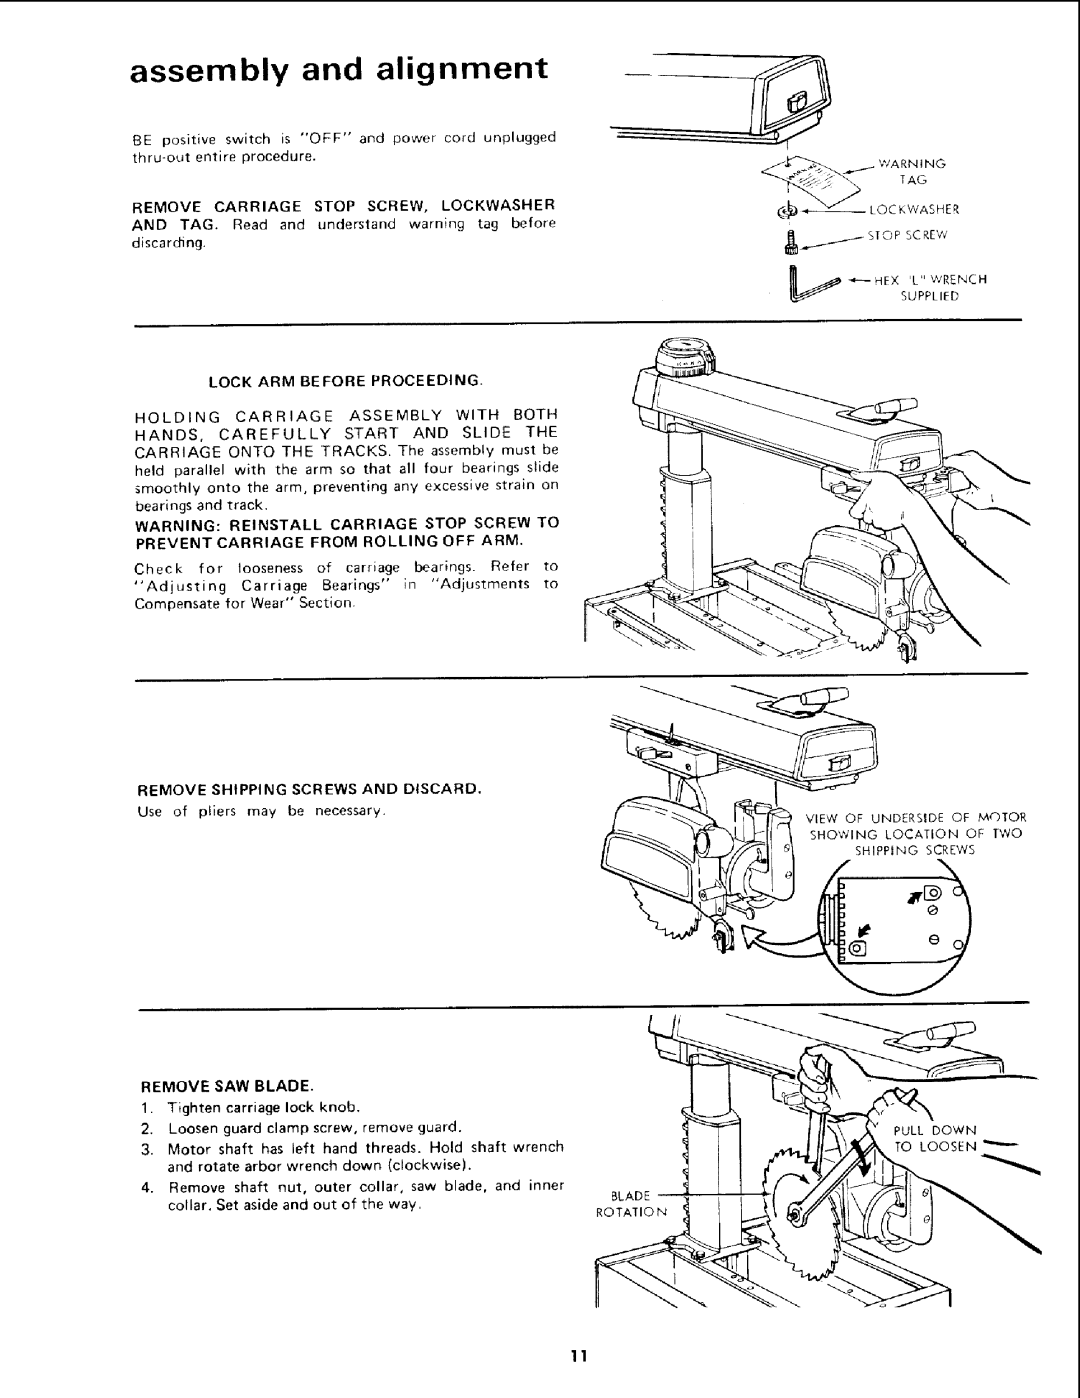
REMOVE CARRIAGE STOP SCREW, LOCKWASHER
AND TAG. Read and understand warning tag before discarcfing.
LOCK ARM BEFORE PROCEEDING.
HOLDING CARRIAGE ASSEMBLY WITH BOTH
HANDS, CAREFULLY START AND SLIDE THE
CARRIAGE ONTO THE TRACKS. The assembly must be held parallel with the arm so that all four bearings slide smoothly onto the arm, preventing any excessive strain on bearings and track.
WARNING: REINSTALL CARRIAGE STOP SCREW TO
PREVENT CARRIAGE FROM ROLLING OFF ARM.
Check for looseness of carriage bearings. Refer to
"Adjusting Carriage Bearings" in "Adjustments to Compensate for Wear" Section.
REMOVE SHIPPING SCREWS AND DISCARD.
Use of pliers may be necessary.
NDERSIDE OF MOTOR
LOCATION OF TWO
ILel S.IP,INOSCREW
REMOVE SAW BLADE.
1.Tighten carriage lock knob.
2.Loosen guard clamp screw, remove guard.
3.Motor shaft has left hand threads. Hold shaft wrench and rotate arbor wrench down (clockwise).
4.Remove shaft nut, outer collar, saw blade, and inner
PULL DOWN
TO LOOSEN
collar, Set aside and out of the way,
BLADE
ROTATION
11