AVOIDING KICKBACKS (Fig. CC) | Fig. DD |
(Work thrown back towards you) by |
|
keeping the blade sharp, the rip fence |
|
parallel to the saw blade and by keeping |
|
the riving knife, |
|
guards in place, aligned and functioning. |
|
Do not release work before passing it |
|
completely beyond the saw blade. Do not |
|
rip work that is twisted, warped or does |
|
not have a straight edge to guide it along |
|
the fence. Do not attempt to reverse out |
|
of a cut with the blade running. |
|
i,A WARNING]
improper riving knife alignment can
cause "kickback" and serious injury.
Fig. CC
Anti= kickback pawl
RIP FENCE (Fig. EE)
1.Lift upward on the rip fence handle
(1)so the rear holding clamp (2) is fully extended.
2.Place the rip fence on the saw table,
position the set plate (3) under the front of fence and then lower the back of fence onto the table.
3.Push down on the fence handle (1) to lock.
Fig. EE
1
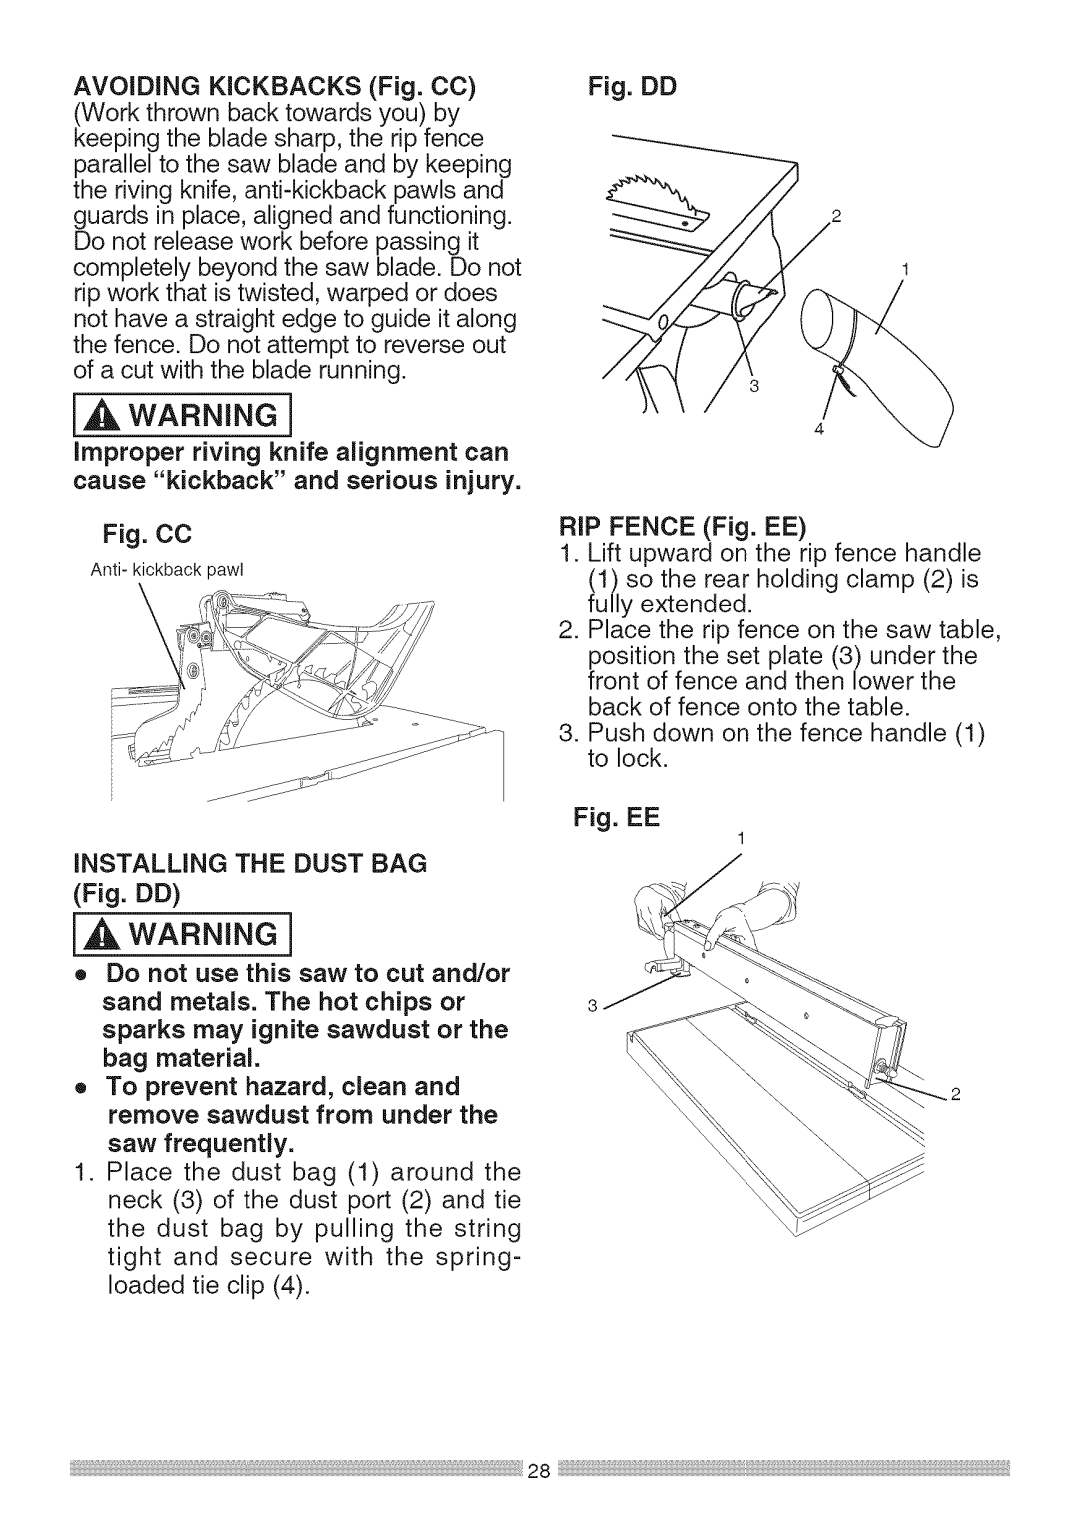
iNSTALLING THE DUST BAG
(Fig. DD)
i,A WARNING]
o Do not use this saw to cut and/or sand metals. The hot chips or sparks may ignite sawdust or the bag material.
o To prevent hazard, clean and remove sawdust from under the
saw frequently.
1.Place the dust bag (1) around the neck (3) of the dust port (2) and tie the dust bag by pulling the string tight and secure with the spring- loaded tie clip (4).
