LUBRiCATiON
All motor bearings are permanently lubricated at the factory and require no additional lubrication. On all mechanical parts of your table saw where a pivot or threaded rod are present, lubricate using graphite or silicone. These dry lubricants will not hold sawdust as would oil or grease.
REPLACING THE CARBON
rip fence, miter gauge and stand assembly to the table saw.
NOTE: To reinstall the same brushes, first make sure the brushes go back in the same sides they came out. This will avoid a
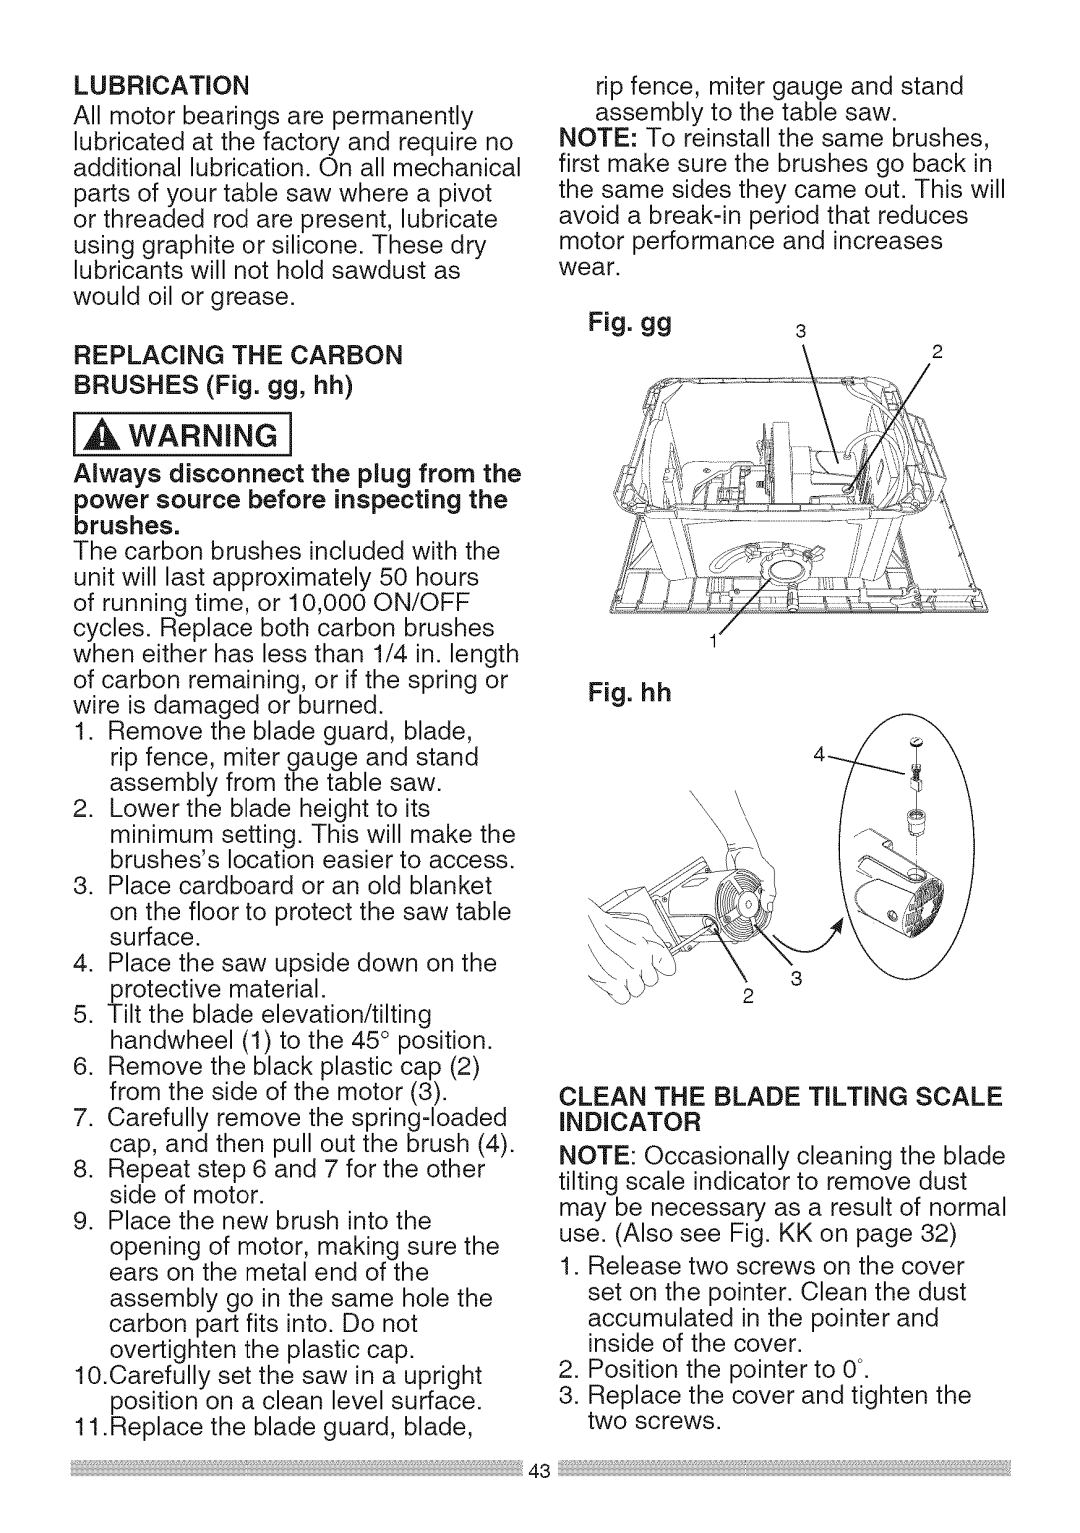
Fig. gg | 3 |
[_ WARNING]
Always disconnect the plug from the power source before inspecting the brushes.
The carbon brushes included with the unit will last approximately 50 hours of running time, or 10,000 ON/OFF cycles. Replace both carbon brushes when either has less than 1/4 in. length of carbon remaining, or if the spring or wire is damaged or burned.
1.Remove the blade guard, blade, rip fence, miter gauge and stand assembly from the table saw.
2.Lower the blade height to its minimum setting. This will make the brushes's location easier to access.
3.Place cardboard or an old blanket
on the floor to protect the saw table surface.
4.Place the saw upside down on the protective material.
5.Tilt the blade elevation/tilting handwheel (1) to the 45 ° position.
6.Remove the black plastic cap (2) from the side of the motor (3).
7.Carefully remove the
8.Repeat step 6 and 7 for the other side of motor.
9.Place the new brush into the
opening of motor, making sure the ears on the metal end of the
assembly go in the same hole the carbon part fits into. Do not overtighten the plastic cap.
10.Carefully set the saw in a upright position on a clean level surface.
11 .Replace the blade guard, blade,
Fig. hh
'\\ |
| / |
\ | \ |
|
|
|
CLEAN THE BLADE TILTING SCALE INDICATOR
NOTE: Occasionally cleaning the blade tilting scale indicator to remove dust may be necessary as a result of normal use. (Also see Fig. KK on page 32)
1.Release two screws on the cover
set on the pointer. Clean the dust
accumulated in the pointer and inside of the cover.
2.Position the pointer to 0°.
3.Replace the cover and tighten the two screws.