1.Removethemitergaugeandstoreit inthe"storage"compartmentinthe baseofthesaw.
2.Securetheripfencetothetable.
3.Raisethebladesoitisabout1/8in.
higherthanthetopoftheworkpiece.
4.Placetheworkpieceflatonthetable andagainstthefence.Keepthe workpieceawayfromtheblade.
5.TurnthesawONandwaitforthe bladetocometofullspeed.
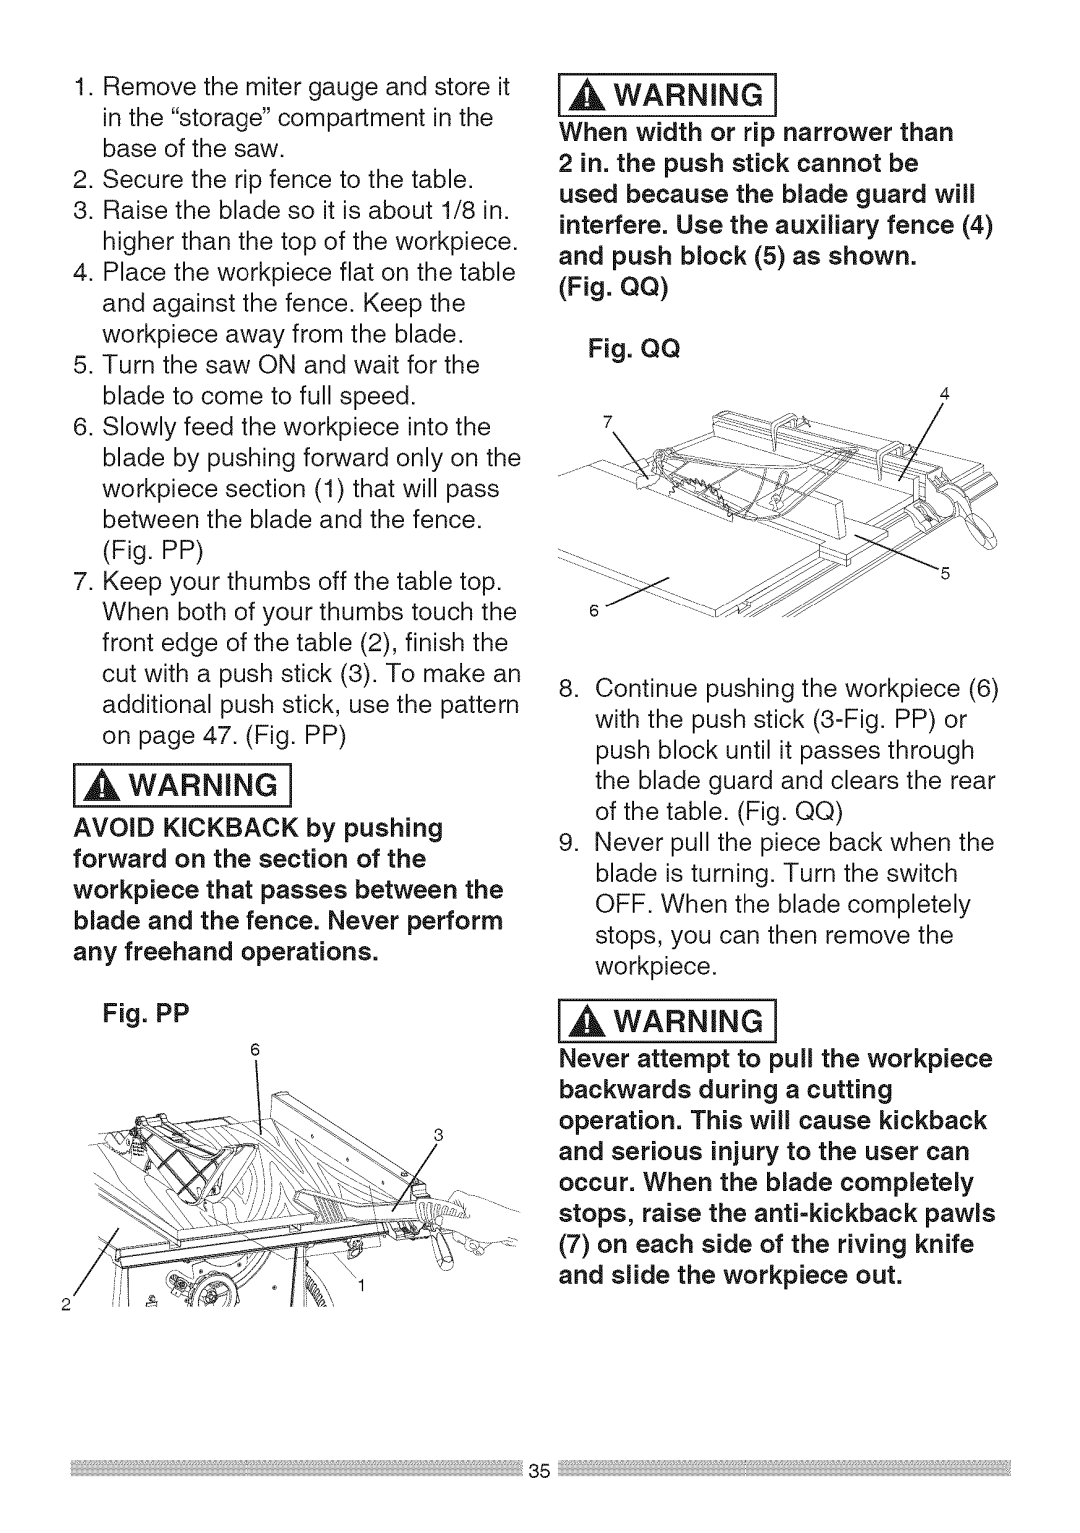
6.Slowlyfeedtheworkpieceintothe bladebypushingforwardonlyonthe workpiecesection(1)thatwillpass betweenthebladeandthefence. (Fig.PP)
7.Keepyourthumbsoffthetabletop. Whenbothofyourthumbstouchthe frontedgeofthetable(2),finishthe cutwitha pushstick(3).Tomakean additionalpushstick,usethepattern onpage47. (Fig.PP)
WARNING I
AVOID KICKBACK by pushing forward on the section of the workpiece that passes between the blade and the fence. Never perform any freehand operations.
Fig. PP
6
WARNING]
When width or rip narrower than 2 in. the push stick cannot be used because the blade guard will interfere. Use the auxiliary fence (4) and push block (5) as shown.
(Fig. QQ)
Fig. QQ
7
8.Continue pushing the workpiece (6) with the push stick (3-Fig. PP) or push block until it passes through the blade guard and clears the rear of the table. (Fig. QQ)
9.Never pull the piece back when the blade is turning. Turn the switch OFF. When the blade completely stops, you can then remove the workpiece.
l,_ WARNING J
