ASSEMBLY
ASSEMBLY
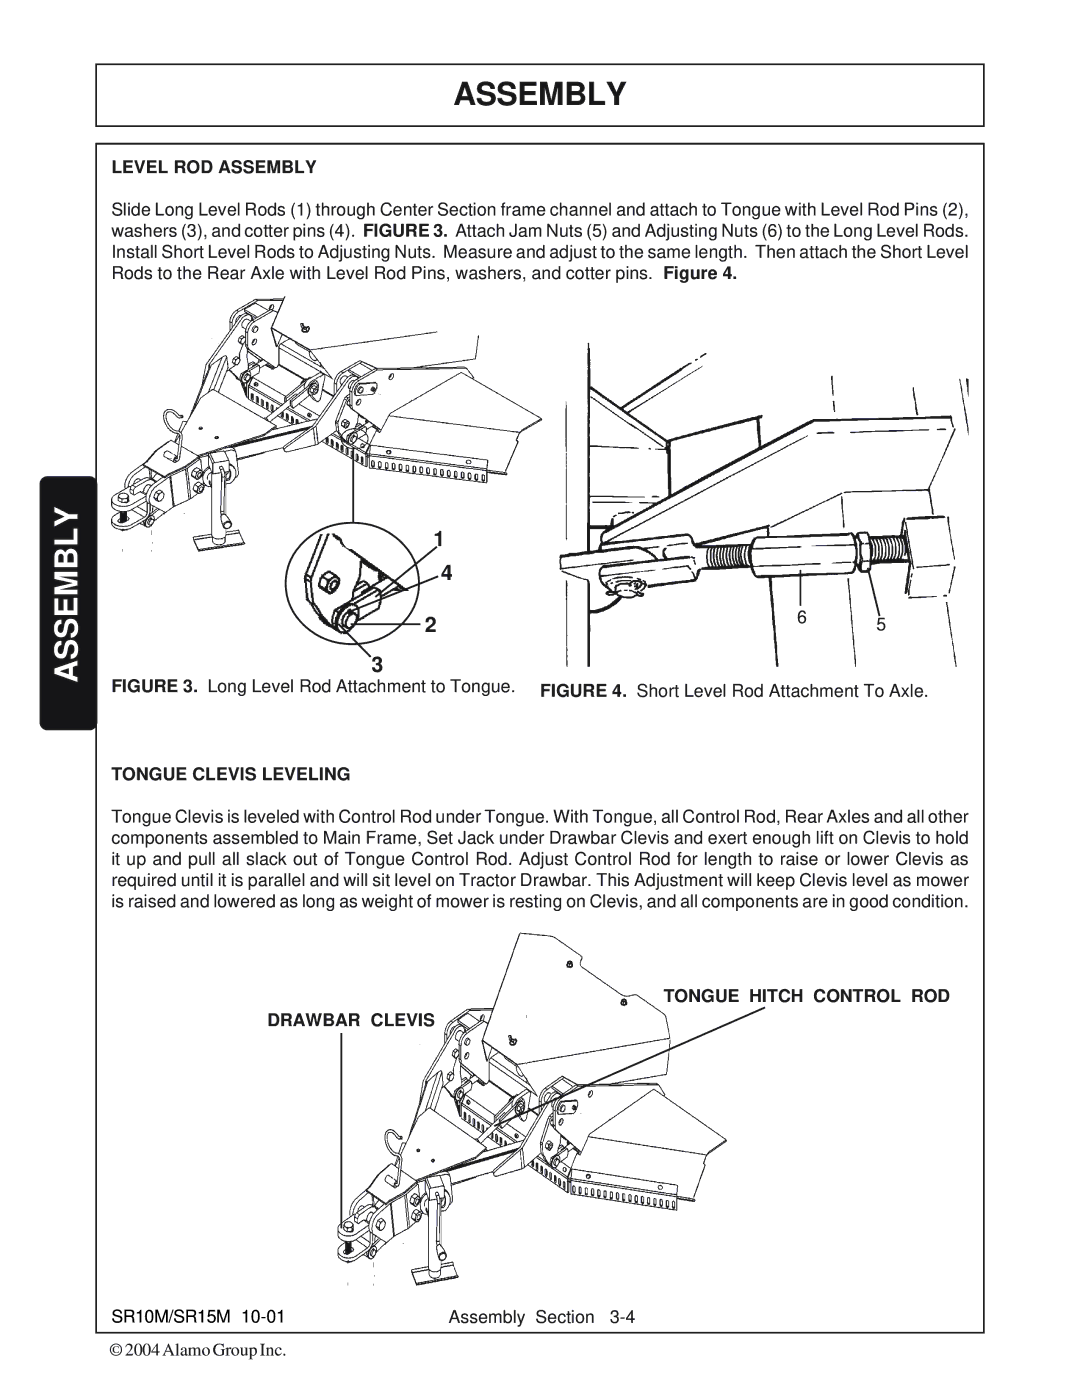
LEVEL ROD ASSEMBLY
Slide Long Level Rods (1) through Center Section frame channel and attach to Tongue with Level Rod Pins (2), washers (3), and cotter pins (4). FIGURE 3. Attach Jam Nuts (5) and Adjusting Nuts (6) to the Long Level Rods. Install Short Level Rods to Adjusting Nuts. Measure and adjust to the same length. Then attach the Short Level Rods to the Rear Axle with Level Rod Pins, washers, and cotter pins. Figure 4.
1
4
|
| 2 | 6 | 5 |
| ||||
|
| |||
3 |
|
| ||
FIGURE 3. Long Level Rod Attachment to Tongue. | FIGURE 4. Short Level Rod Attachment To Axle. | |||
TONGUE CLEVIS LEVELING
Tongue Clevis is leveled with Control Rod under Tongue. With Tongue, all Control Rod, Rear Axles and all other components assembled to Main Frame, Set Jack under Drawbar Clevis and exert enough lift on Clevis to hold it up and pull all slack out of Tongue Control Rod. Adjust Control Rod for length to raise or lower Clevis as required until it is parallel and will sit level on Tractor Drawbar. This Adjustment will keep Clevis level as mower is raised and lowered as long as weight of mower is resting on Clevis, and all components are in good condition.
TONGUE HITCH CONTROL ROD
DRAWBAR CLEVIS
SR10M/SR15M | Assembly Section |
© 2004 Alamo Group Inc.