(Continued)
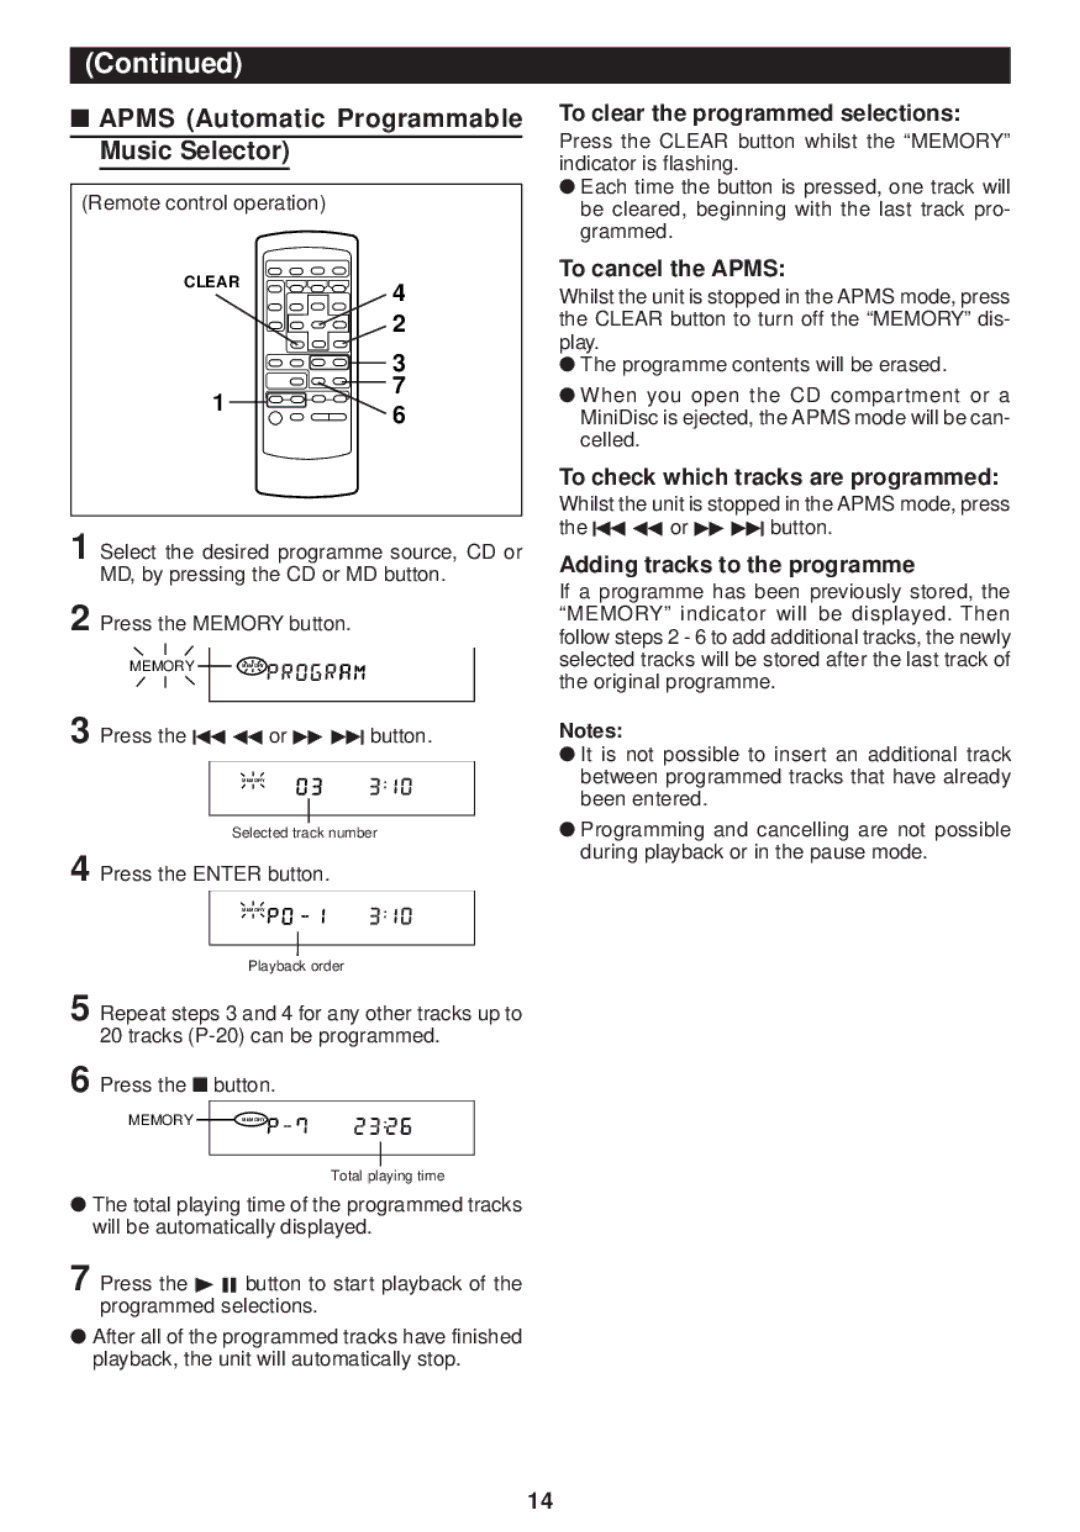
■APMS (Automatic Programmable Music Selector)
(Remote control operation)
CLEAR
4
| 2 | |
| 3 | |
1 | 7 | |
6 | ||
|
1 Select the desired programme source, CD or MD, by pressing the CD or MD button.
2 Press the MEMORY button.
MEMORY | MEMORY |
3 Press the 5 3 or 2 4 button.
MEMORY
Selected track number
4 Press the ENTER button.
MEMORY
Playback order
5 Repeat steps 3 and 4 for any other tracks up to 20 tracks
6 Press the ■ button.
MEMORY | MEMORY |
Total playing time
●The total playing time of the programmed tracks will be automatically displayed.
7 Press the 0 6 button to start playback of the programmed selections.
●After all of the programmed tracks have finished playback, the unit will automatically stop.
To clear the programmed selections:
Press the CLEAR button whilst the “MEMORY” indicator is flashing.
●Each time the button is pressed, one track will be cleared, beginning with the last track pro- grammed.
To cancel the APMS:
Whilst the unit is stopped in the APMS mode, press the CLEAR button to turn off the “MEMORY” dis- play.
●The programme contents will be erased.
●When you open the CD compartment or a MiniDisc is ejected, the APMS mode will be can- celled.
To check which tracks are programmed:
Whilst the unit is stopped in the APMS mode, press the 5 3 or 2 4 button.
Adding tracks to the programme
If a programme has been previously stored, the “MEMORY” indicator will be displayed. Then follow steps 2 - 6 to add additional tracks, the newly selected tracks will be stored after the last track of the original programme.
Notes:
●It is not possible to insert an additional track between programmed tracks that have already been entered.
●Programming and cancelling are not possible during playback or in the pause mode.
14