3-2-23 SNMP
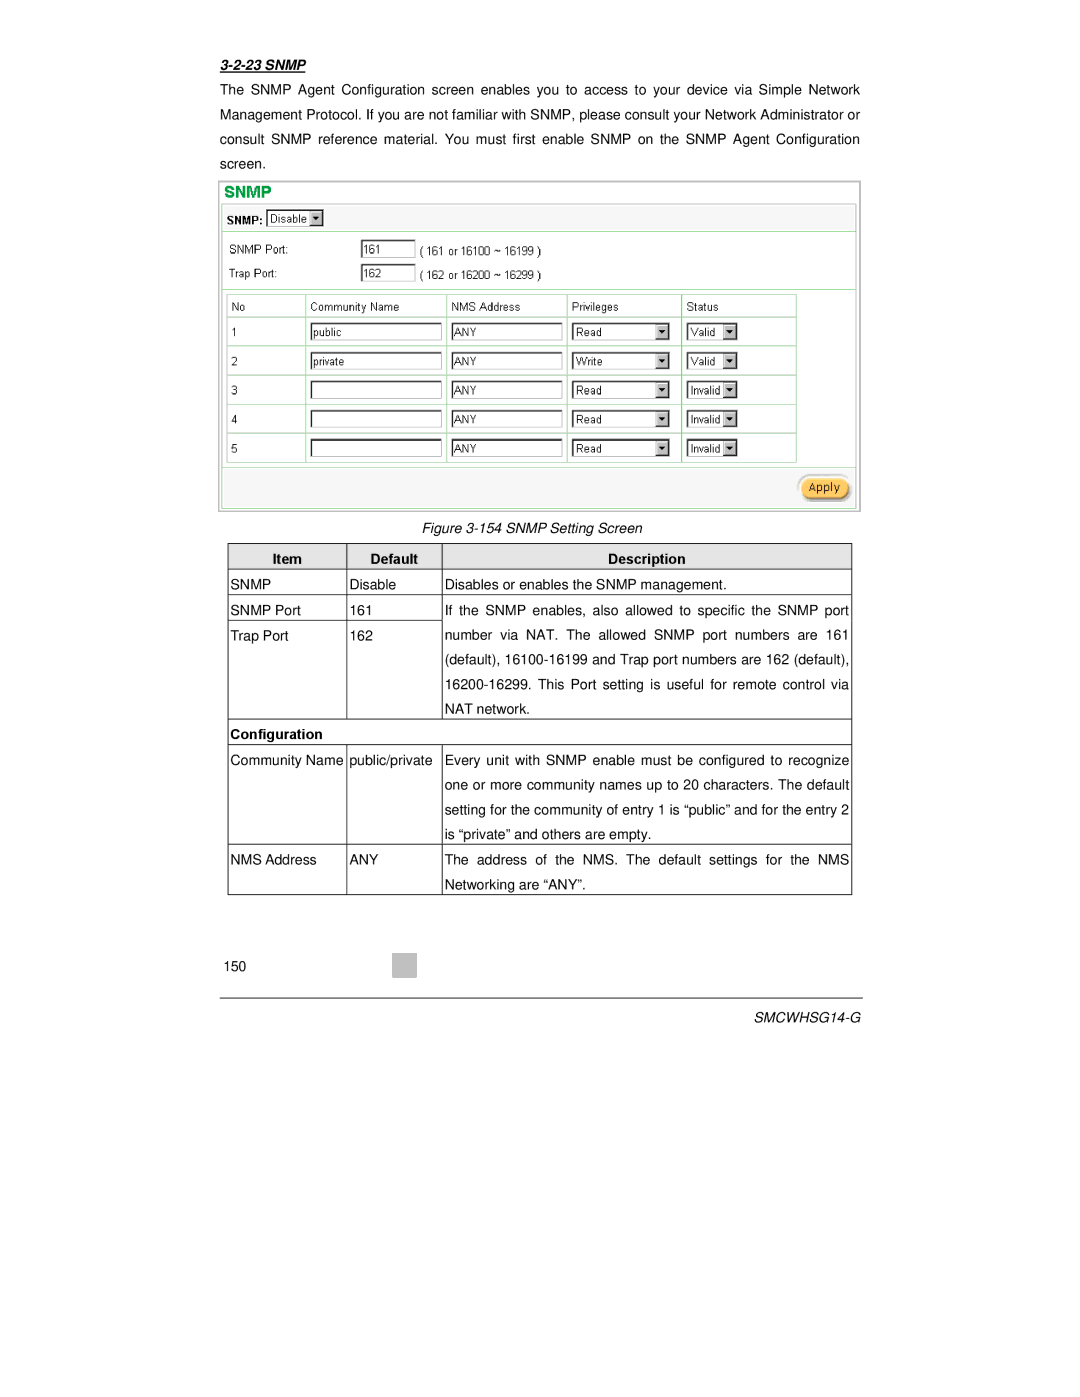
The SNMP Agent Configuration screen enables you to access to your device via Simple Network Management Protocol. If you are not familiar with SNMP, please consult your Network Administrator or consult SNMP reference material. You must first enable SNMP on the SNMP Agent Configuration screen.
|
|
|
| Figure | ||
|
|
|
|
| ||
| Item | Default | Description |
| ||
| SNMP | Disable | Disables or enables the SNMP management. |
| ||
| SNMP Port | 161 |
|
| If the SNMP enables, also allowed to specific the SNMP port |
|
| Trap Port | 162 |
|
| number via NAT. The allowed SNMP port numbers are 161 |
|
|
|
|
|
| (default), |
|
|
|
|
|
|
| |
|
|
|
|
| NAT network. |
|
| Configuration |
|
|
|
|
|
| Community Name | public/private | Every unit with SNMP enable must be configured to recognize |
| ||
|
|
|
|
| one or more community names up to 20 characters. The default |
|
|
|
|
|
| setting for the community of entry 1 is “public” and for the entry 2 |
|
|
|
|
|
| is “private” and others are empty. |
|
| NMS Address | ANY | The address of the NMS. The default settings for the NMS |
| ||
|
|
|
|
| Networking are “ANY”. |
|
150 |
|
|
|
|
| |
|
|
|
|
| ||
|
|
|
|
|
|
|
|
|
|
|
| ||
