Memory Stick Memory Stick
SETUP
Viewing Photos
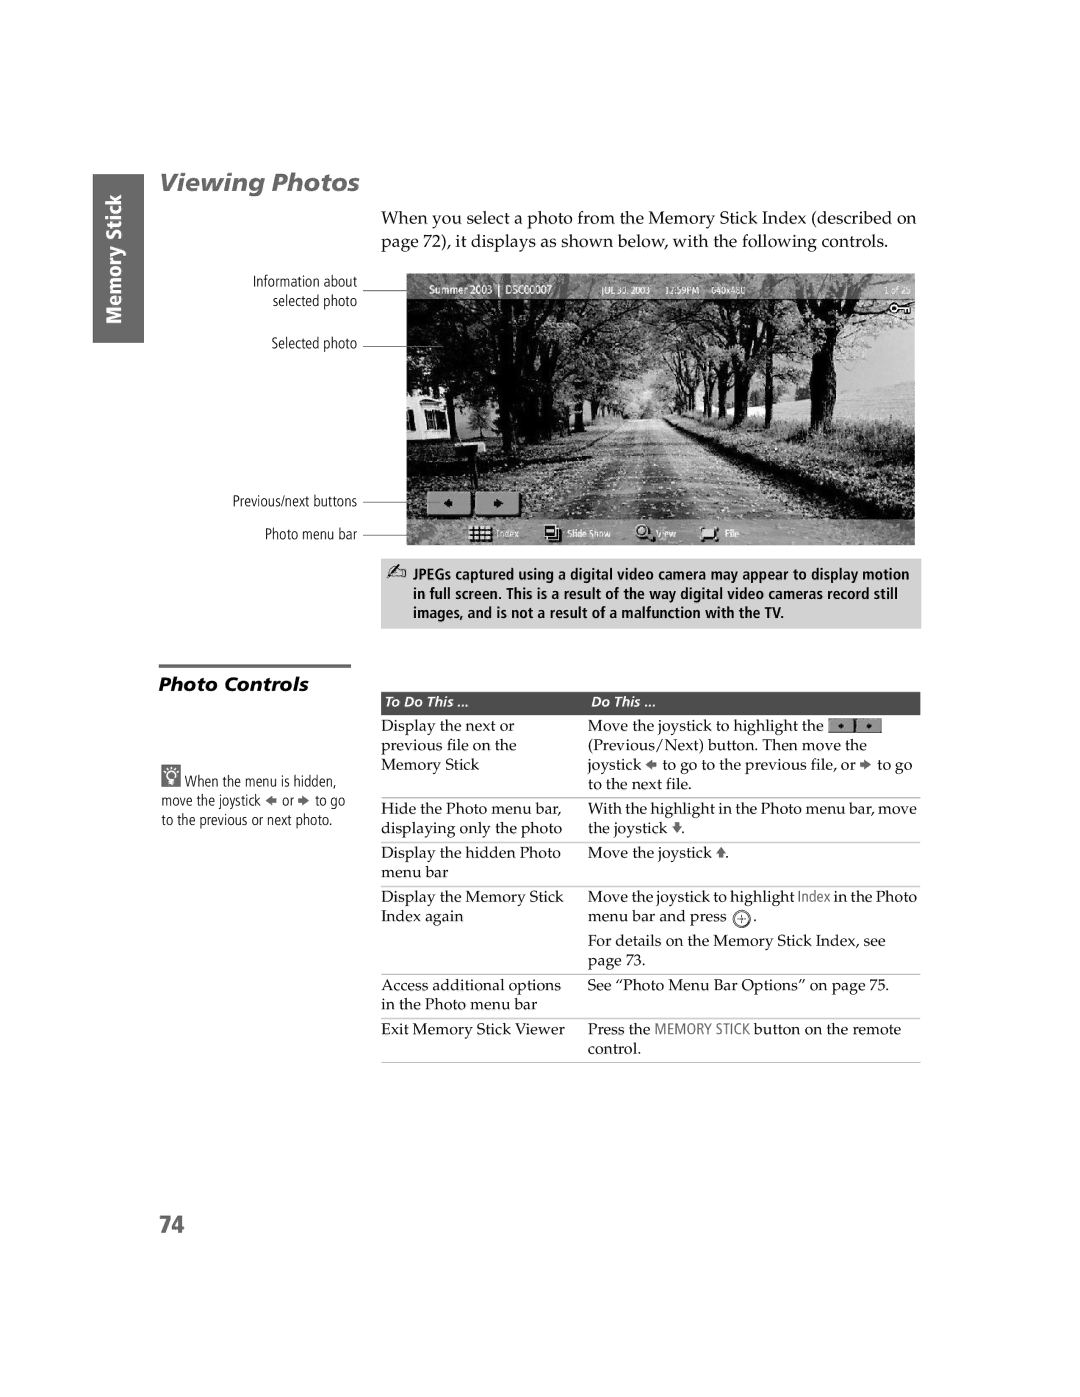
When you select a photo from the Memory Stick Index (described on page 72), it displays as shown below, with the following controls.
Information about selected photo
Selected photo
Previous/next buttons
Photo menu bar
✍JPEGs captured using a digital video camera may appear to display motion in full screen. This is a result of the way digital video cameras record still images, and is not a result of a malfunction with the TV.
Memory Stick Features
SETUP
Photo Controls
zWhen the menu is hidden, move the joystick B or b to go to the previous or next photo.
To Do This ... | Do This ... |
Display the next or | Move the joystick to highlight the |
previous file on the | (Previous/Next) button. Then move the |
Memory Stick | joystick B to go to the previous file, or b to go |
| to the next file. |
|
|
Hide the Photo menu bar, | With the highlight in the Photo menu bar, move |
displaying only the photo | the joystick v. |
|
|
Display the hidden Photo | Move the joystick V. |
menu bar |
|
|
|
Display the Memory Stick | Move the joystick to highlight Index in the Photo |
Index again | menu bar and press . |
| For details on the Memory Stick Index, see |
| page 73. |
|
|
Access additional options | See “Photo Menu Bar Options” on page 75. |
in the Photo menu bar |
|
|
|
Exit Memory Stick Viewer | Press the MEMORY STICK button on the remote |
| control. |
|
|
74