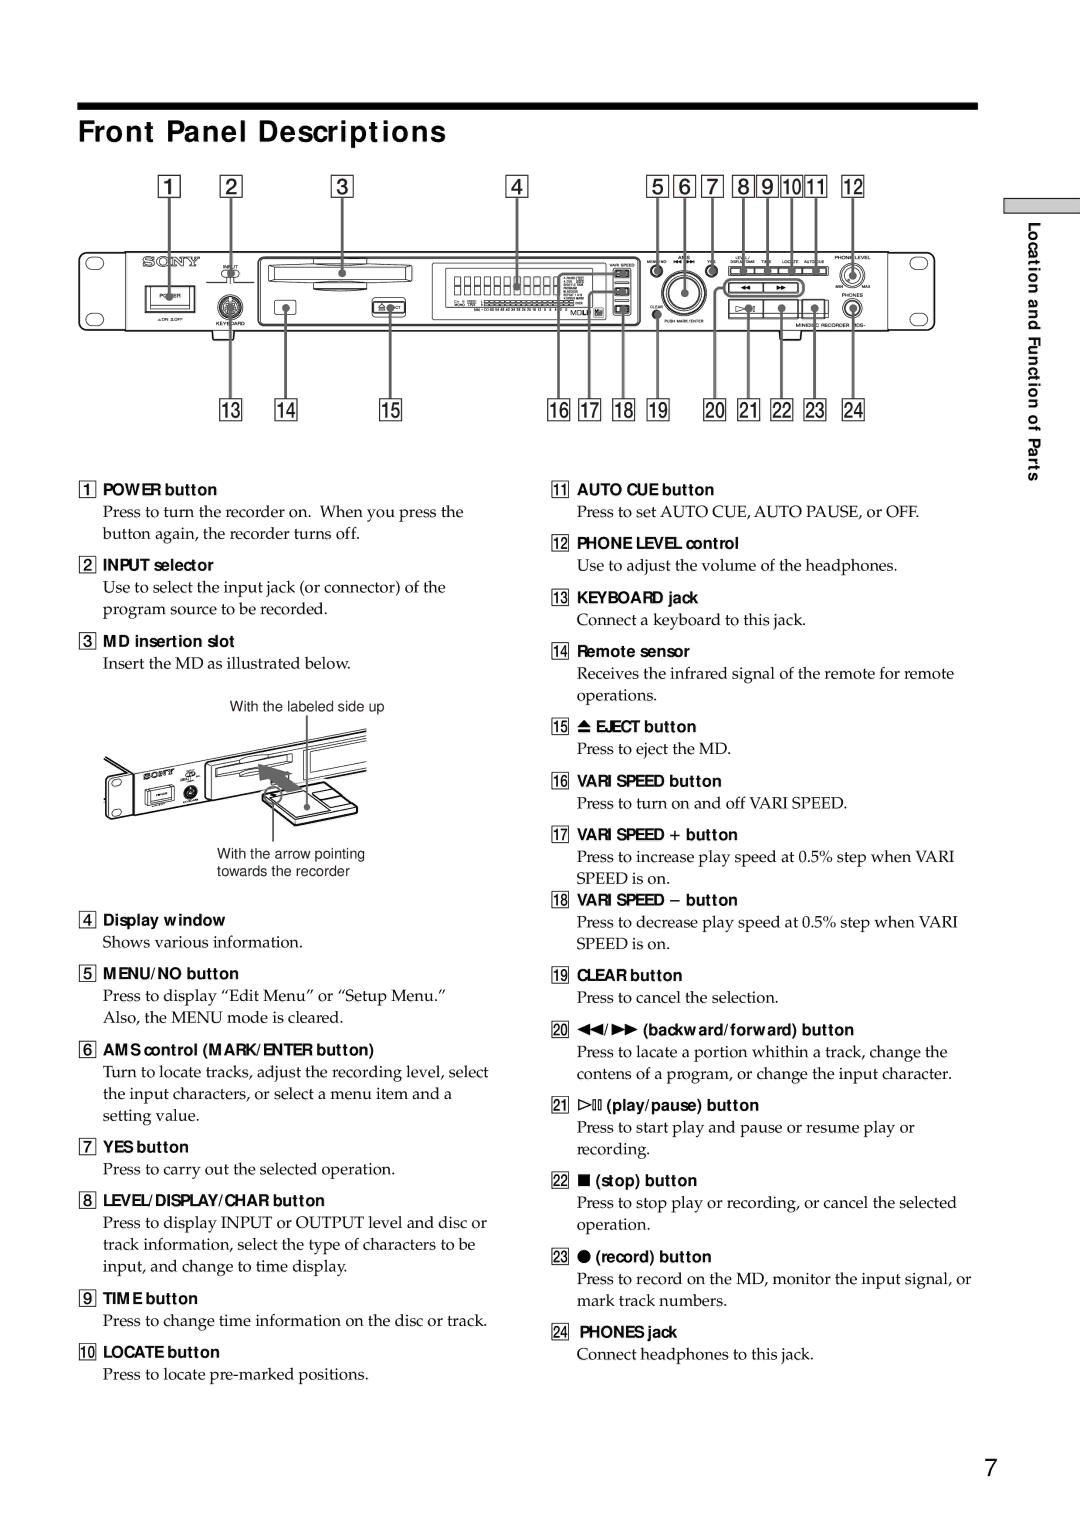
Front Panel Descriptions
1 2 | 3 | 4 | 567 89q;qa qs |
qd qf | qg |
1POWER button
Press to turn the recorder on. When you press the button again, the recorder turns off.
2INPUT selector
Use to select the input jack (or connector) of the program source to be recorded.
3MD insertion slot
Insert the MD as illustrated below.
With the labeled side up
qh qj qk ql w; wa ws wd wf
!Á AUTO CUE button
Press to set AUTO CUE, AUTO PAUSE, or OFF.
!ª PHONE LEVEL control
Use to adjust the volume of the headphones.
!£ KEYBOARD jack
Connect a keyboard to this jack.
!¢ Remote sensor
Receives the infrared signal of the remote for remote operations.
Location and Function of Parts
With the arrow pointing towards the recorder
4Display window
Shows various information.
5MENU/NO button
Press to display “Edit Menu” or “Setup Menu.” Also, the MENU mode is cleared.
6AMS control (MARK/ENTER button)
Turn to locate tracks, adjust the recording level, select the input characters, or select a menu item and a setting value.
7YES button
Press to carry out the selected operation.
8LEVEL/DISPLAY/CHAR button
Press to display INPUT or OUTPUT level and disc or track information, select the type of characters to be input, and change to time display.
9TIME button
Press to change time information on the disc or track.
0LOCATE button
Press to locate
!° Z EJECT button
Press to eject the MD.
!¤ VARI SPEED button
Press to turn on and off VARI SPEED.
!¦ VARI SPEED + button
Press to increase play speed at 0.5% step when VARI SPEED is on.
!¥ VARI SPEED _ button
Press to decrease play speed at 0.5% step when VARI SPEED is on.
!» CLEAR button
Press to cancel the selection.
@¼ m/M (backward/forward) button
Press to lacate a portion whithin a track, change the contens of a program, or change the input character.
@Á 7 (play/pause) button
Press to start play and pause or resume play or recording.
@ª x (stop) button
Press to stop play or recording, or cancel the selected operation.
@£ z (record) button
Press to record on the MD, monitor the input signal, or mark track numbers.
@¢ PHONES jack
Connect headphones to this jack.
7
