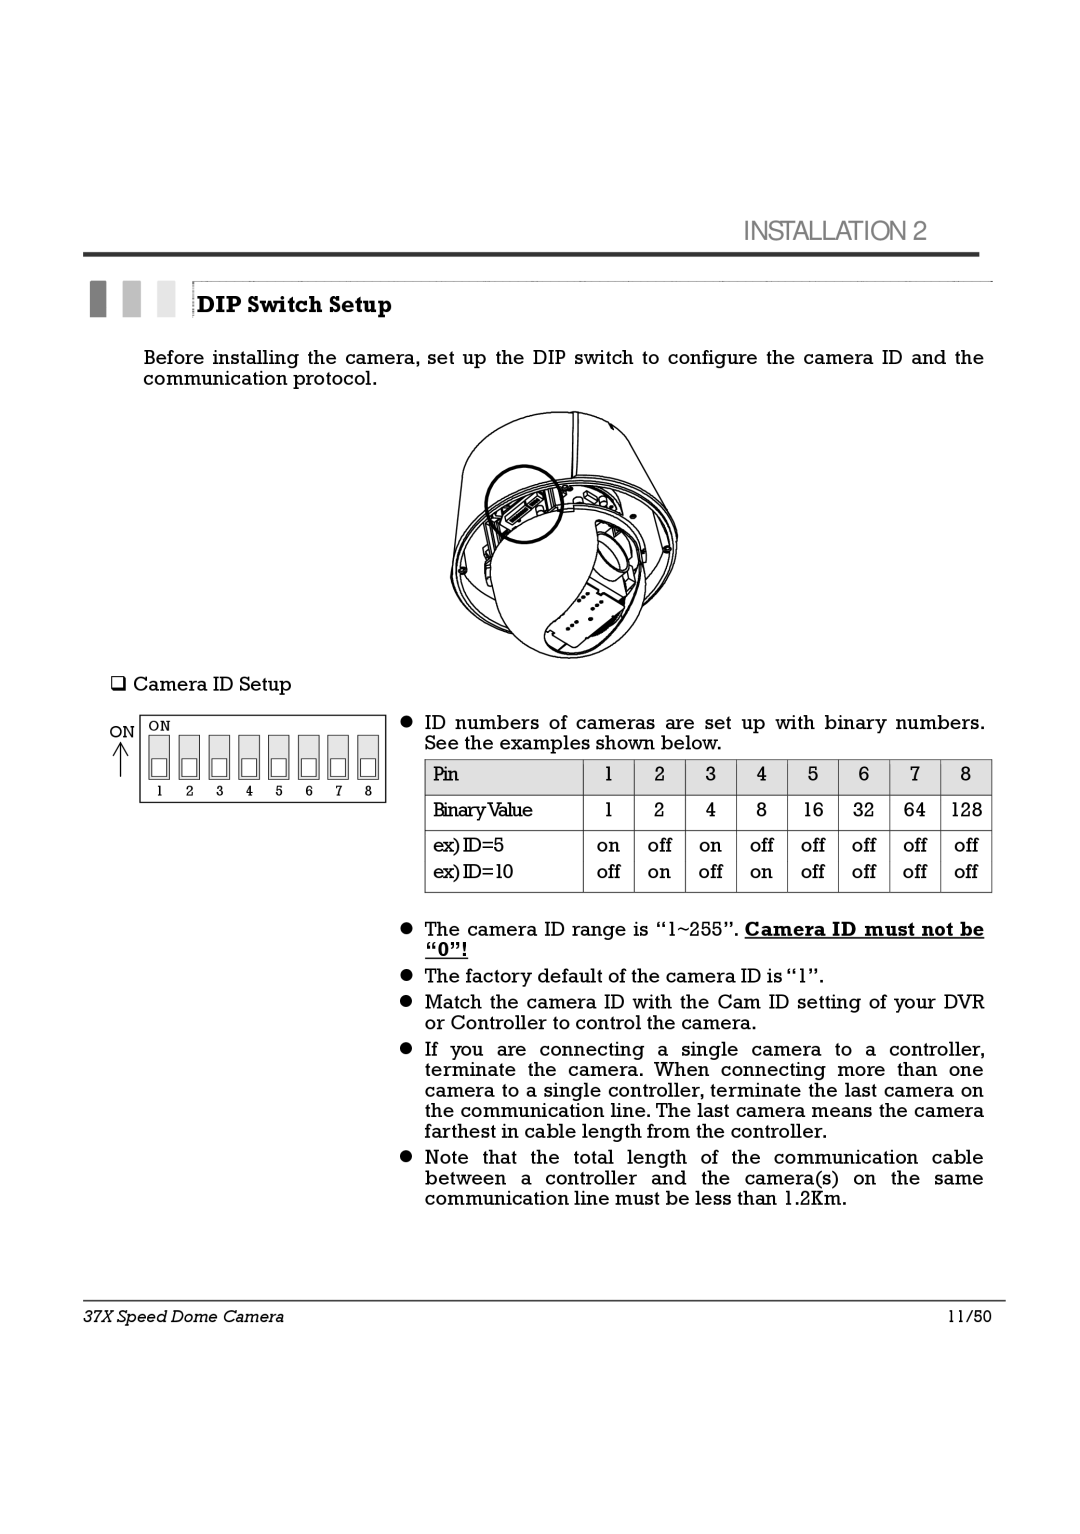
HTSD37X, SIPSD37X specifications
Speco Technologies is known for its innovative approach to security solutions, and the SIPSD37X and WMSD37X models are no exception. These advanced surveillance cameras combine high-performance specifications with cutting-edge technology, making them ideal choices for both commercial and residential applications.The SIPSD37X is a state-of-the-art indoor PTZ (pan-tilt-zoom) camera, while the WMSD37X is designed for outdoor use with a focus on ruggedness and environmental resilience. Both models leverage advanced imaging technology, ensuring high-quality video capture with impressive clarity. The SIPSD37X features a high-resolution sensor that delivers 1080p HD video, providing detailed imagery for effective monitoring. The WMSD37X takes this further with its 4MP sensor, enabling an even greater level of detail in various lighting conditions.
One of the standout features of the SIPSD37X is its versatile PTZ functionality. With a wide range of motion and powerful zoom capabilities, users can easily track moving subjects or survey large areas from a stationary position. This flexibility is complemented by features such as digital noise reduction and wide dynamic range (WDR), which enhance video quality in challenging lighting situations.
In terms of connectivity and usability, both models support Power over Ethernet (PoE), simplifying installation by decreasing the number of cables required. They are also equipped with advanced compression technologies such as H.265, maximizing storage efficiency without compromising video quality. This means longer recording times and lower bandwidth usage, which is crucial for maintaining extensive surveillance systems.
The WMSD37X stands out with its rugged construction, designed to withstand harsh weather conditions. Its IP66 rating indicates that it is both dust-tight and water-resistant, making it suitable for outdoor environments. The built-in infrared (IR) LEDs enable night vision capabilities, allowing for clear imaging even in total darkness.
Both cameras are compatible with Speco Technologies' robust software solutions, allowing for seamless integration with existing security systems. Users can easily access live feeds, playback recordings, and manage settings remotely, enhancing overall surveillance efficiency.
In conclusion, the SIPSD37X and WMSD37X from Speco Technologies represent a fusion of high-quality imaging, advanced functionality, and durability. Their unique features make them ideal choices for anyone seeking reliable surveillance solutions that meet a variety of monitoring needs. Whether for indoor or outdoor applications, these cameras exemplify Speco's commitment to security innovation.