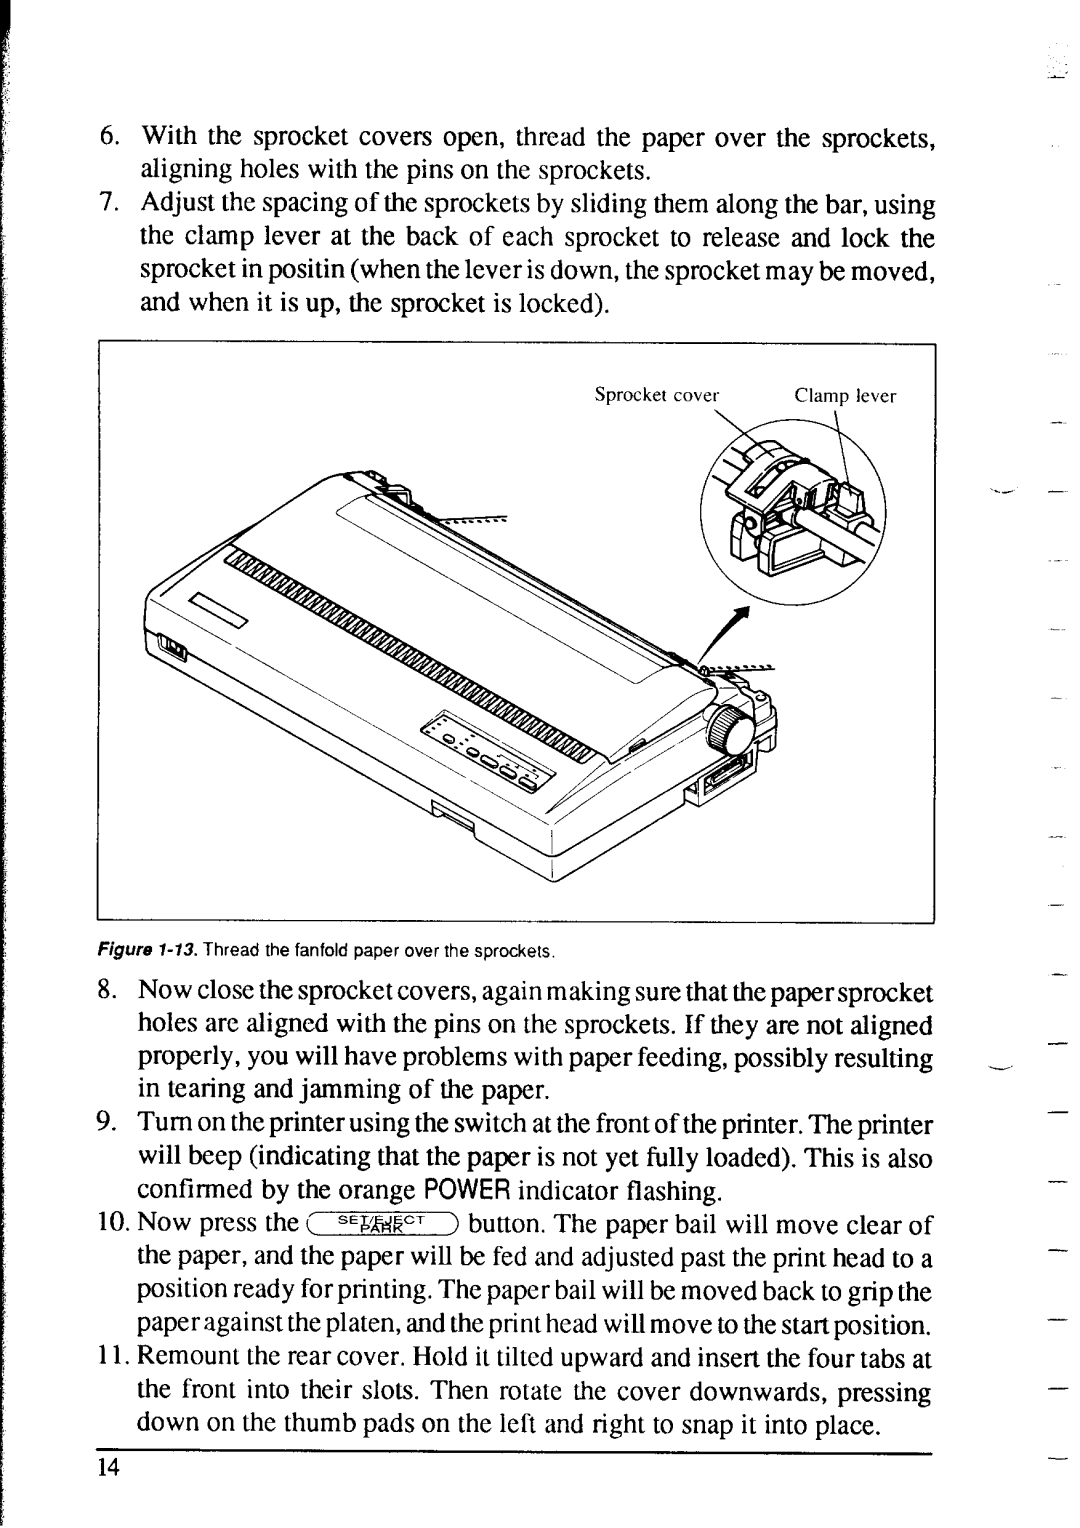
6.With the sprocket covers open, thread the paper over the sprockets, aligning holes with the pins on the sprockets.
7.Adjust the spacing of the sprockets by sliding them along the bar, using the clamp lever at the back of each sprocket to release and lock the sprocket in positin (when the lever is down, the sprocket may be moved, and when it is up, the sprocket is locked).
Sprocket cove, | Clamp lever |
Figure |
|
|
8. Now close the sprocket covers, again making sure that the paper sprocket |
|
|
holes are aligned with the pins on the sprockets. If they are not aligned |
|
|
properly, you will have problems with paper feeding, possibly resulting | - | - |
in tearing and jamming of the paper. |
|
|
9. Turn on the printer using the switch at the front of the printer. The printer |
| - |
will beep (indicating that the paper is not yet fully loaded). This is also |
| - |
confirmed by the orange POWER indicator flashing. |
| |
|
| |
10. Now press the < sE~~~cT ) button. The paper bail will move clear of |
| - |
the paper, and the paper will be fed and adjusted past the print head to a |
| |
|
| |
position ready for printing. The paper bail will be moved back to grip the |
|
|
paper against the platen, and the print head will move to the start position. |
| - |
11. Remount the rear cover. Hold it tilted upward and insert the four tabs at |
| - |
the front into their slots. Then rotate the cover downwards, pressing |
| |
|
| |
down on the thumb pads on the left and right to snap it into place. |
| - |
14 |
| |
|
|