Starting up the User Setup Utility 17
Starting up the User Setup Utility
❏To start up the User Setup Utility, move to the directory you specified under “Installing the User Setup Utility” on page 15. If you want to move to the directory we named “star” in our example in the previous section, you would input the following:
C:\>cd star ↵
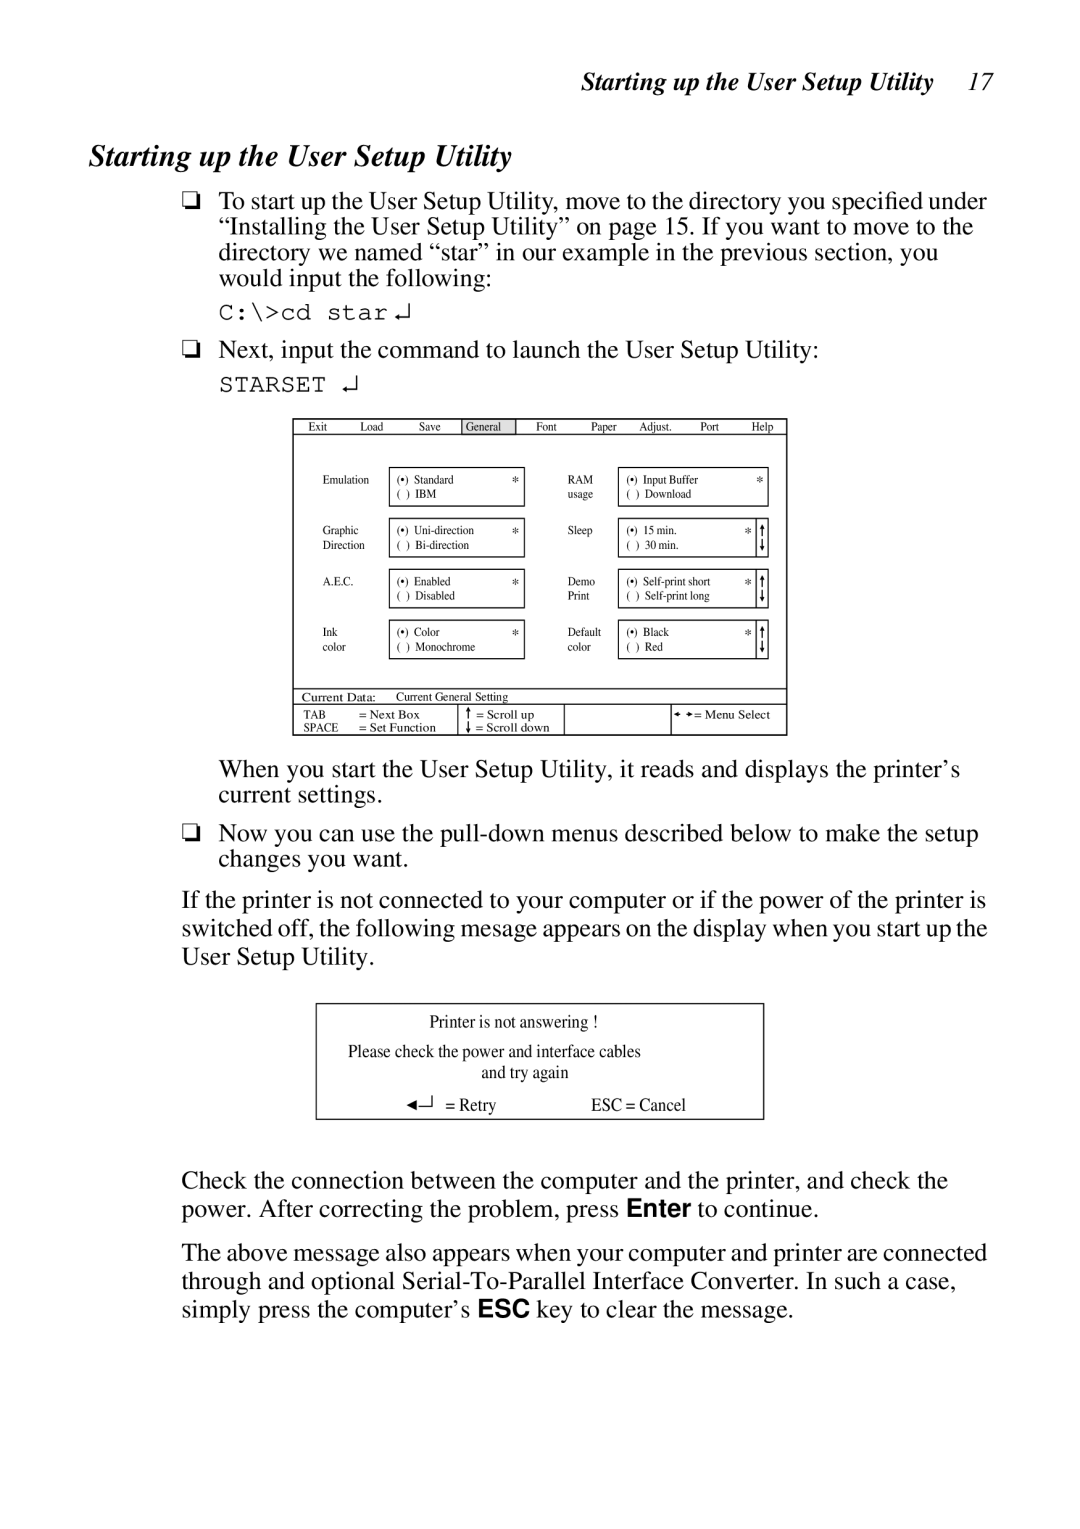
❏Next, input the command to launch the User Setup Utility:
STARSET ↵
Exit | Load | Save | General |
Font | Paper | Adjust. | Port | Help |
Emulation | (•) Standard | * | RAM | |
| ( ) IBM |
| usage | |
Graphic |
|
|
| Sleep |
|
|
| ||
(•) | * | |||
Direction | ( ) |
|
| |
A.E.C. |
|
| Demo | |
(•) Enabled | * | |||
| ( ) | Disabled |
| |
Ink |
|
|
| Default |
|
|
| ||
(•) | Color | * | ||
color | ( ) Monochrome |
| color | |
|
|
|
|
|
(•) | Input Buffer | * | ||
( ) Download |
|
|
| |
|
|
|
|
|
|
|
|
|
|
(•) | 15 min. | * |
|
|
( ) | 30 min. |
|
|
|
|
|
| ||
|
|
|
|
|
|
|
|
|
|
(•) | * |
|
| |
|
| |||
( ) |
|
|
| |
|
|
|
|
|
|
|
|
|
|
(•) | Black | * |
|
|
( ) Red |
|
|
| |
|
|
| ||
|
|
|
|
|
Current Data: | Current General Setting |
TAB | = Next Box |
SPACE | = Set Function |
=Scroll up
=Scroll down
![]() = Menu Select
= Menu Select
When you start the User Setup Utility, it reads and displays the printer’s current settings.
❏Now you can use the
If the printer is not connected to your computer or if the power of the printer is switched off, the following mesage appears on the display when you start up the User Setup Utility.
Printer is not answering !
Please check the power and interface cables and try again
= Retry | ESC = Cancel |
Check the connection between the computer and the printer, and check the power. After correcting the problem, press Enter to continue.
The above message also appears when your computer and printer are connected through and optional