36Using the Printer with Windows 3.1
Installing TrueType fonts
The TrueType fonts that are supplied on the 3.5” floppy disk that comes with the printer can be used only when you are running Windows 3.1 or later. Use the following procedure to install the fonts.
❏Launch Windows.
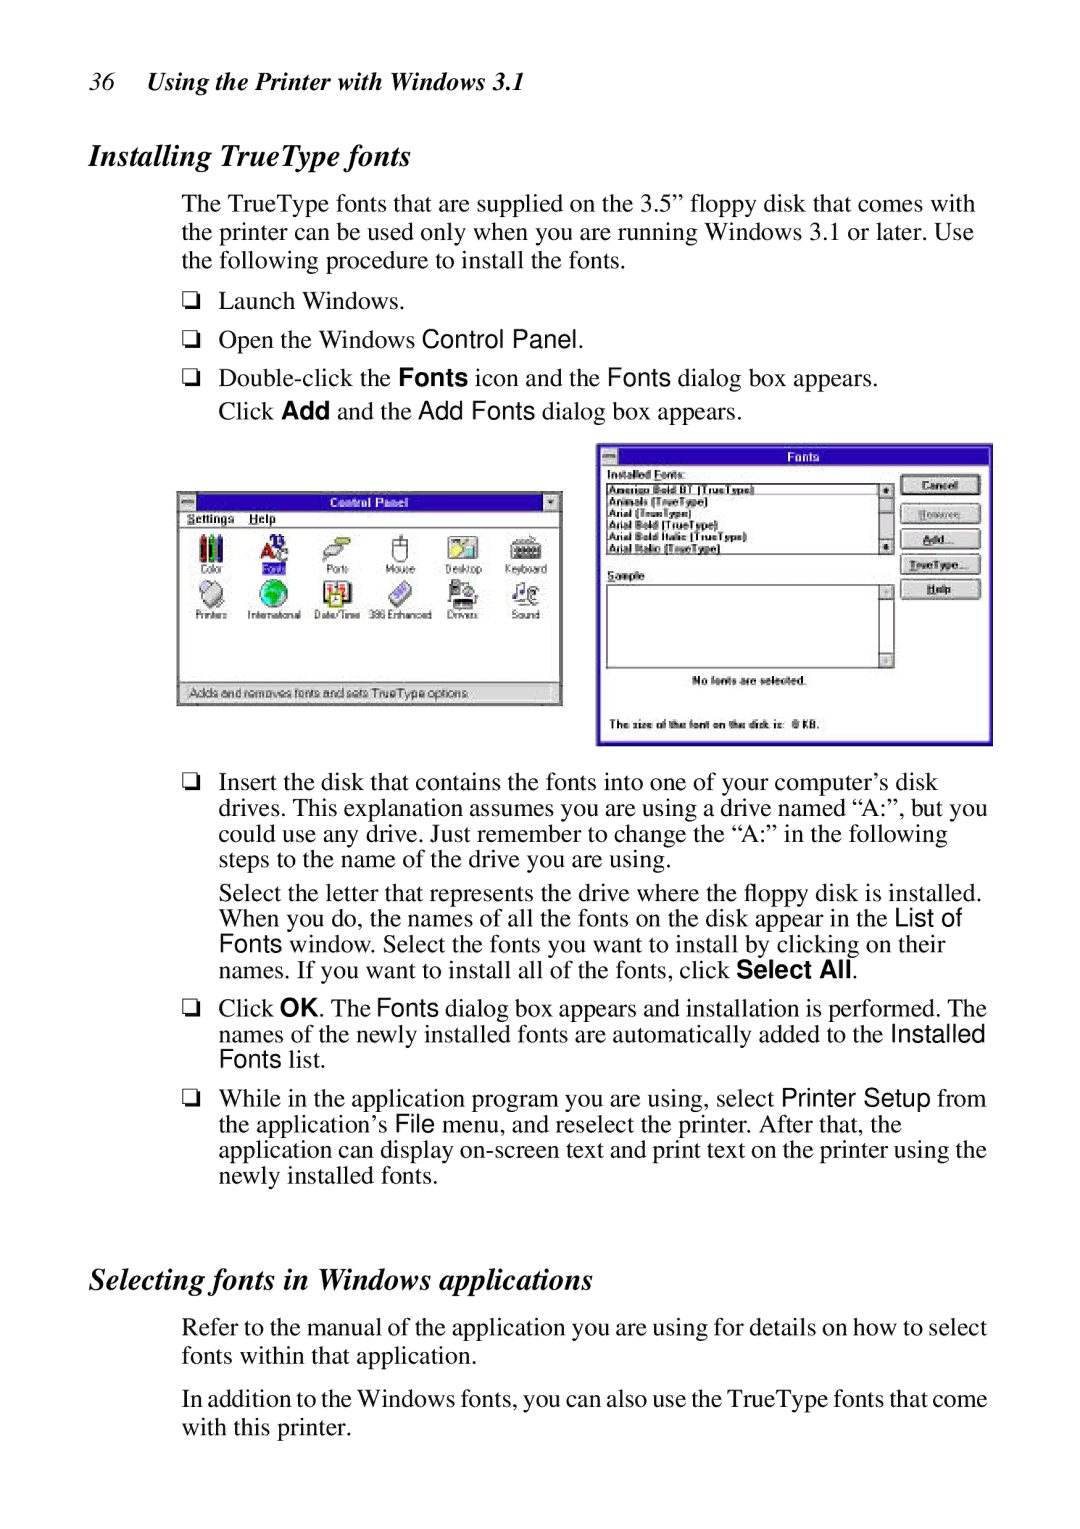
❏Open the Windows Control Panel.
❏
❏Insert the disk that contains the fonts into one of your computer’s disk drives. This explanation assumes you are using a drive named “ A:”, but you could use any drive. Just remember to change the “A:” in the following steps to the name of the drive you are using.
Select the letter that represents the drive where the floppy disk is installed. When you do, the names of all the fonts on the disk appear in the List of Fonts window. Select the fonts you want to install by clicking on their names. If you want to install all of the fonts, click Select All.
❏Click OK. The Fonts dialog box appears and installation is performed. The names of the newly installed fonts are automatically added to the Installed Fonts list.
❏While in the application program you are using, select Printer Setup from the application’s File menu, and reselect the printer. After that, the application can display
Selecting fonts in Windows applications
Refer to the manual of the application you are using for details on how to select fonts within that application.
In addition to the Windows fonts, you can also use the TrueType fonts that come with this printer.