iPod® CENTER CONSOLE INSTALLATION INSTRUCTIONS
2
3
2
4
1
1
3
5
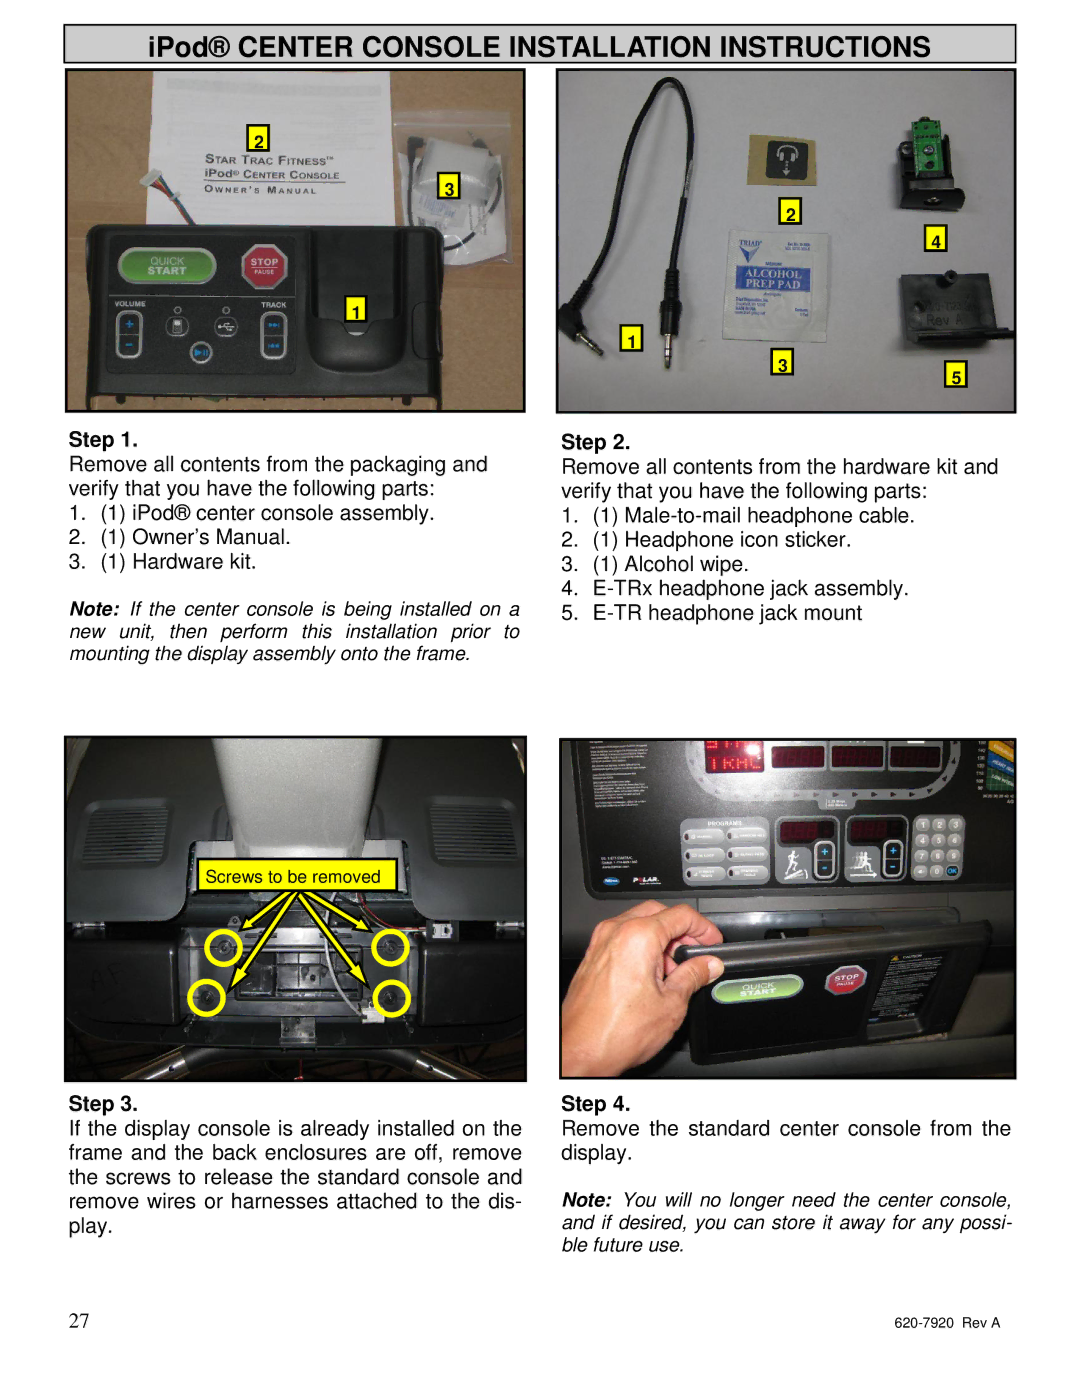
Step 1.
Remove all contents from the packaging and verify that you have the following parts:
1.(1) iPod® center console assembly.
2.(1) Owner’s Manual.
3.(1) Hardware kit.
Note: If the center console is being installed on a new unit, then perform this installation prior to mounting the display assembly onto the frame.
Step 2.
Remove all contents from the hardware kit and verify that you have the following parts:
1.(1)
2.(1) Headphone icon sticker.
3.(1) Alcohol wipe.
4.
5.
Screws to be removed
Step 3.
If the display console is already installed on the frame and the back enclosures are off, remove the screws to release the standard console and remove wires or harnesses attached to the dis- play.
Step 4.
Remove the standard center console from the display.
Note: You will no longer need the center console, and if desired, you can store it away for any possi- ble future use.
27 |
|