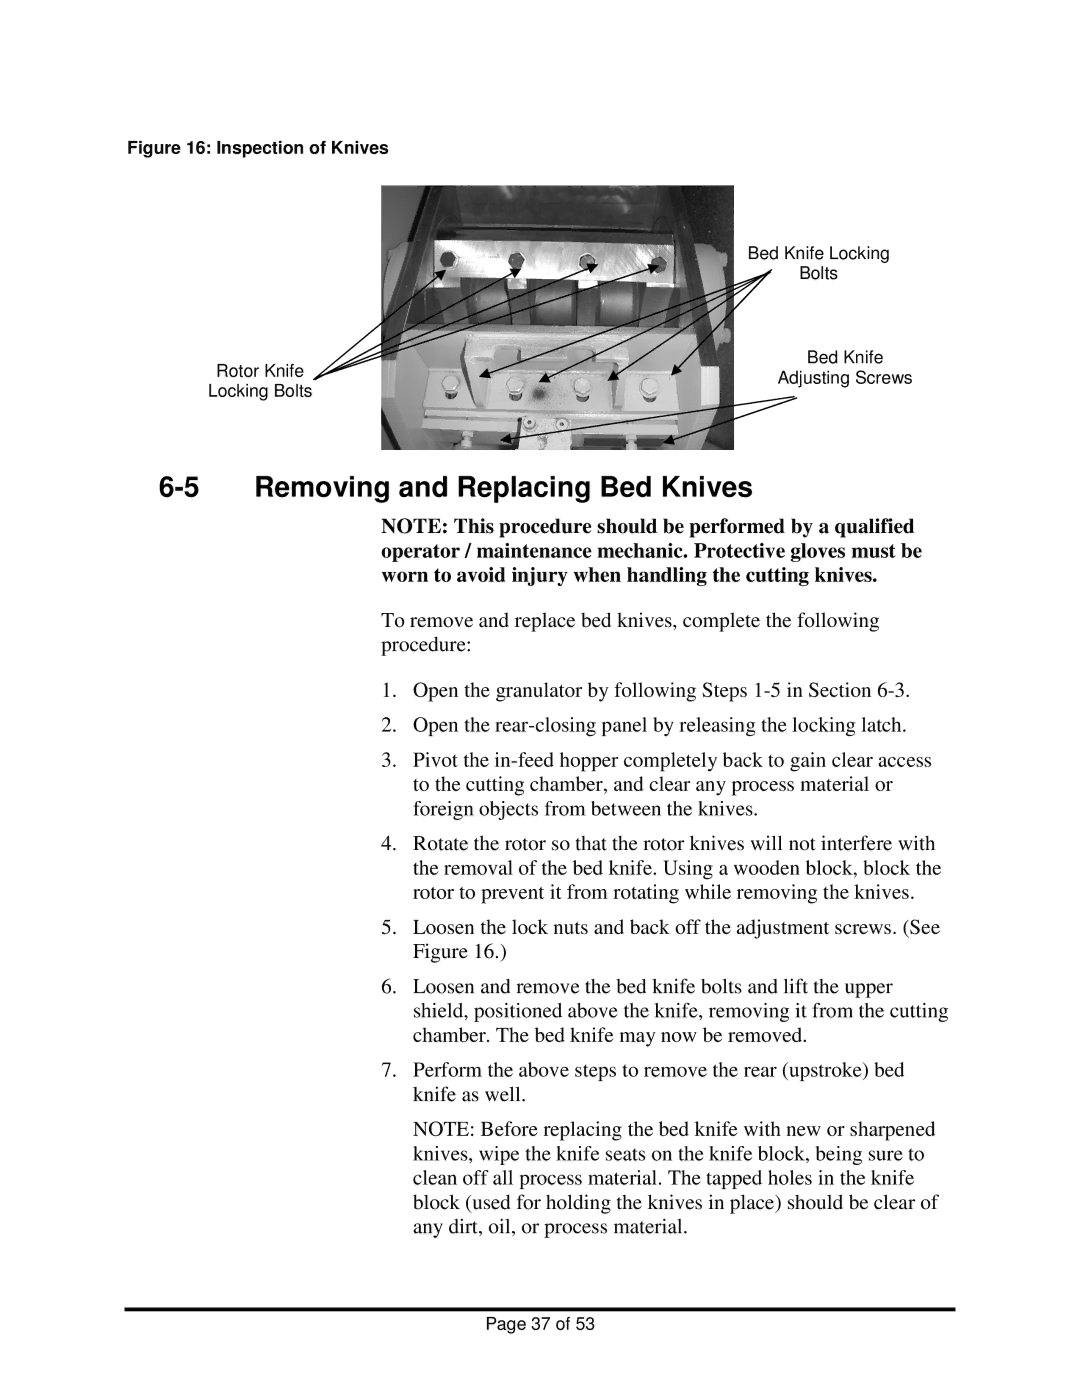
Figure 16: Inspection of Knives
Bed Knife Locking
Bolts
Bed Knife
Rotor KnifeAdjusting Screws
Locking Bolts
6-5 Removing and Replacing Bed Knives
NOTE: This procedure should be performed by a qualified operator / maintenance mechanic. Protective gloves must be worn to avoid injury when handling the cutting knives.
To remove and replace bed knives, complete the following procedure:
1.Open the granulator by following Steps
2.Open the
3.Pivot the
4.Rotate the rotor so that the rotor knives will not interfere with the removal of the bed knife. Using a wooden block, block the rotor to prevent it from rotating while removing the knives.
5.Loosen the lock nuts and back off the adjustment screws. (See Figure 16.)
6.Loosen and remove the bed knife bolts and lift the upper shield, positioned above the knife, removing it from the cutting chamber. The bed knife may now be removed.
7.Perform the above steps to remove the rear (upstroke) bed knife as well.
NOTE: Before replacing the bed knife with new or sharpened knives, wipe the knife seats on the knife block, being sure to clean off all process material. The tapped holes in the knife block (used for holding the knives in place) should be clear of any dirt, oil, or process material.
Page 37 of 53