Chapter 6: Advanced Chassis Setup
The SAS/SATA drive carriers are located in the front of the chassis, making them easily accessible for installation and removal. These drives are
Installing/removing SAS/SATA drives
1.To remove a SAS/SATA drive, first push the release button located beside the drive's LEDs
2.Swing the handle fully out and use it to pull the SAS/SATA drive carrier straight out (see Figure
Note: Your operating system must have RAID support to enable the
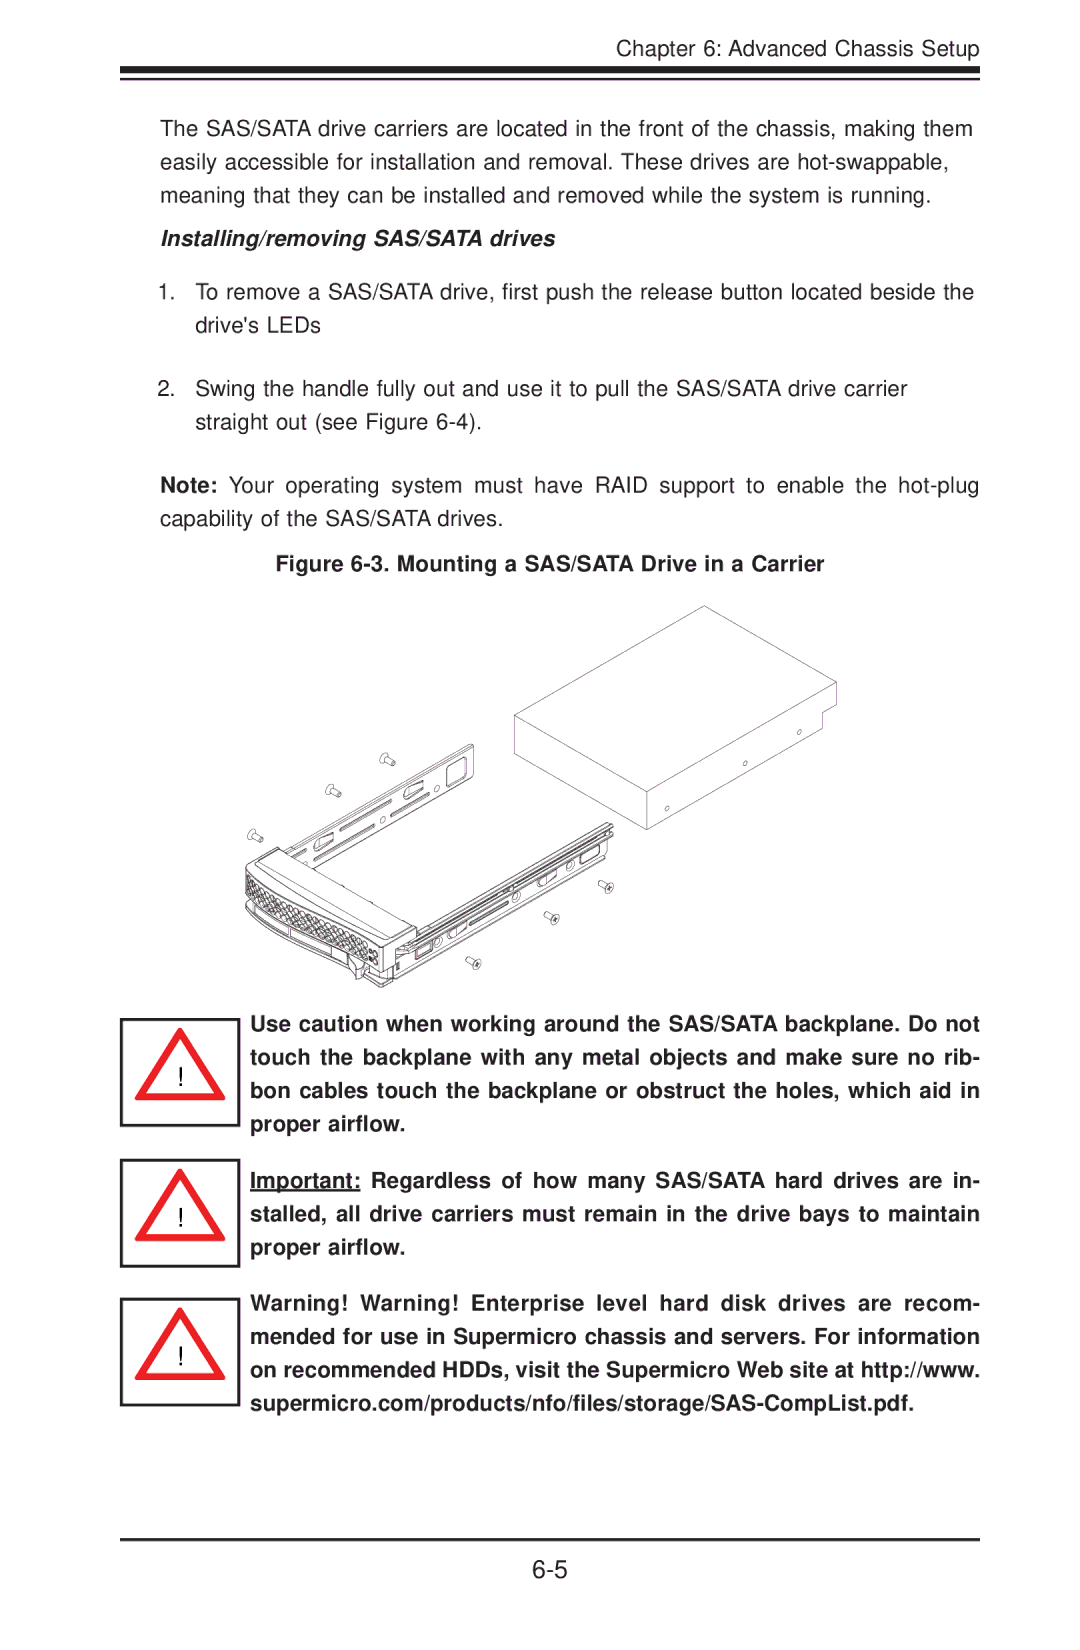
Figure 6-3. Mounting a SAS/SATA Drive in a Carrier
! |
! |
! |
Use caution when working around the SAS/SATA backplane. Do not touch the backplane with any metal objects and make sure no rib- bon cables touch the backplane or obstruct the holes, which aid in proper airflow.
Important: Regardless of how many SAS/SATA hard drives are in- stalled, all drive carriers must remain in the drive bays to maintain proper airflow.
Warning! Warning! Enterprise level hard disk drives are recom- mended for use in Supermicro chassis and servers. For information on recommended HDDs, visit the Supermicro Web site at http://www.
