MAIN MENU | SVAT ELECTRONICS |
| nowyoucansee |
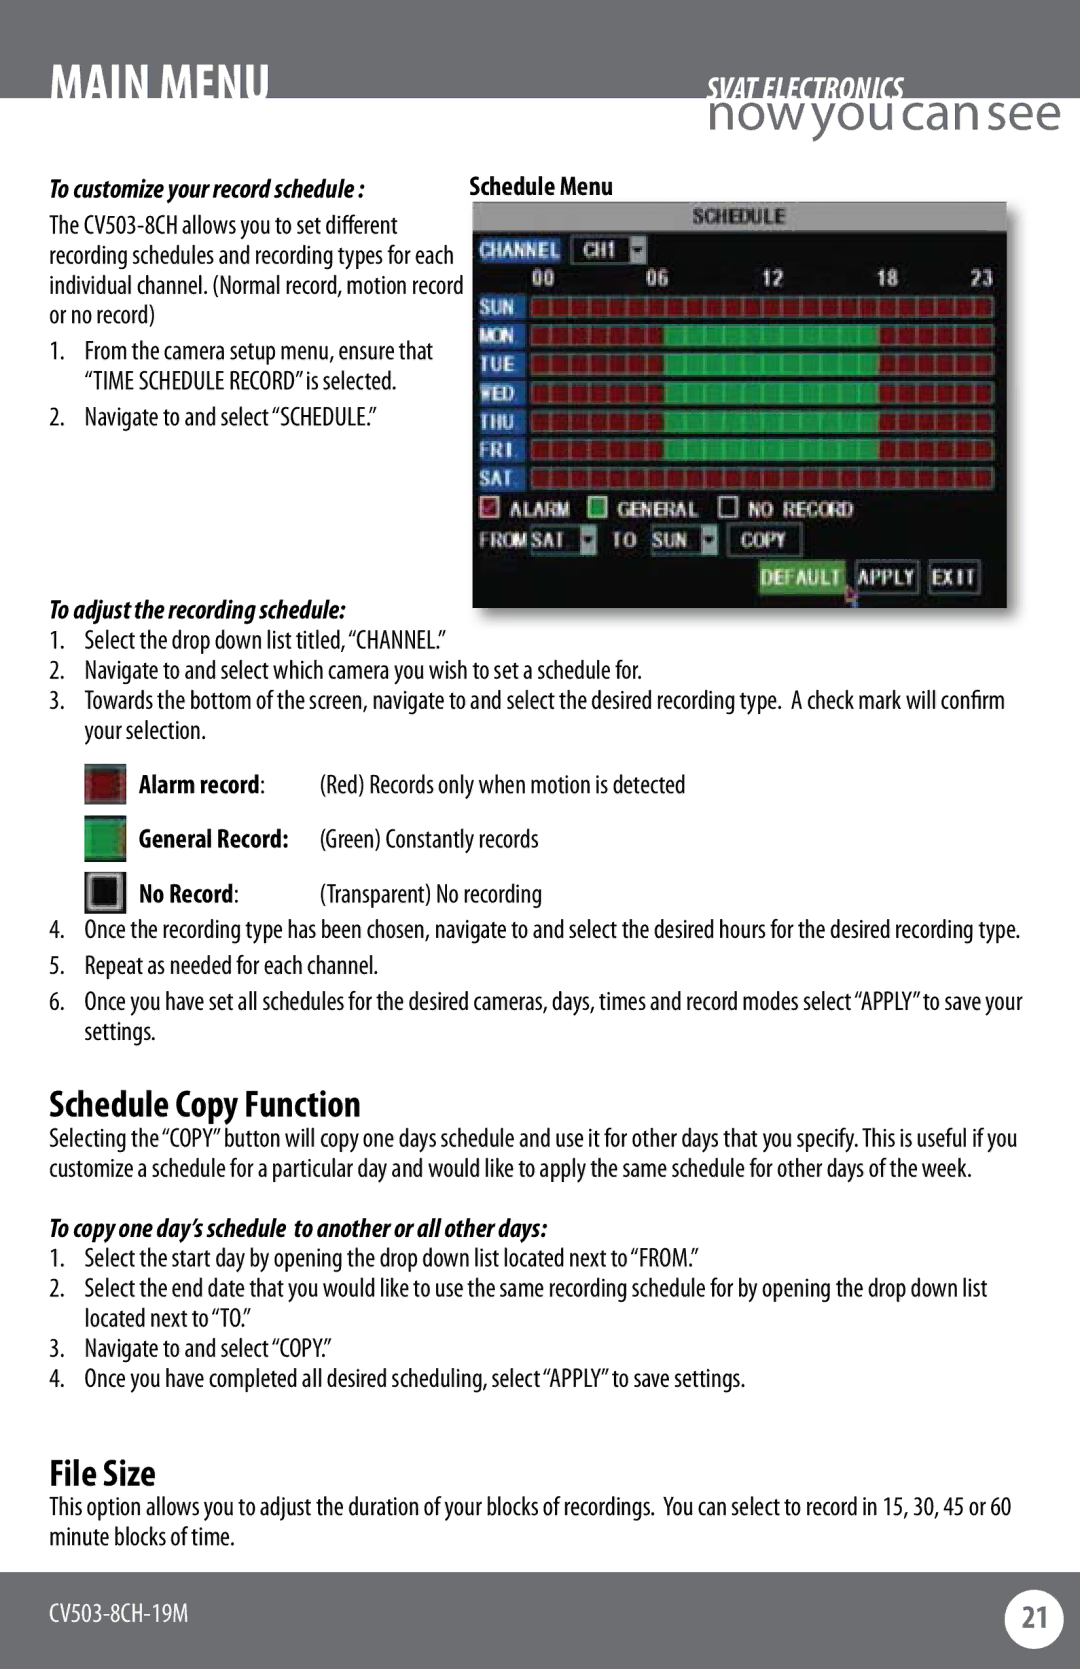
To customize your record schedule : | Schedule Menu |
The
1.From the camera setup menu, ensure that “TIME SCHEDULE RECORD” is selected.
2.Navigate to and select “SCHEDULE.”
To adjust the recording schedule:
1.Select the drop down list titled, “CHANNEL.”
2.Navigate to and select which camera you wish to set a schedule for.
3.Towards the bottom of the screen, navigate to and select the desired recording type. A check mark will confirm your selection.
Alarm record: (Red) Records only when motion is detected
General Record: (Green) Constantly records
No Record: (Transparent) No recording
4.Once the recording type has been chosen, navigate to and select the desired hours for the desired recording type.
5.Repeat as needed for each channel.
6.Once you have set all schedules for the desired cameras, days, times and record modes select “APPLY” to save your settings.
Schedule Copy Function
Selecting the “COPY” button will copy one days schedule and use it for other days that you specify. This is useful if you customize a schedule for a particular day and would like to apply the same schedule for other days of the week.
To copy one day’s schedule to another or all other days:
1.Select the start day by opening the drop down list located next to “FROM.”
2.Select the end date that you would like to use the same recording schedule for by opening the drop down list located next to “TO.”
3.Navigate to and select “COPY.”
4.Once you have completed all desired scheduling, select “APPLY” to save settings.
File Size
This option allows you to adjust the duration of your blocks of recordings. You can select to record in 15, 30, 45 or 60 minute blocks of time.
21 | |
|
|
